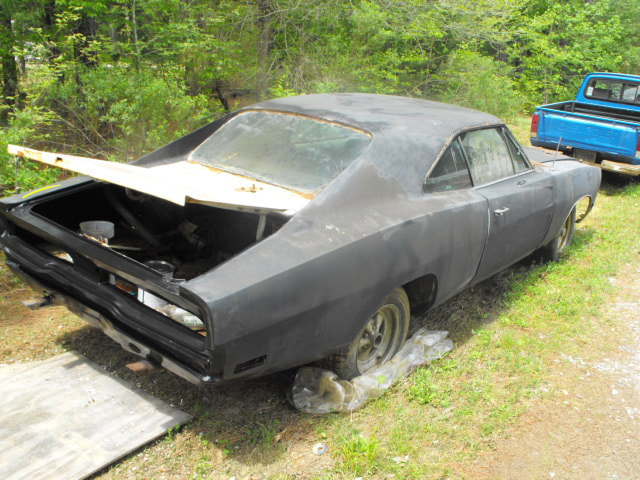
The flagship of our automotive fleet, been in my possession since the late 90's, the 1970 Dodge Charger has a long history with me, having been reintroduced to the streets in 98 and been like a sidekick to me like the General Lee was to the Duke boys. I drove this car all over the streets of the Chicagoland area and even points beyond, having a good time and making many friends along the way. It's interesting how a car can do so many things from a social perspective. This car came equipped with a 440 Magnum big block V8 mated to a 727 Torqueflite automatic transmission with a reverse manual valve body. A 4bbl Edelbrock carburetor topped off the engine. The last time this car seen the road was in 2006, just before we moved to rural MS. It seen a brief span of road time, not even enough miles to be worth mentioning before it ended up being parked. Ironically, the amount of time this car sat idle on the grass in our yard did more damage to this car than all the times this car rode the streets of Chicago and had snow pile on top of it occasionally.
While In Chicago I did have to do some patching on the rear quarters, nothing too serious but enough that it needed addressing. I had paint put on the car and it was fine for a little while but after being parked, it didn't take too long for moisture to take its toll. The first thing was the mold that started forming in the interior, mainly the carpet. Of course the vinyl top was a wick to absorb even more moisture, causing rust pinholes to form on the roof, allowing more moisture to eventually wick into the interior, wetting the carpet, which along with the mold, also started slowly rusting the floor out too.
I had started to do work on this car, especially since at the same time the powertrain was showing serious signs of fatigue, enough so to warrant an overhaul. In the process of gutting the interior to rid it of the moldy material, I also got started with removing the powertrain in order to overhaul everything. I disassembled the engine, sending the heads to a machine shop to be reworked, while I worked on the block. After getting the engine done I rebuilt the transmission as well. Putting everything back together, taking time to paint things to help protect and make things look nice, I was able to start the engine up for a short spell, only to have some weird quirks appear from the engine. Also the transmission failed to function. This was a major fail with a capital F. Because of this, the car ended up being parked yet again for a while.
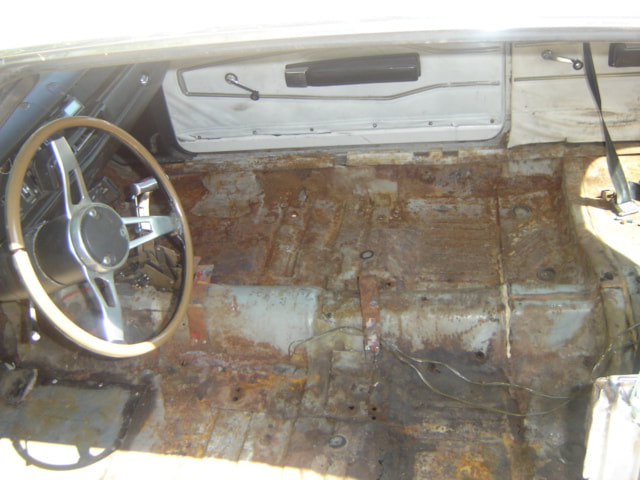
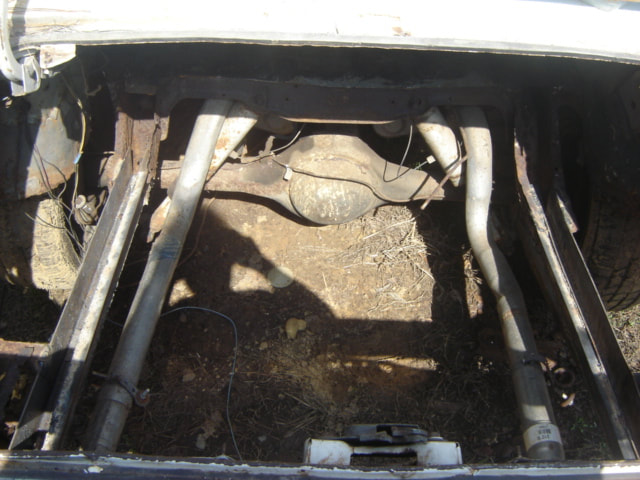
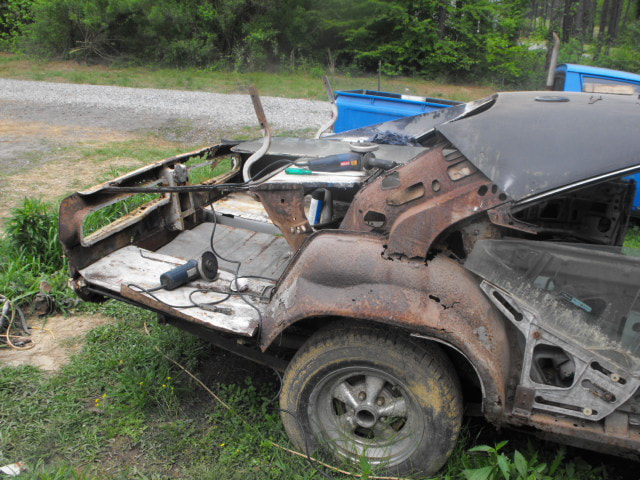
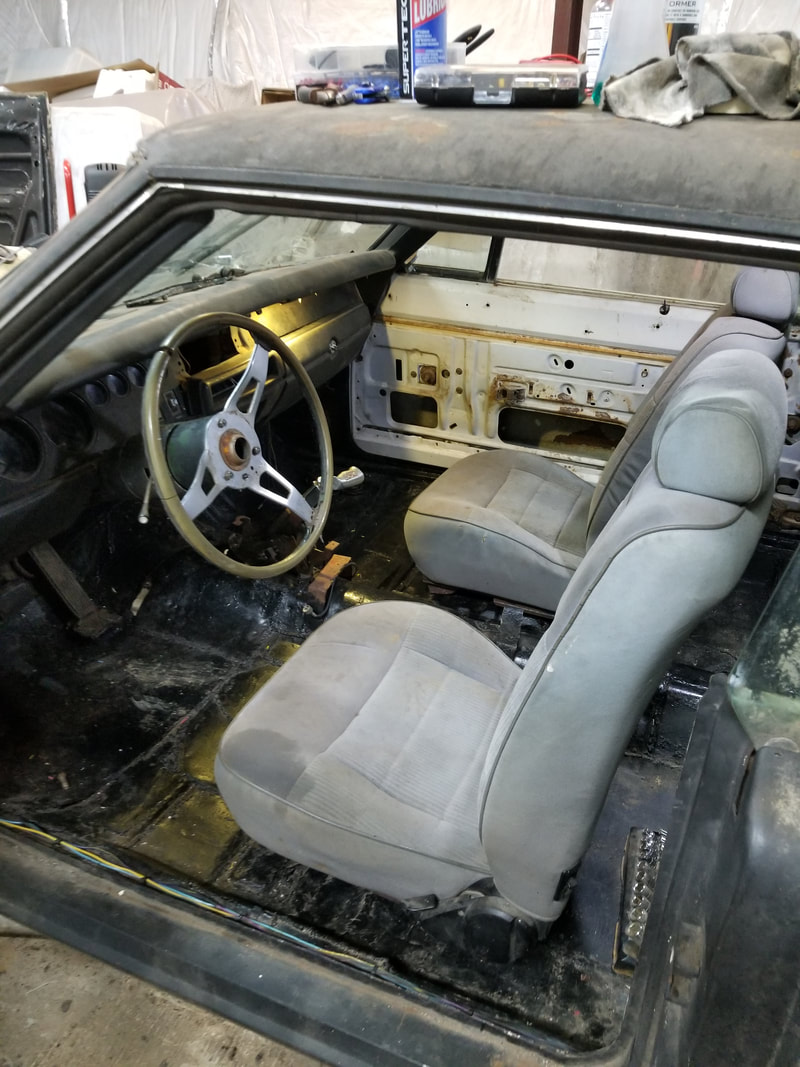
A wider coverage shot of floor from driver's side door.
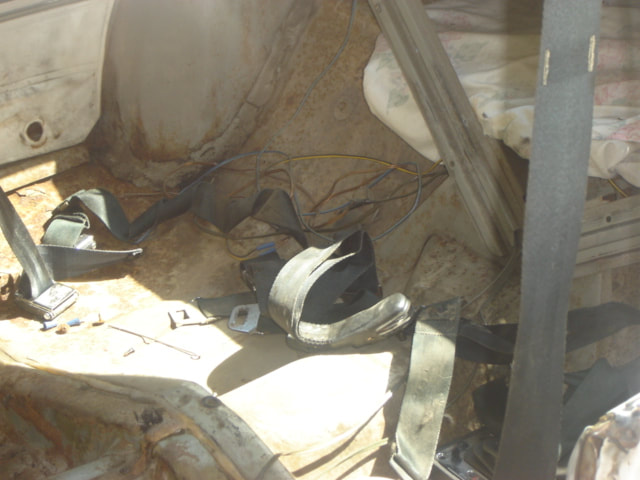
Back seat area after removing seat.
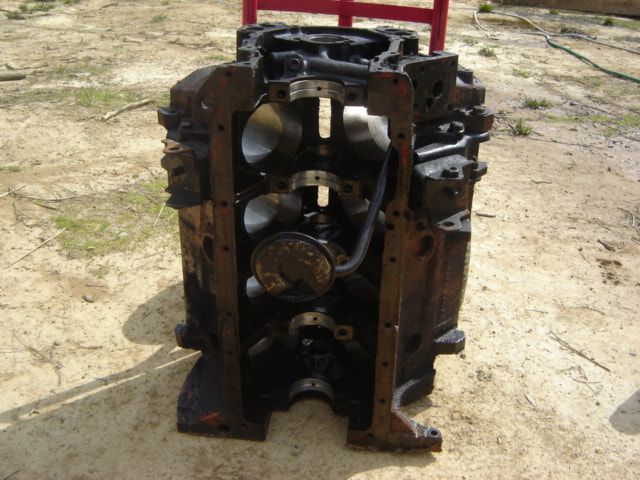
A shot inside the crankcase of engine after disassembly.
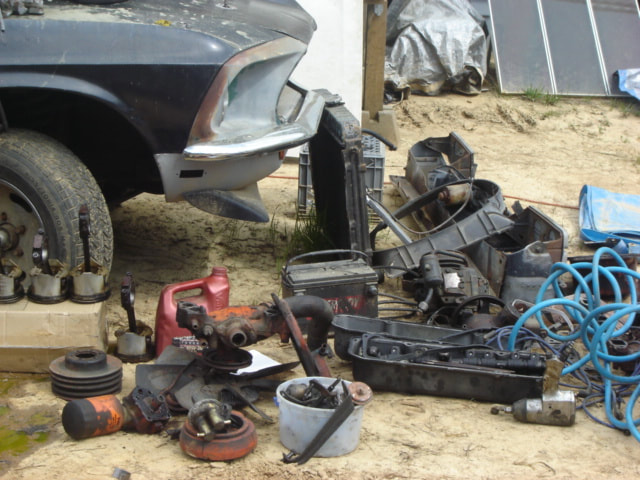
All the parts pulled from the engine during disassembly.
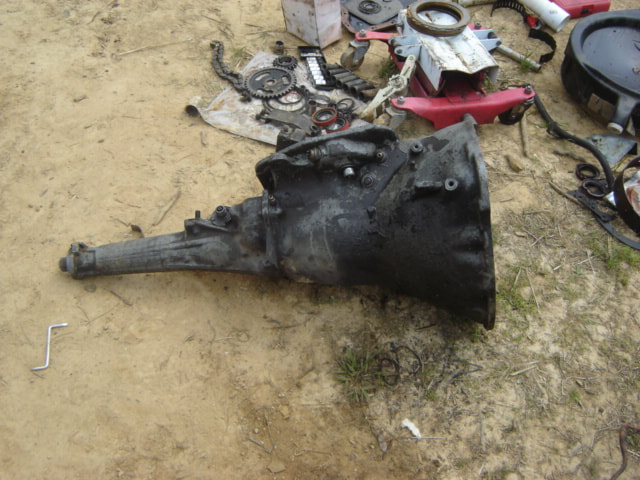
Transmission on the ground after separating from engine, this thing's dirty as hell.
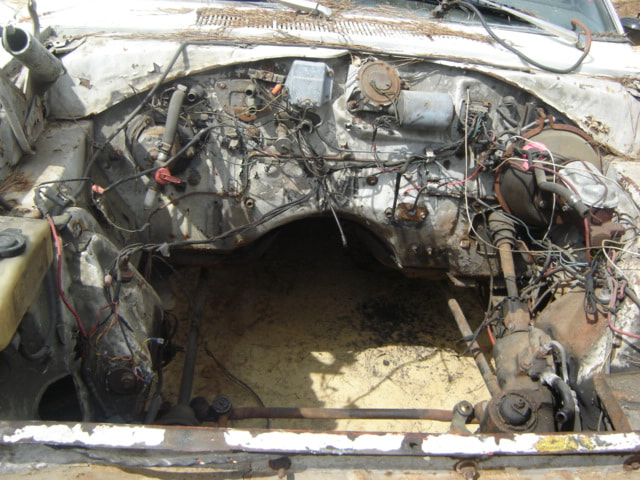
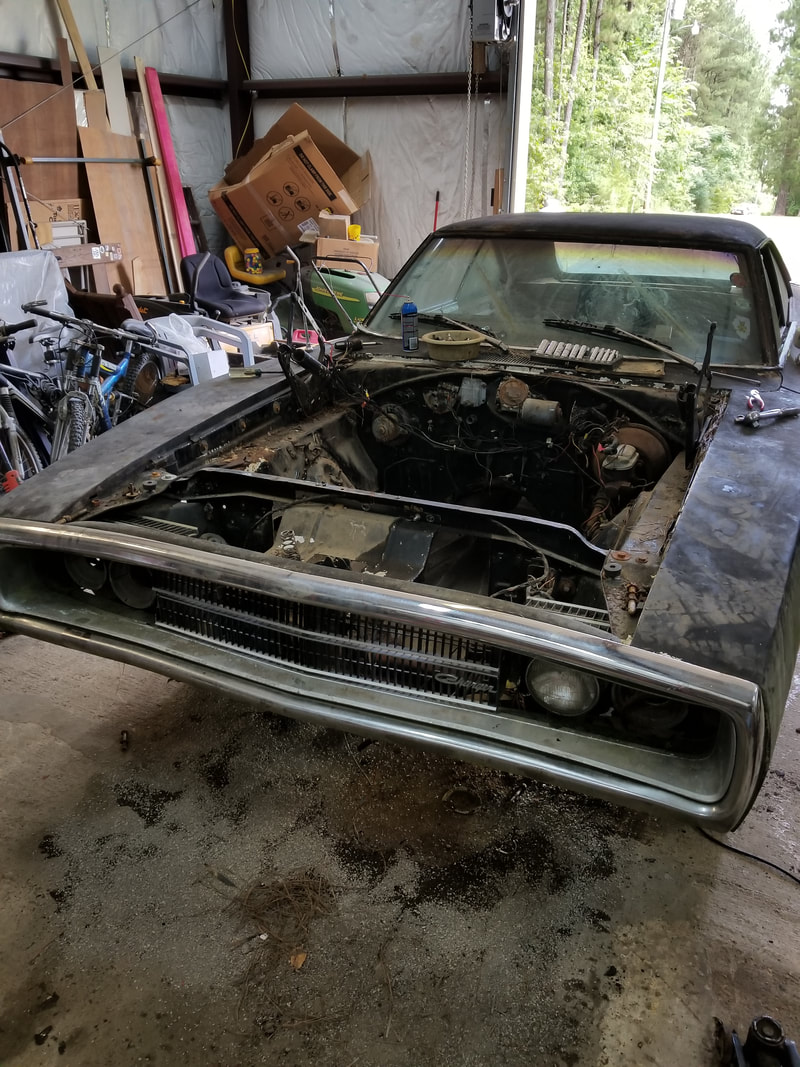
Engine bay sans engine and transmission.
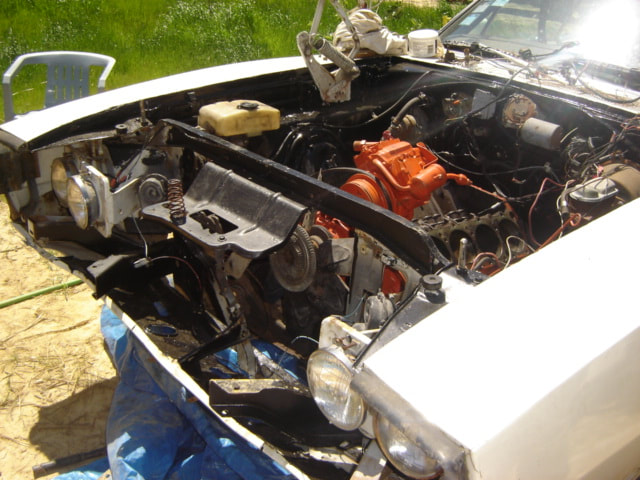
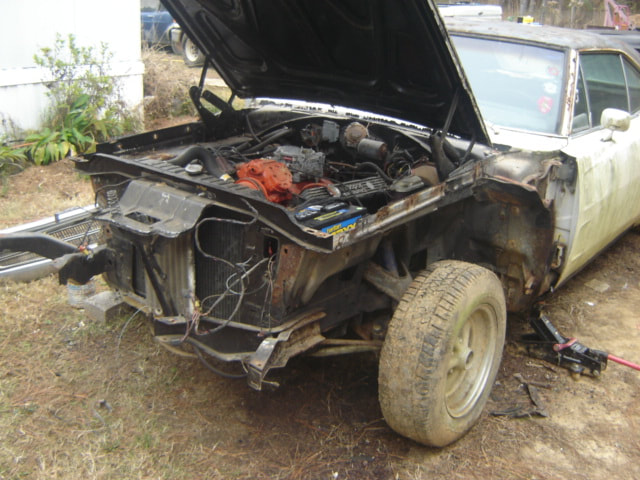
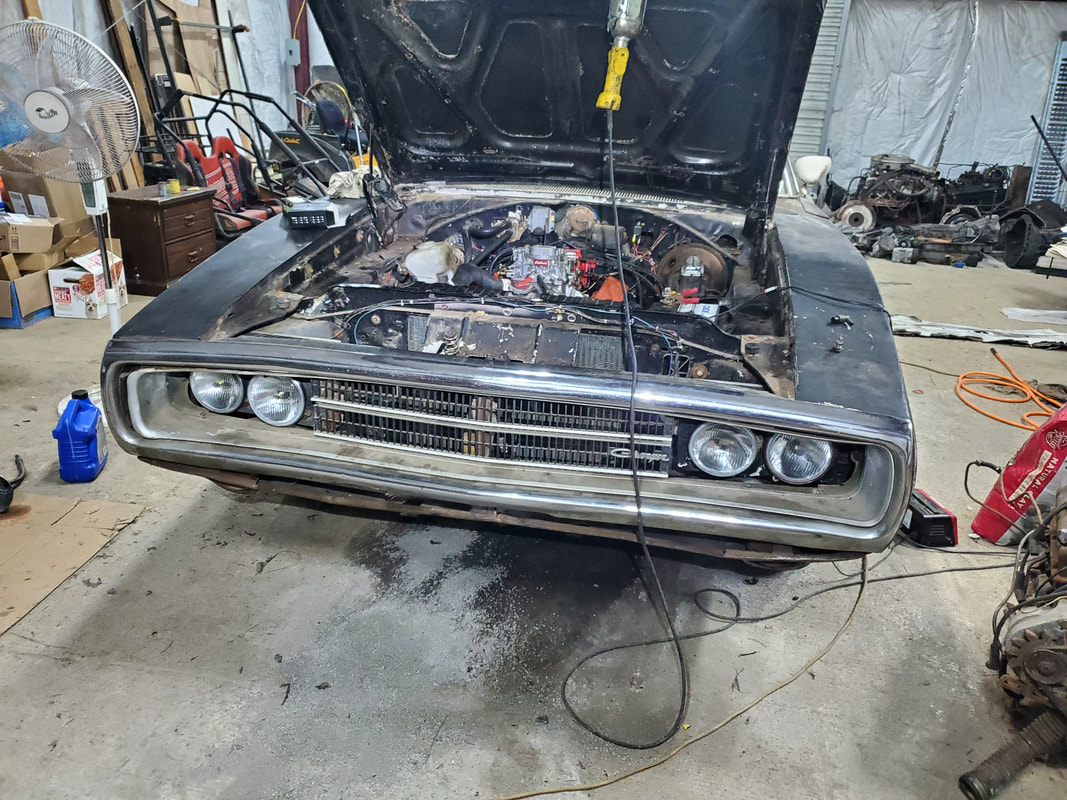
Shot of the front of the car with the bumper assembly removed to show how the inside of the front looks.
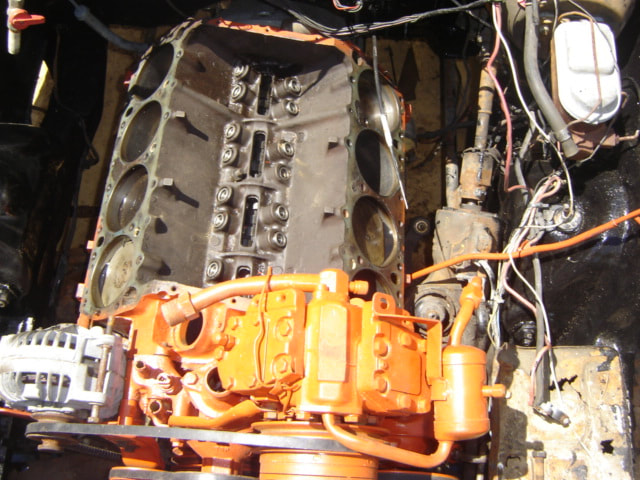
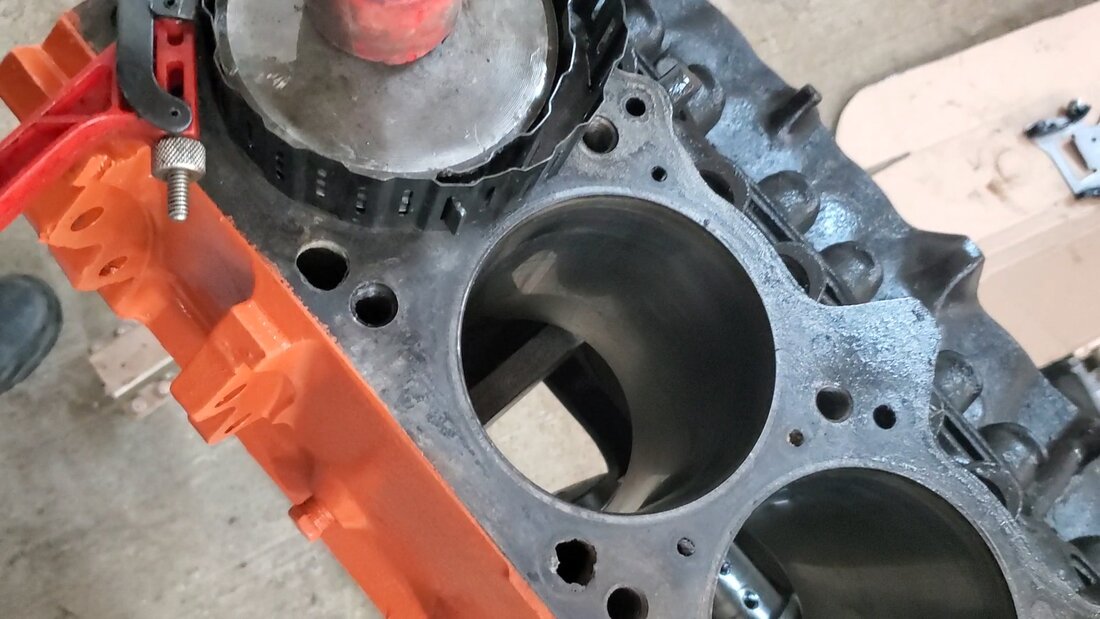
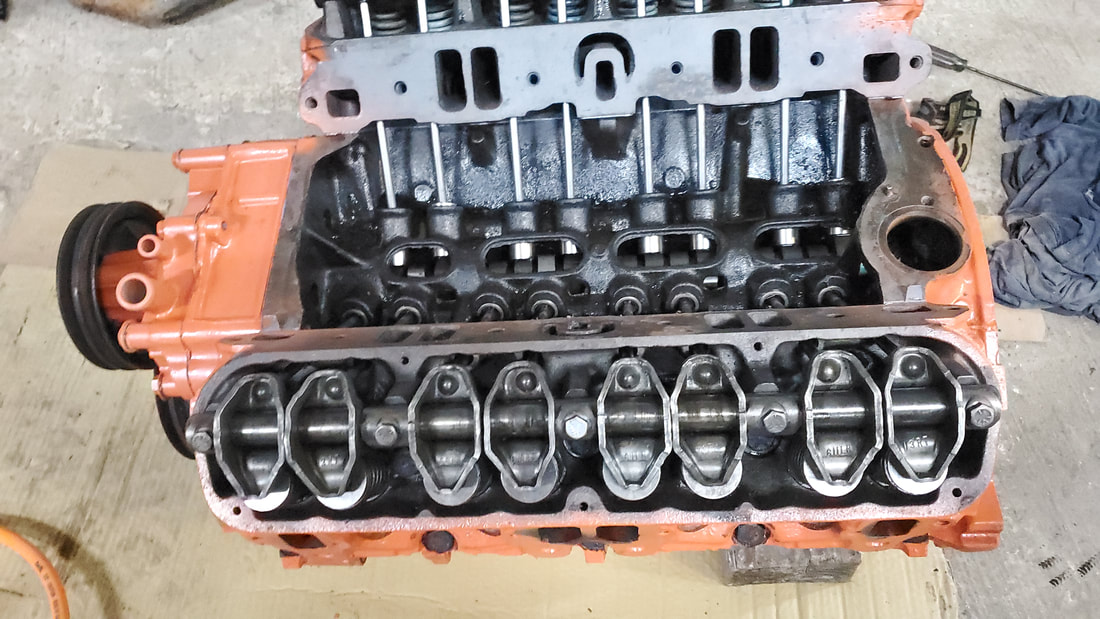
A shot of the short block from above.
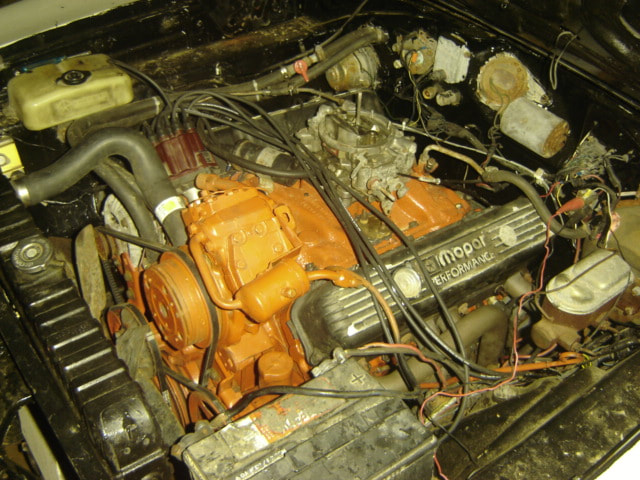
The 440 after full reassembly.
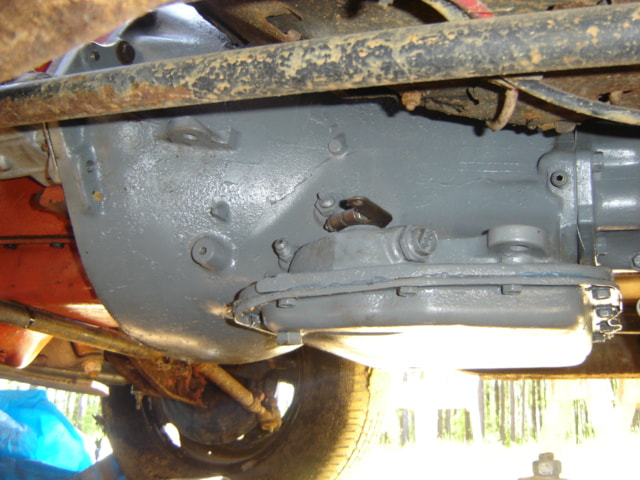
Shot of the rebuilt and painted transmission.
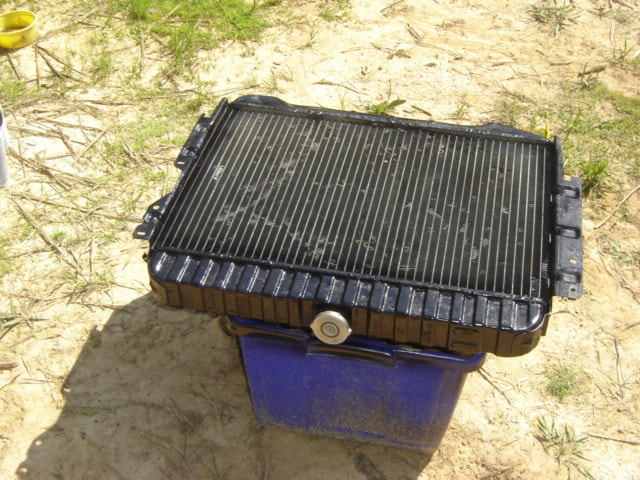
Radiator after painting all over.
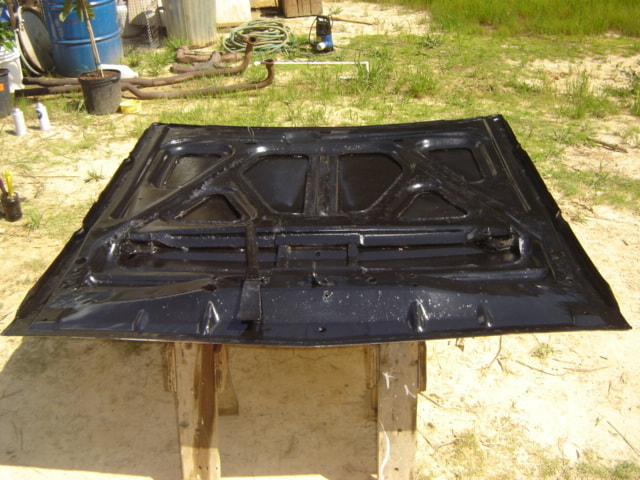
Hood after painting the inside thoroughly.
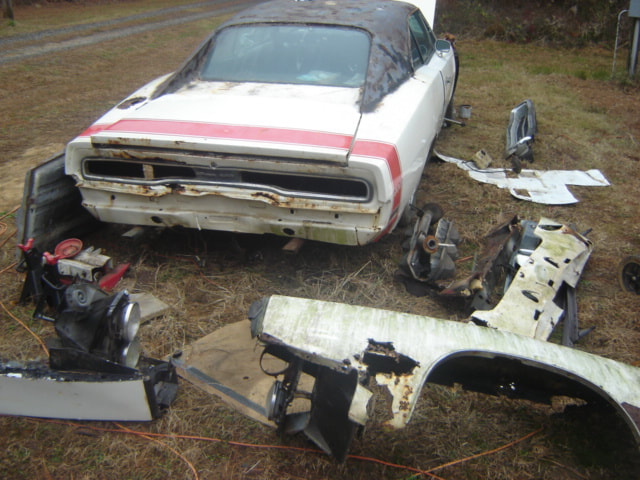
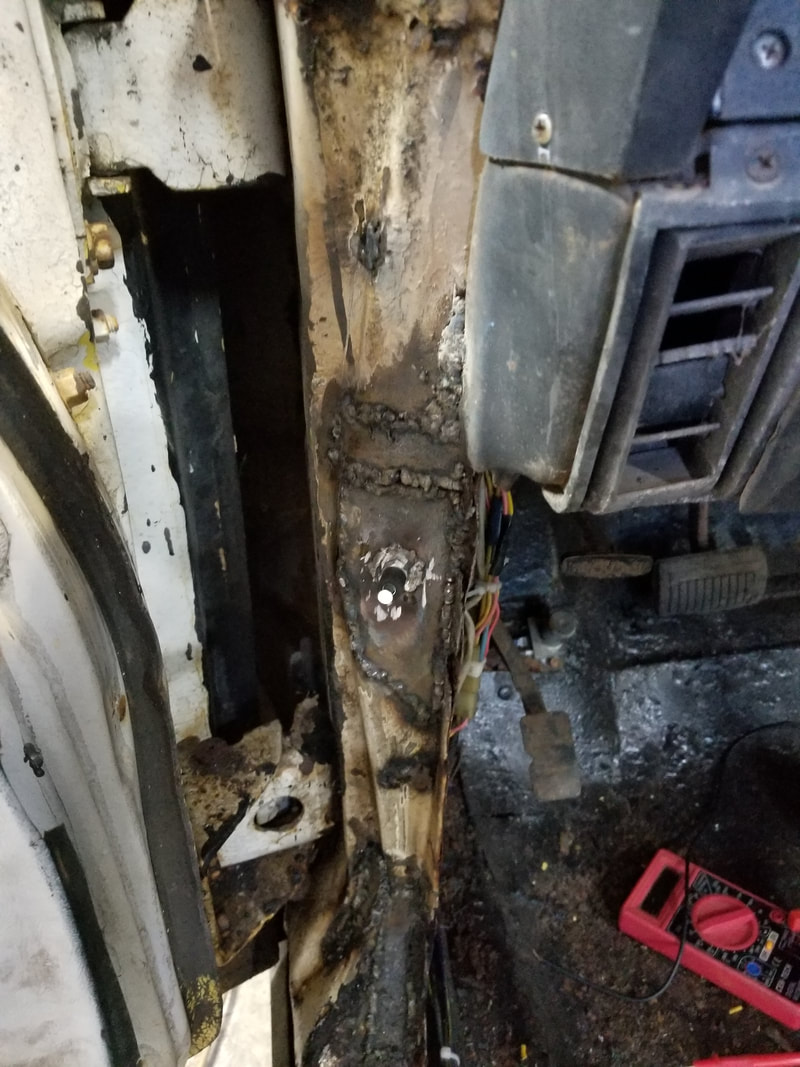
After the fun with the engine and transmission, the next thing was addressing the continuing rust of the body. As noted, the few years of this car just sitting on the grassy ground of our forest yard did more damage to the body and frame than any amount of driving on the Chicago streets in the winter. Besides the floor being compromised from moisture, the frame rails in the rear took a serious beating to the point there really wasn't much left from just in front of the axle on back. The torsion bar crossmember had a lot of cancer in it as well and would need attention before the car ever rode the roads again otherwise the point where the torsion bars are anchored in the crossmember could twist free from the frame rail and cause a catastrophe. Along with the frame rails the trunk floor was pretty well shot and the rear quarters were rotted horribly. The front fenders had a shitload of cancer in them as well and because of the vinyl top the roof had pinholes all over. It was a dumpster fire when I finally got to work on the body. After getting the frame rails made using flat stock iron, and replacing the rocker panels, I patched the doors, roof and hood and covered all in cheap paint for protection. I removed the fenders and took time to patch up the left fender and luckily found an old right fender that I got online that I was able to do light patching on, mostly just some light bondo and sanding to prep it for cheap paint. I then cut out the old quarter panels and replaced them with new reproduction quarter panels.
Fenders, valance panel and other hardware scattered about during the time the car was being worked on.
Front end of car after removing bumper, valance and both fenders.
While waiting for replacement quarters to come in, I took time to patch the doors and hood along with the roof. The roof took a little effort as the bondo didn't stick at times and would chip off. I ended up having to tack some metal from the inside to provide some extra backing to allow the bondo to stick properly. I topped everything off with a layer of cheap paint just to cover the body for protection.
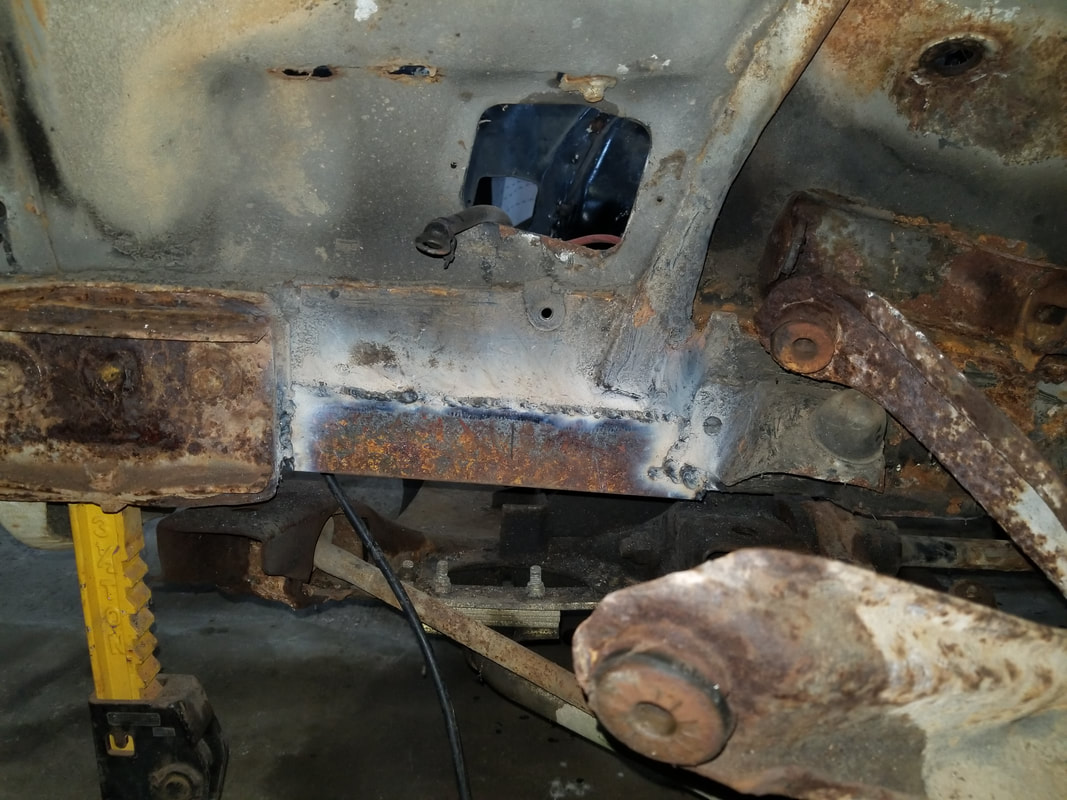
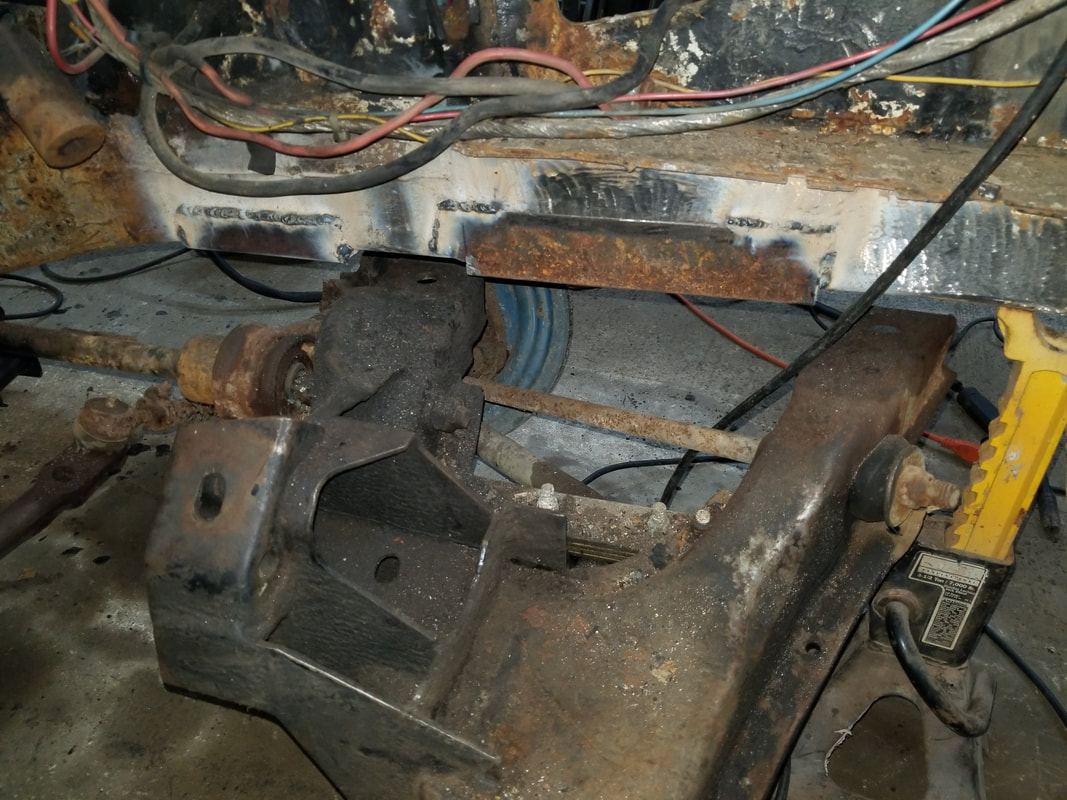
New frame rails made from flat stock metal welded in place against what was left of the original metal in this area. Even the rear spring bracket areas were replaced so everything will be nice and tight like its supposed to be, versus dragging ass.
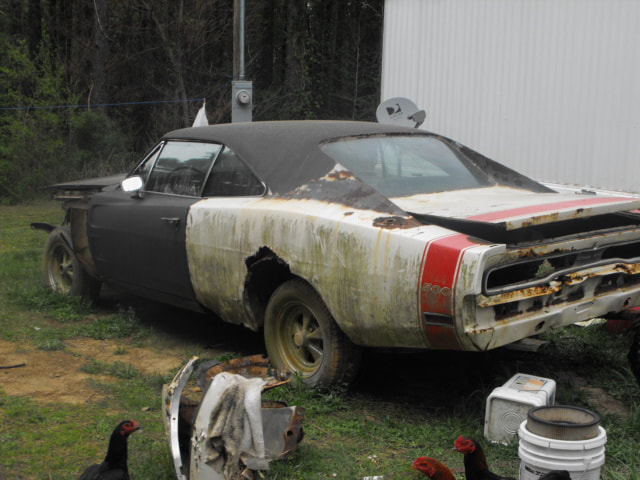
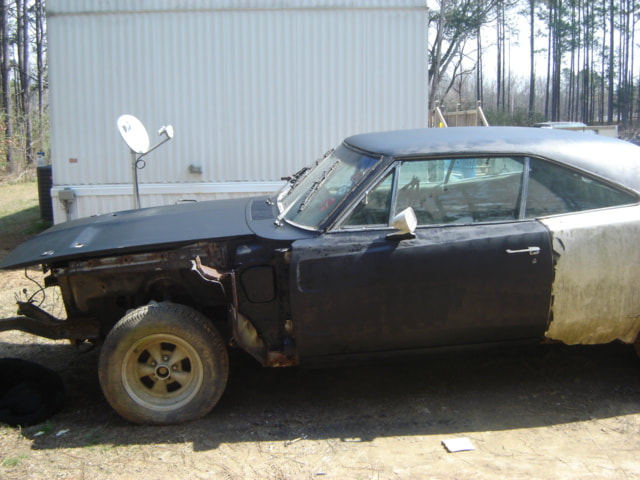
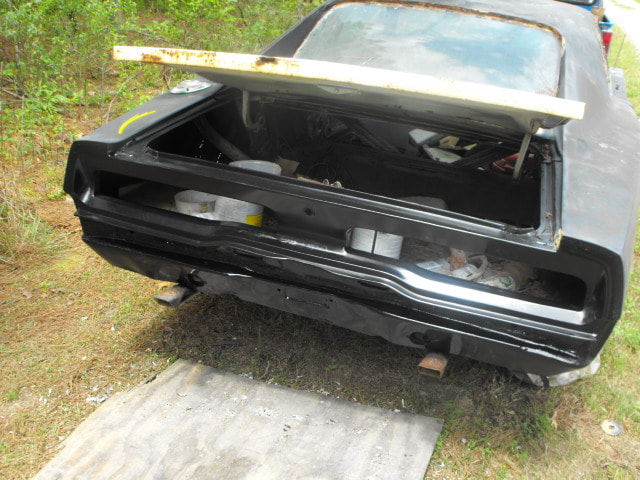
Rear of car riding high again after remaking the rear frame rails and trunk section. Note the rust over the rest of the car.
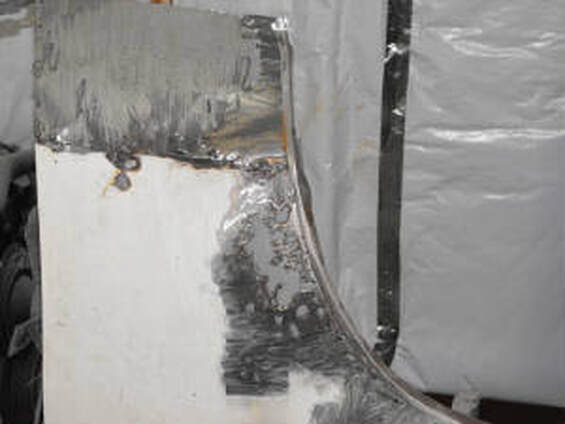
Closeup showing the extent of decay on the fender.
The patch job involving tacking pieces of sheet metal on the inside of the fender to provide a backing for putting bondo over rust hole sections actually didn't turn out too bad. There were some flaws in the lines but all in all its not bad. It too got an application of cheap paint.
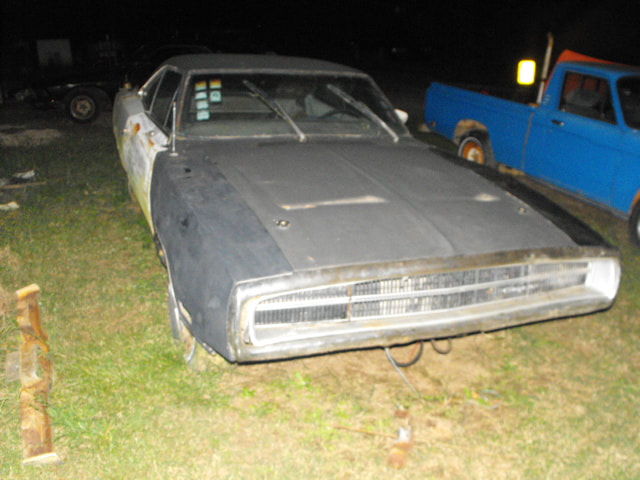
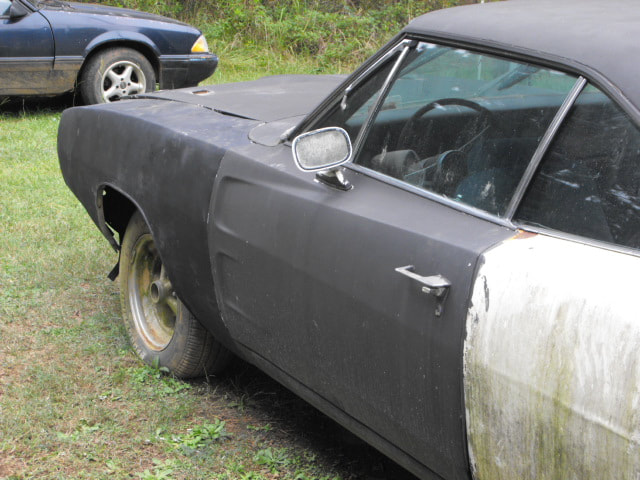
We managed to find a used right fender for a cheap price so I immediately got it and did some minor patchwork and painted it took before reinstalling. With both fenders in place I replaced the grille assembly as well.
Cutting out the quarter panel in order to prep the body for the new quarters that would be tack welded in place.
New quarter panel welded in place, note the bondo on the sail above the quarter where the factory welds were originally made. The replacement quarters are made to weld in the same spots as the factory used when they assembled these cars. Note the missing quarter on the right side.
Sails above quarters are sanded down on the bondo and everything is covered in a good layer of cheap paint for protection. Also note the right quarter is in place just as well.
New taillight panel welded in place. Rear valance was still good enough to save and is pretty much the only intact original piece of sheet metal on the car.
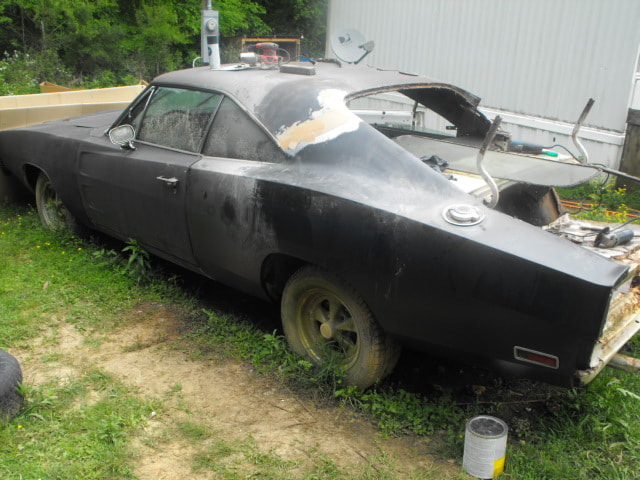
A shot of the car after covering with some more cheap paint for further protection. The worst is over as the body job was probably the most nerve wracking experience due to what was at stake if I messed up in any way.
Fast forward a few years and we pick back up again. We stopped working on the car in 2013 and didn't pick back up again until 2018. It was then that we dragged the car up to the garage to start gutting everything and give this car a full go-through, including everything from redoing the engine, patching the floors, finishing any frame patching, rewiring, interior work, brakes, suspension, you name it. I want to make sure that before this car hits the road again we've gotten everything done on here that would need attention. Of course we're not talking about a full restore, but a level of restoration that would allow this car to hit the road in a comfortable manner that I wouldn't have to worry about it for a while until I did decide to get the final components to do what would amount to a restoration up to stock levels.
First thing I started with was some minor body, frame and floor work. I had to replace the front valance as it was trashed, then cut out rusted areas of the floor and weld in patches as well as finish patching and reinforcing the front and rear subframes. Even though I did make the new rear subframe rails going from the front of the axle on back, there was a matter of finishing the patching and reinforcing everything so it would hold up well. There was a lot of scrap metal being used and a lot of welding wire and cutting discs expended to get things done on the body.
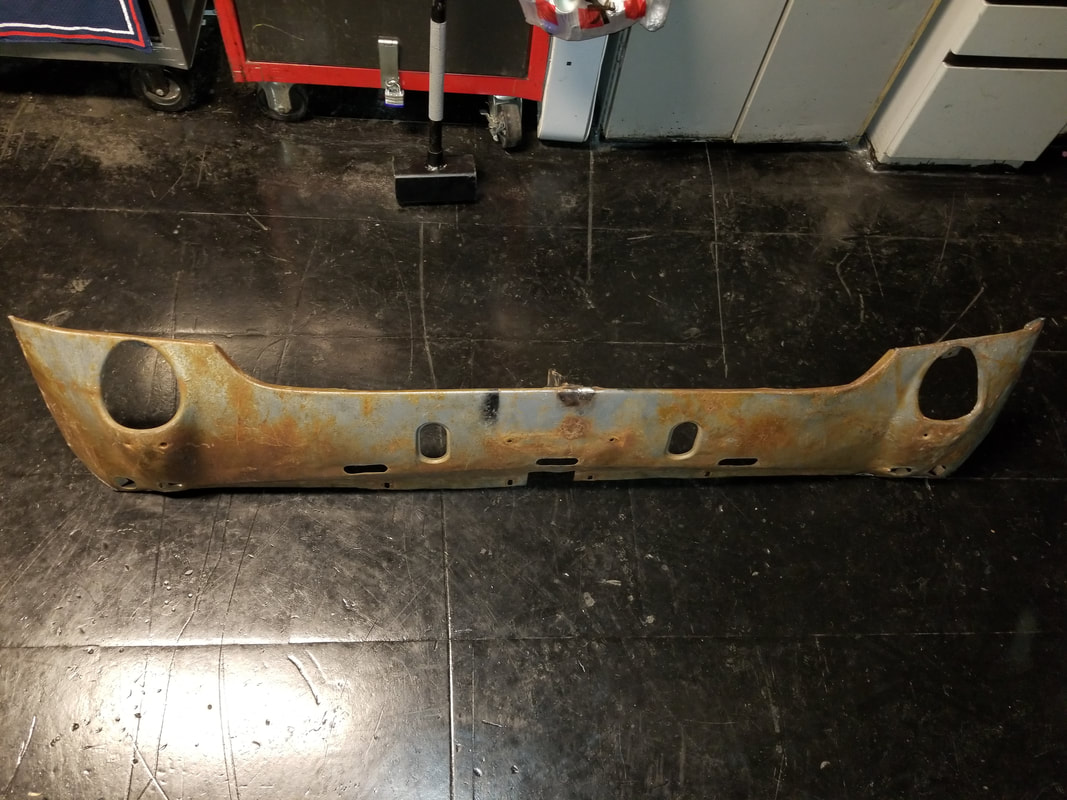
The new used front valance panel.
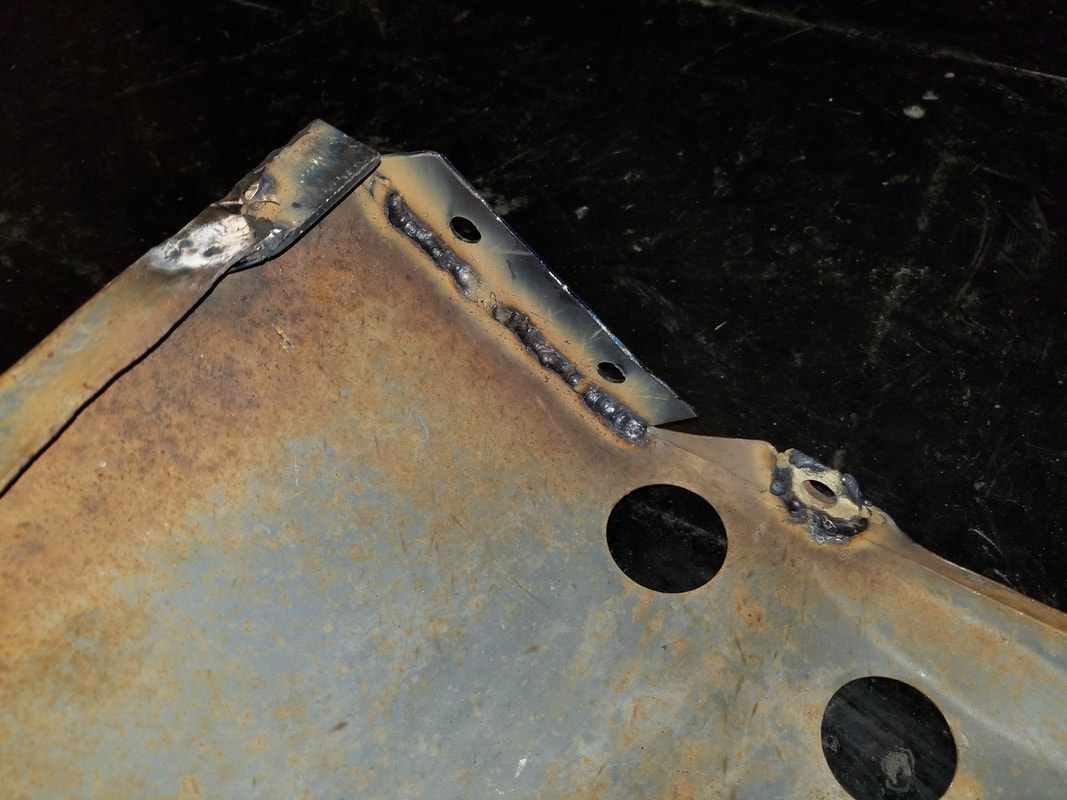
Several light welds had to be done to repair the cracked metal tabs that are needed to hold this panel in place against the fenders.
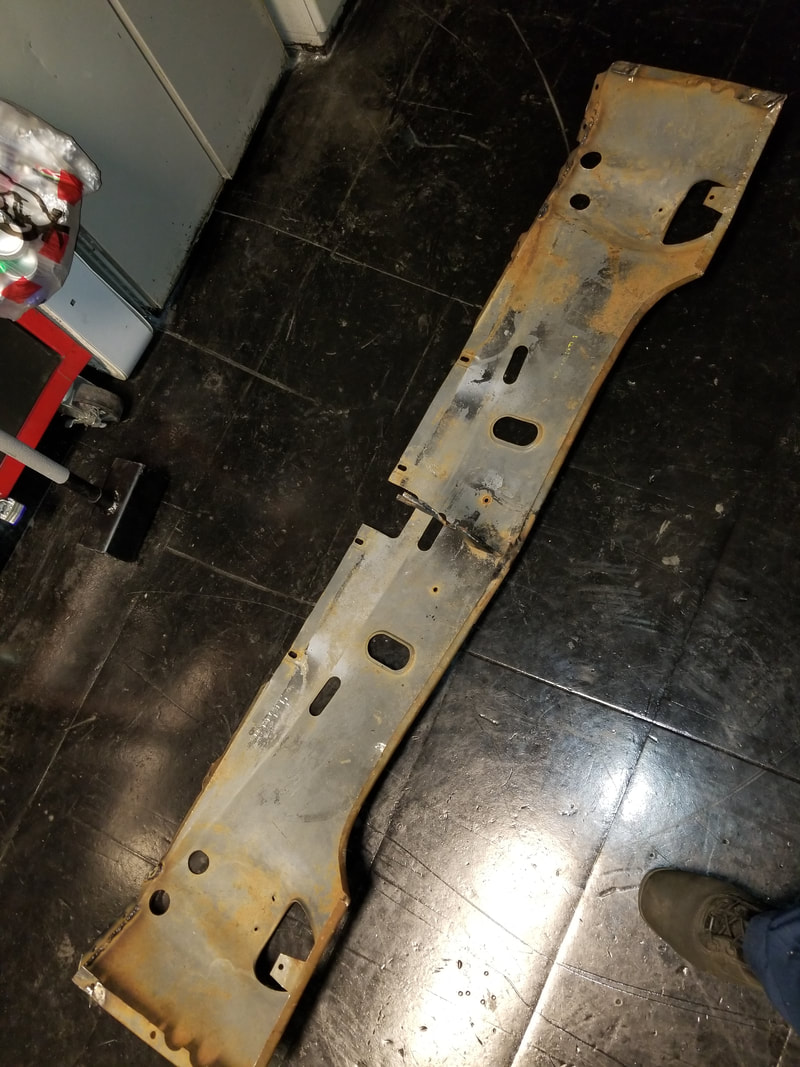
Inside of valance panel after making repairs. Along with welding, dents had to be tapped out with a body hammer around the panel.
Car after pulling engine and transmission out.
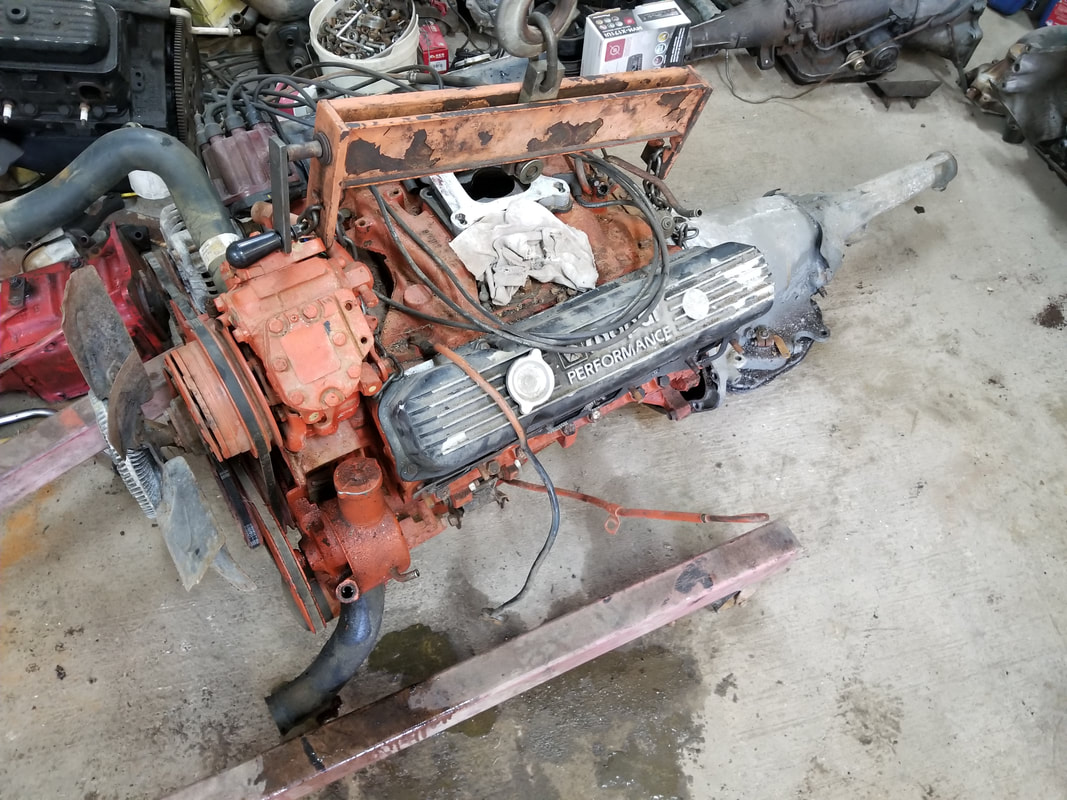
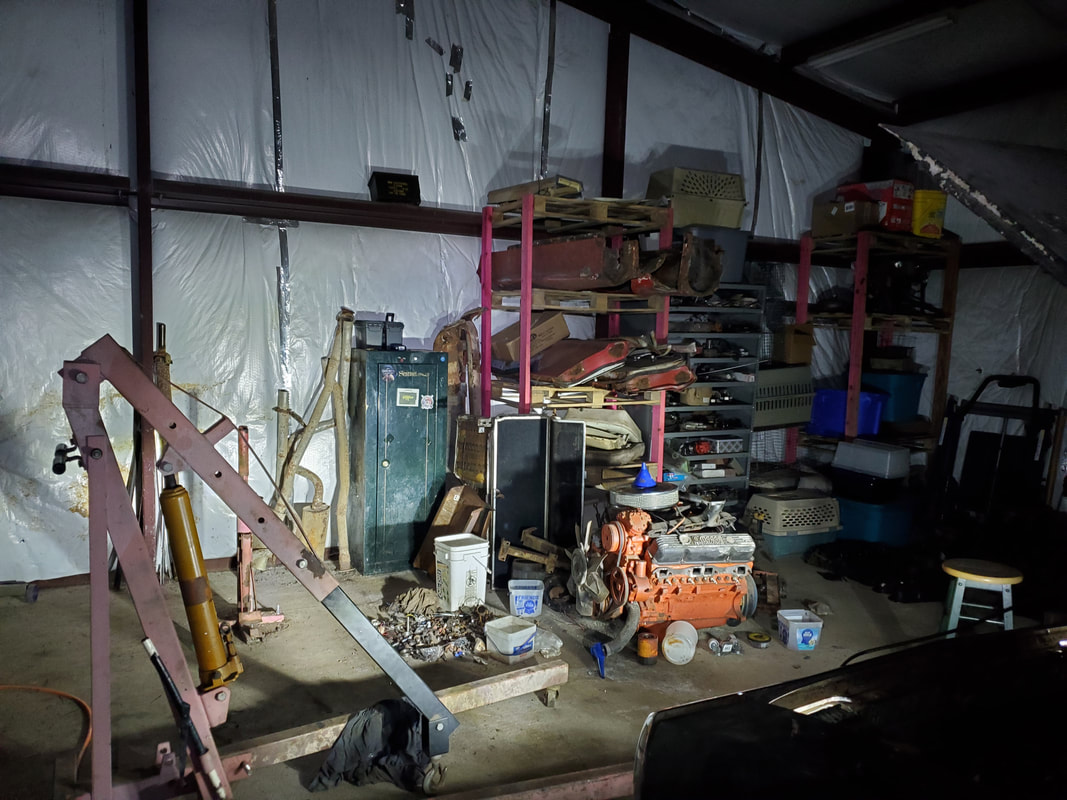
Engine and transmission after pulling from the car, staged on the floor out of the way.
Section of frame rail with an angle iron patch welded in place. Note the control arms removed from shock tower to make room for the patching work.
Inside of engine bay at right frame rail. Outline of angle iron patches are visible even after painting the metal with black paint.
More angle iron patches welded in place on left frame rail as seen from the inside of the engine bay.
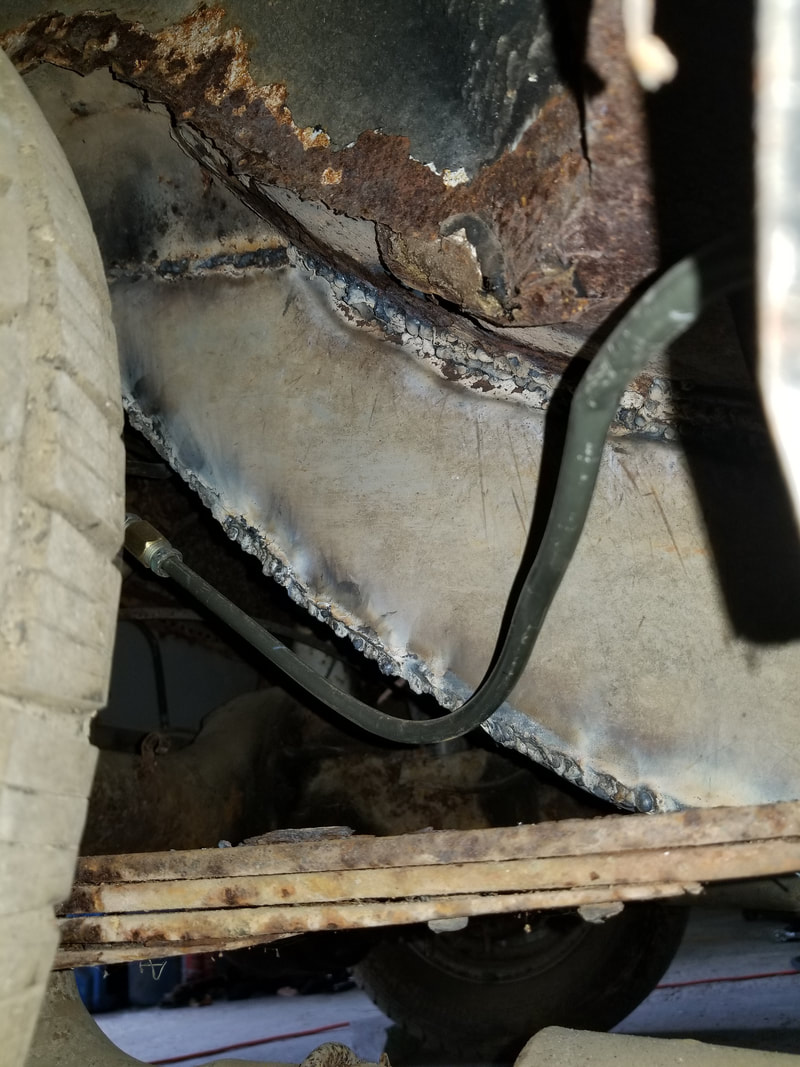
Flat iron stock patch cut to match the curvature of the rear frame rail as it goes up and over the axle.
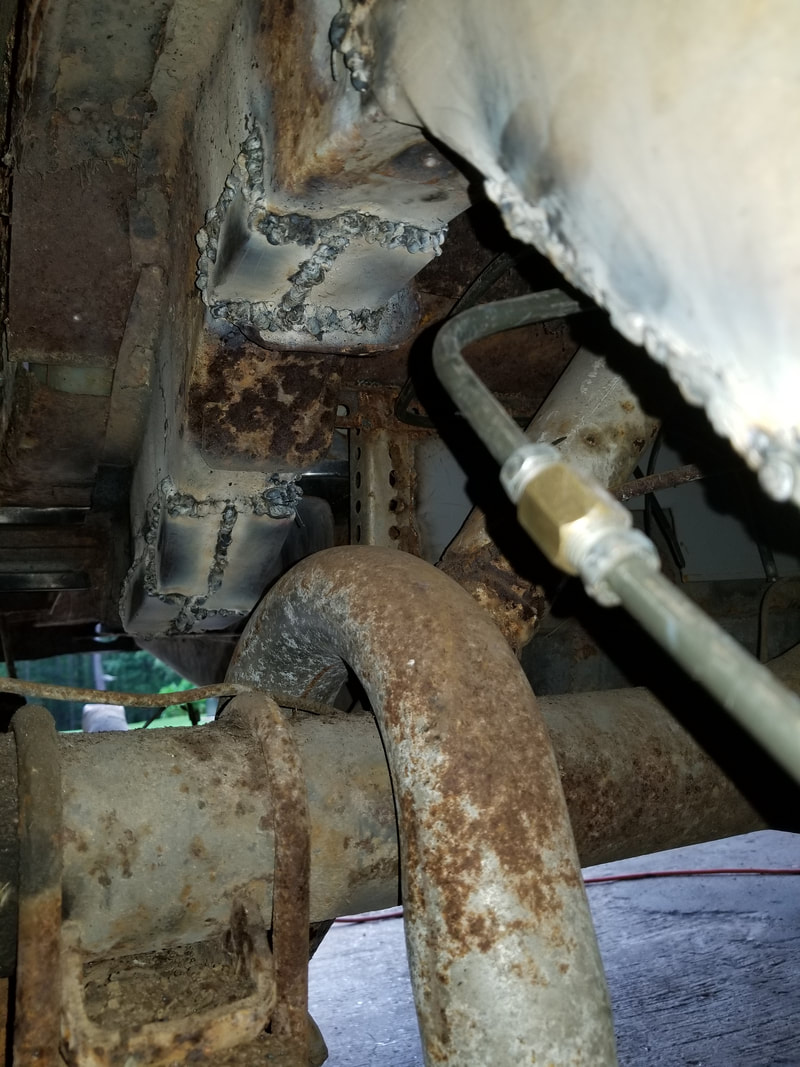
More ugly patching under right rear frame rail as it goes over the axle. Patches had to be done in pieces as I covered the bad areas of the frame rail and went around the curvature of the old rail.
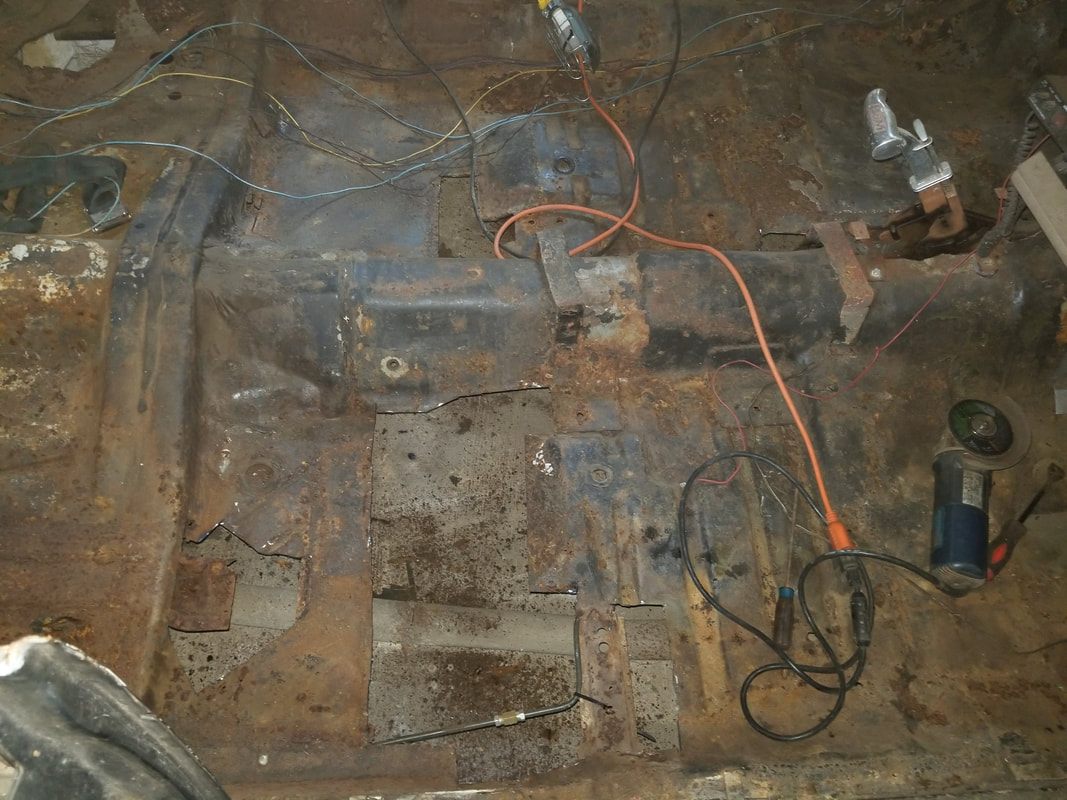
Sections of floor cut out, look carefully, you'll see large sections of floor missing and see the garage floor through said holes. These holes had rusted metal that had to be addressed.

Rusted out section of rear floor near right frame rail cut out.
Underside of fenderwell painted with thick layer of paint to cover up metal to help protect against moisture and the resulting rust that comes from moisture on metal.
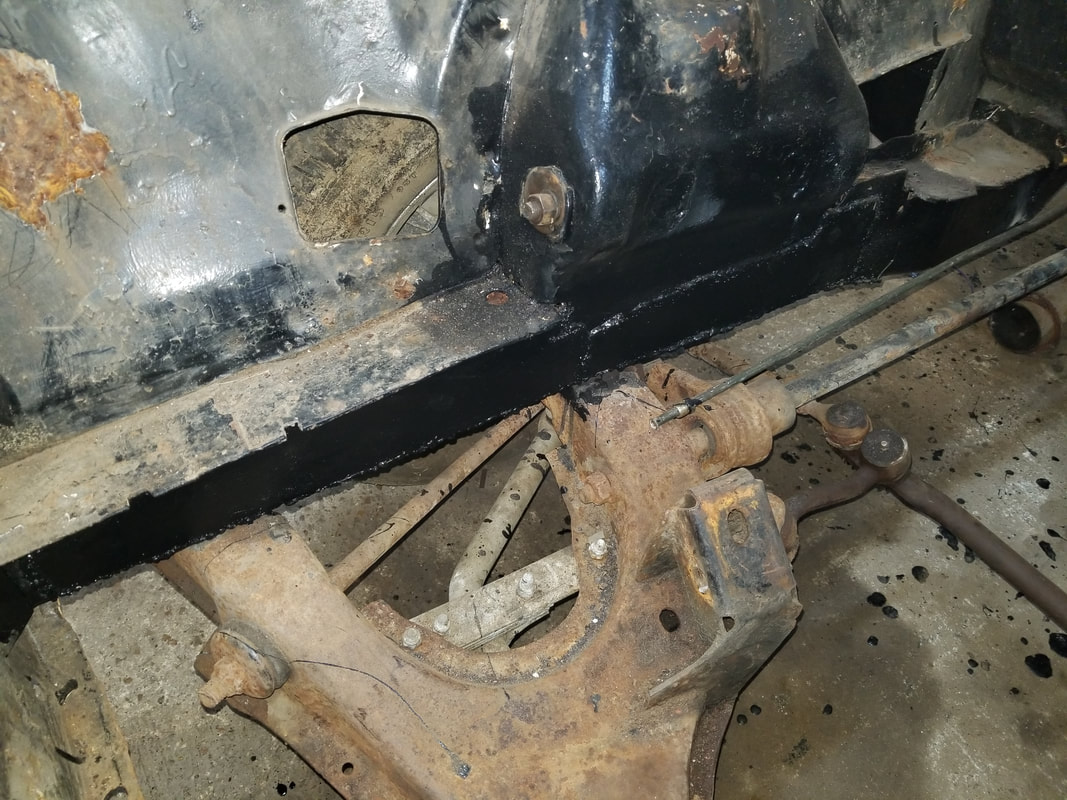
After welding patches of scrap metal over the holes that were cut in the floors, as well as finishing up any errant areas of frame rail that needed patching I took the time to paint over all over the bare metal, especially on the frame rails, with a thick layer of black paint to help cover the metal to help protect it from rusting too fast when moisture gets under the fenderwells and frame and underside of floor. Afterward the next order of business was rewiring the car.
Starting this off involved pulling out all the old wiring, all the way up to and including the old fuse block. With the old stuff out, I took the time to take the plugs to any devices that were specific and cut from the wire harness with a few inches of wire to connect to when I run the new wiring. I also got an aftermarket fuse block that has ten fuse terminals, using the newer bladed fuses that were common in 80s and early 90s cars. This fuse block also has indicator lights to show when a fuse is blown to help in quick troubleshooting if there's an electrical issue. After mounting the fuse block in the same spot as the old fuse block, in the glove box area, I ran each load's circuit from the load neatly through the inside of the dash and back to the fuse block. I had to get main 12v power over to the ignition switch then power from the ignition switch over to the fuse block. Engine specific loads like power for the distributor, gauges, starter solenoid, alternator were routed through the same path and over to the opening in the firewall where the wire bundle passes through to the engine bay.
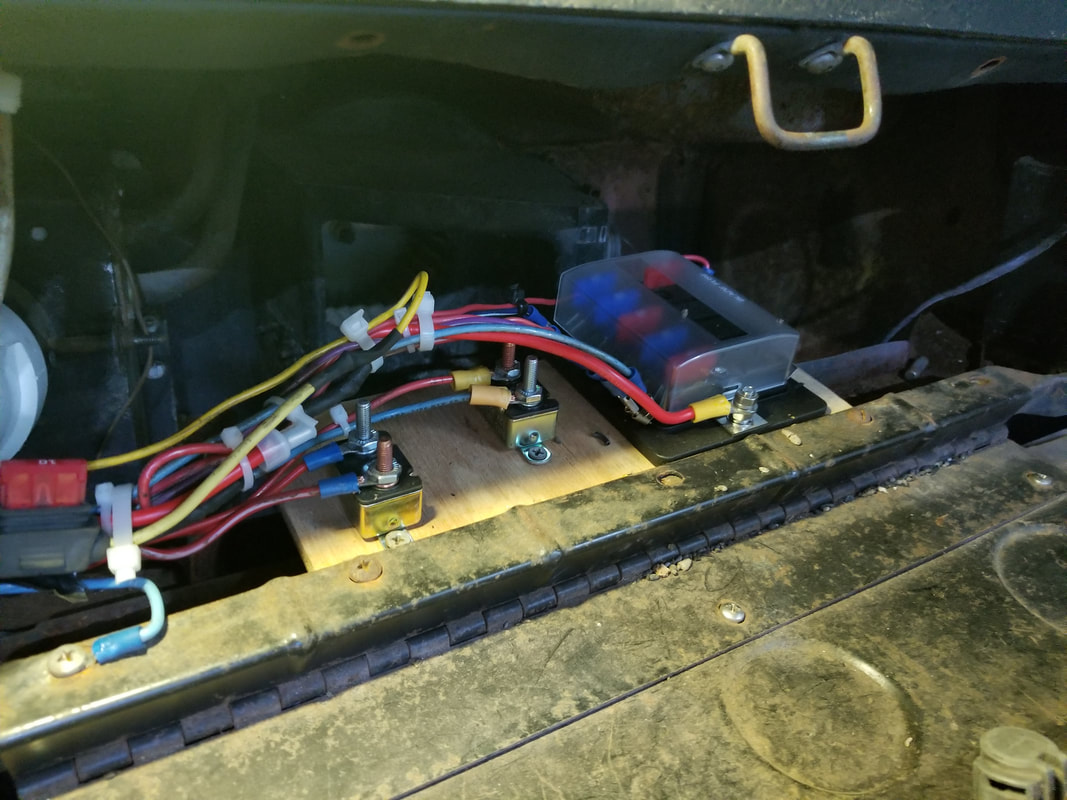
Fuse block and added panel for circuit breakers since a couple of loads were too large to have routed through the ignition switch and fuse block. Note the inline fuse terminal also wired in place and the neatness of the wire bundles utilizing zip ties.
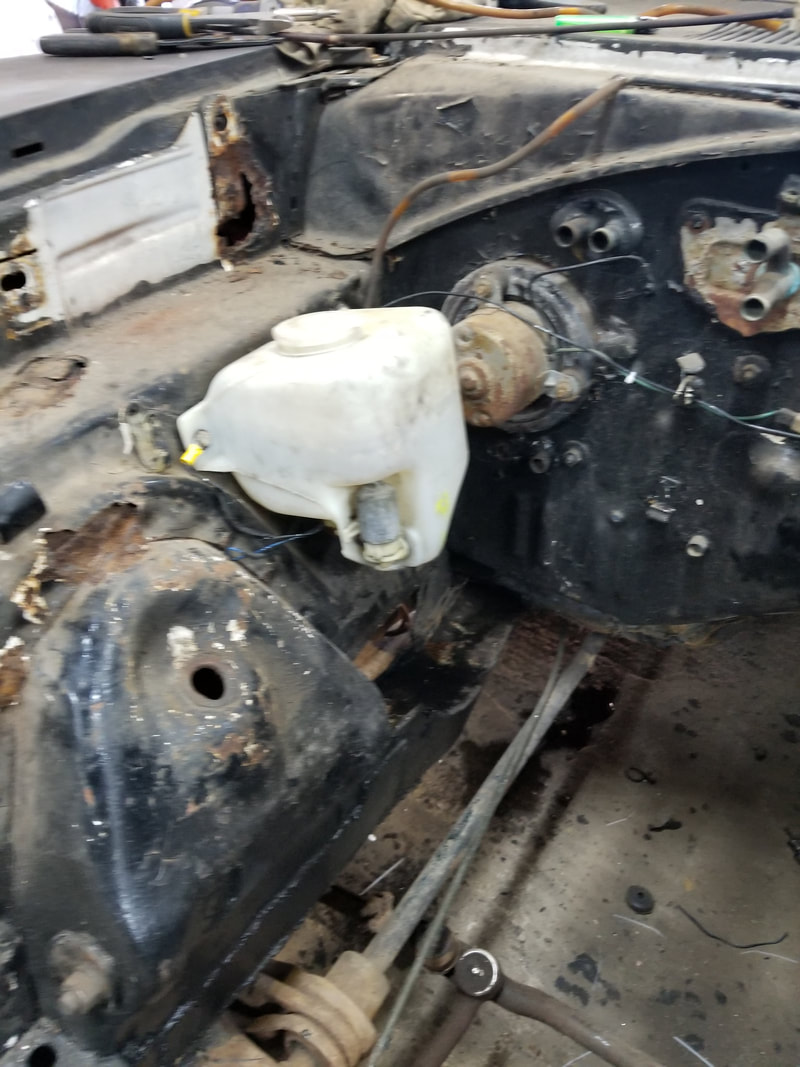
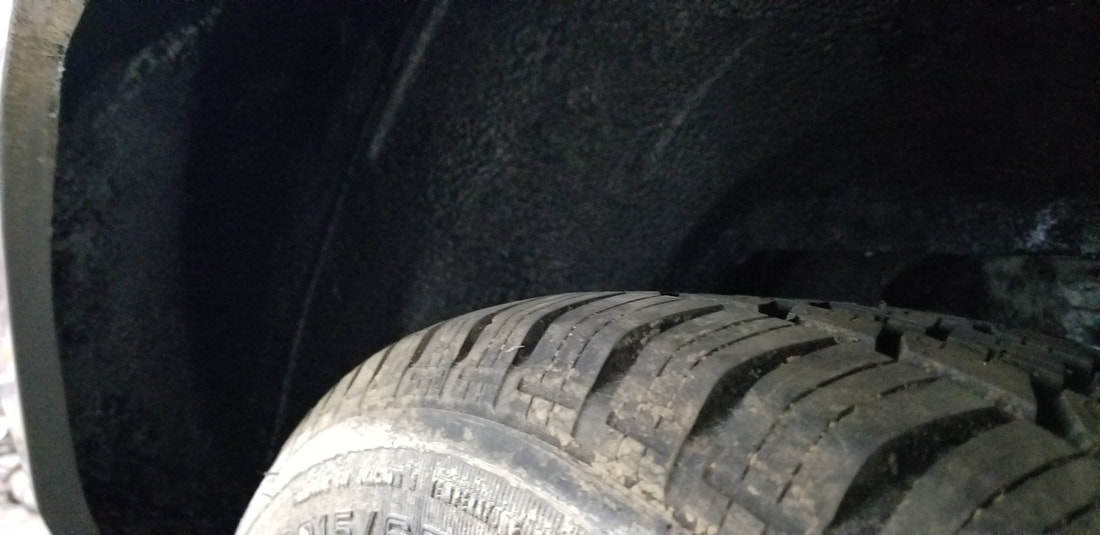
Wiper washer bottle added to back of fender panel. This bottle is a bottle removed from another car in the junkyard. I made sure to get a bottle of a particular size that would allow it to fit in this spot in the engine bay, plus its closer to the nozzles in the window and closer to the firewall. The wires hooked up to the washer bottle are a ground that goes straight to the chassis and a positive wire, coming from the switch in the dash. The dash switch takes a power wire from the fuse block.
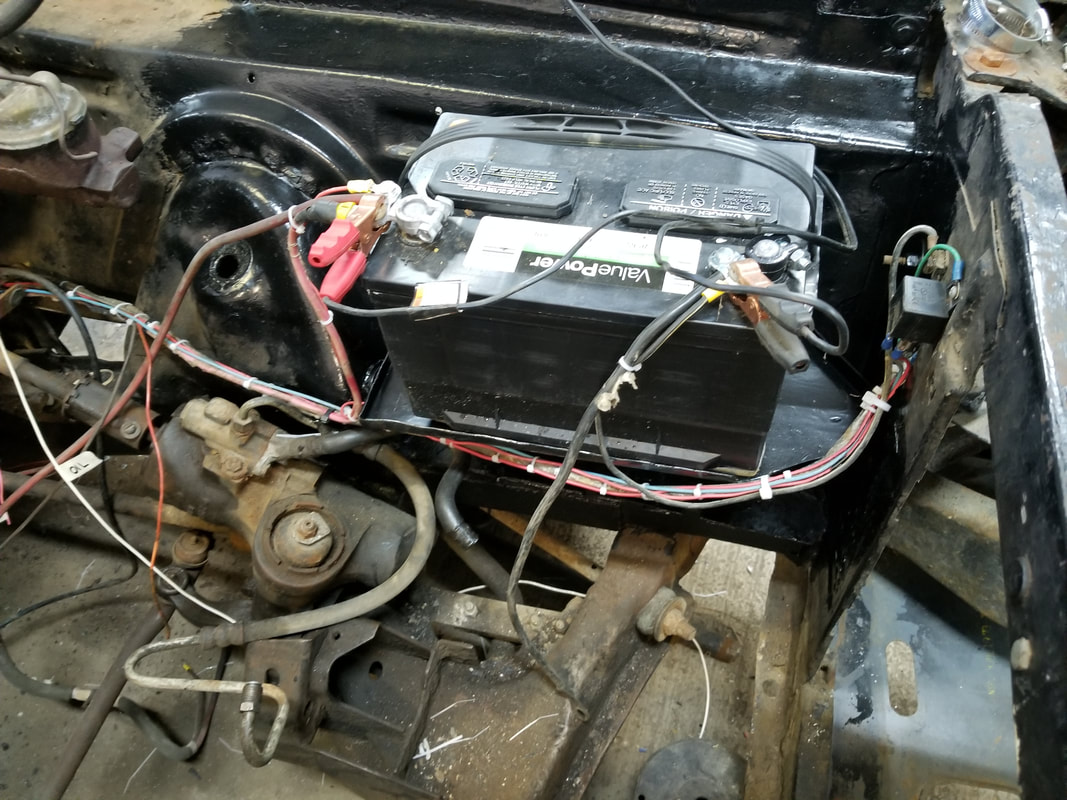
Battery wired up. Wire bundles are for wires going to headlights, turn signal lights, as well as the main wires feeding the fuse block. Note one of the wires to the left marked with oil, for the line coming from the oil pressure gauge, this wire will go to the oil pressure sensor on the engine. Also note how wire bundles are kept nice and neat with zip ties.
Door switch installed. I did have to add a patch in the door jamb before putting the switch in place. These switches are actually GM switches that switch the ground side of the interior lights, which keep things simpler than trying to have two wires going to one switch. The interior lights have a constant power wire going to them from the fuse block and a ground wire going to these switches. The switches are wired in a parallel circuit where either door switch can switch the ground to closed to complete the circuit.
Dash light illuminated with the open door. The interior lights were replaced with COB LED lights in place of the regular incandescent bulbs for better illumination.
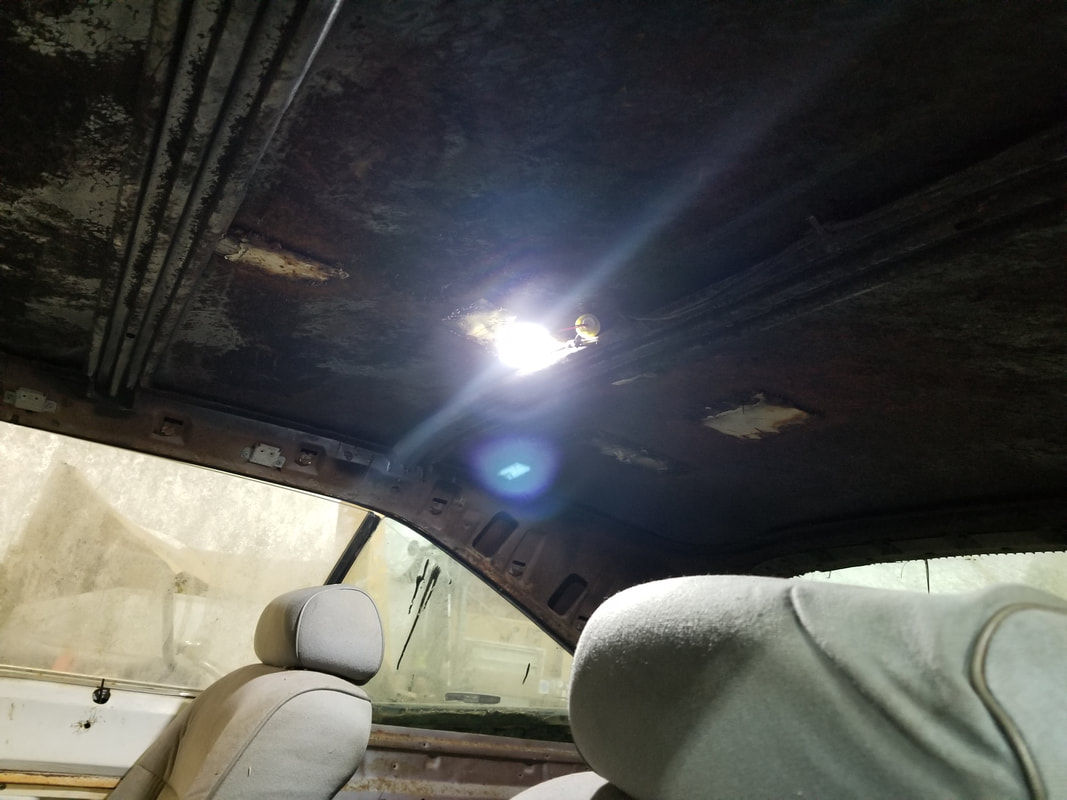
COB LED board secured to ceiling of car and wired up with wires following path along roof frame down A-pillar and into the dash back to the fuse block.

Headlights rewired with new H4 plugs.
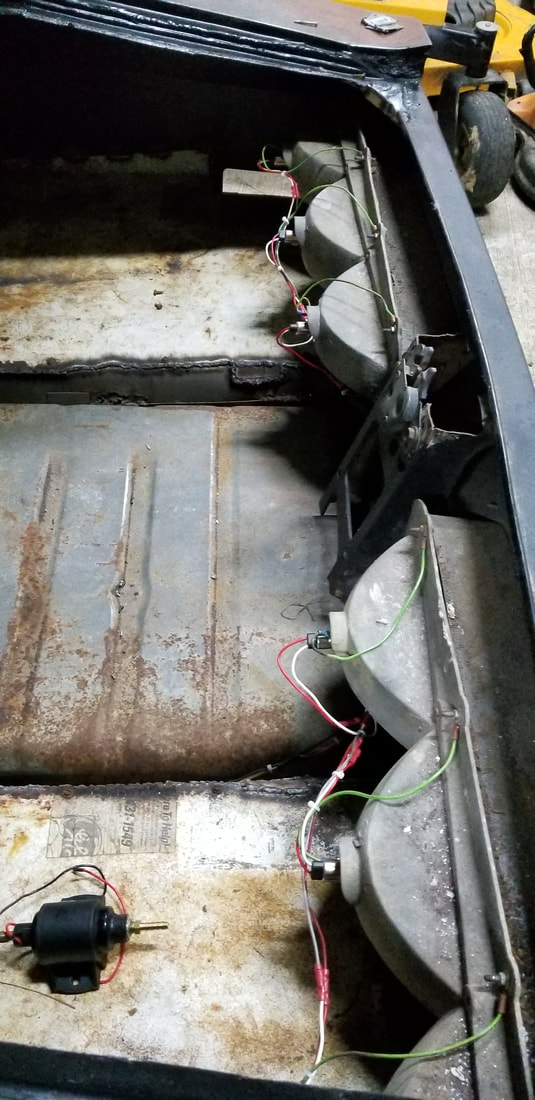
Taillights wired up neatly, again with zip ties, note electric fuel pump in foreground. The fuel pump will be installed under the car close to the fuel tank and have its wires routed neatly along the fuel line back into the cab of the car and to the fuse block. The turn signals on the taillights were wired up back to factory condition with the turn signal cam so the 2nd filament in the bulbs will transition from brake light to turn signal when operated. All taillights operate as intended as well.
After getting the electrical system done I took the time to replace the lower control arms with a spare set of arms I had in stock as the bushings were more than likely dry rotted and could compromise the old arms. I also installed new shocks and ball joints as these components were old. I rebuilt the brake system, installing a new master cylinder, brake lines and hoses along with calipers. After the quick runthrough with the brakes and suspension I turned my attention to a spare 318 engine and transmission that I picked up for cheap. I planned on installing this rig while I ran through the 440 and 727 to get both of them right. One of the things I had to do since the power steering pump that was on the engine was slightly different from the one that was on the 440 was have custom power steering hoses made. They took the ends from the old 440 hoses and the ones that were still attached to the 318 rig and added male and female fittings to the cut off ends in order to allow each hose to be pieced together as sets. At least when I do put the 440 back in I can just get a new set of power steering hoses that will definitely fit on the old setup versus the mix match setup I'm currently working with. I had another little fiasco with this rig as well. The first go around the engine ended up having a small hole in the timing cover that caused crankcase vapors to blow out. I installed JB weld over this to plug this up. Then it turned out that along with what sounded like a rod knock the engine was blowing water vapors from the bad gasket around the exhaust manifold. This meant one thing, bad head gaskets. What this also meant was out comes the engine. I had to disassemble the engine in order to try and fix the apparent problems that this used engine had.
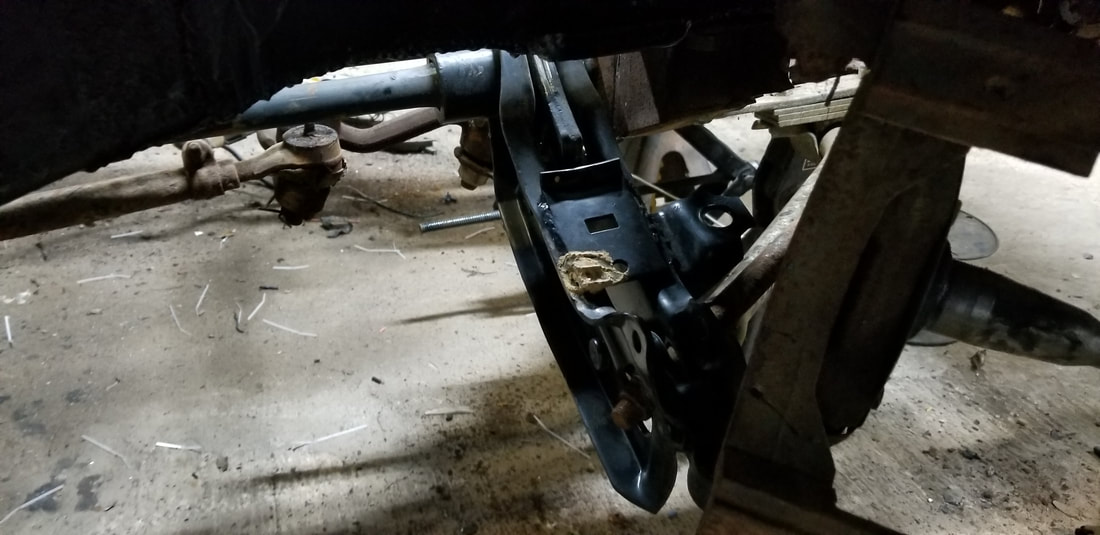
Refurbished control arm installed in place on the torsion bar with the spindle hooked up to the new ball joint also bolted in place.
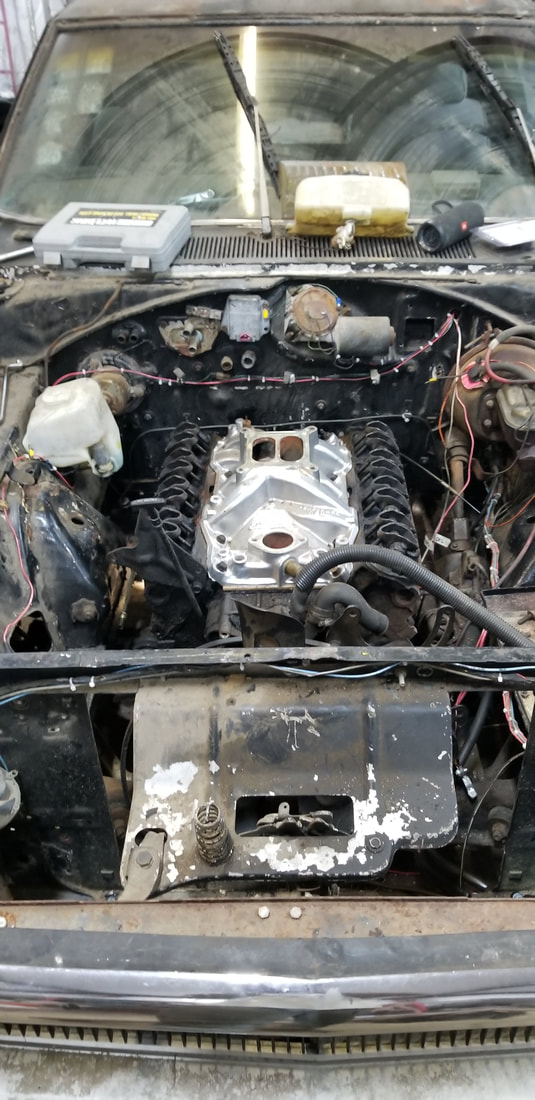
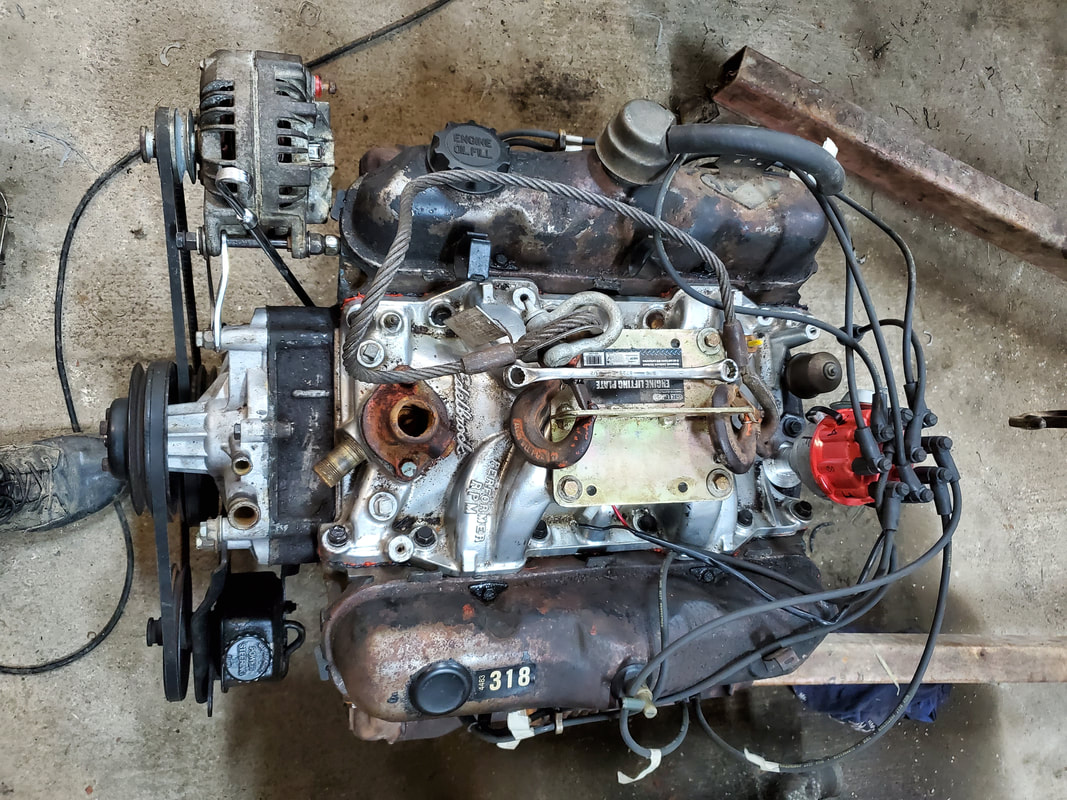
318 engine with aftermarket 4bbl intake manifold in place. Valve covers are not present as I had to check to make sure the engine gets proper oil pressure at the top. The 4bbl intake replaced the stock TBI intake that was on this engine as it came from a late 80's truck.
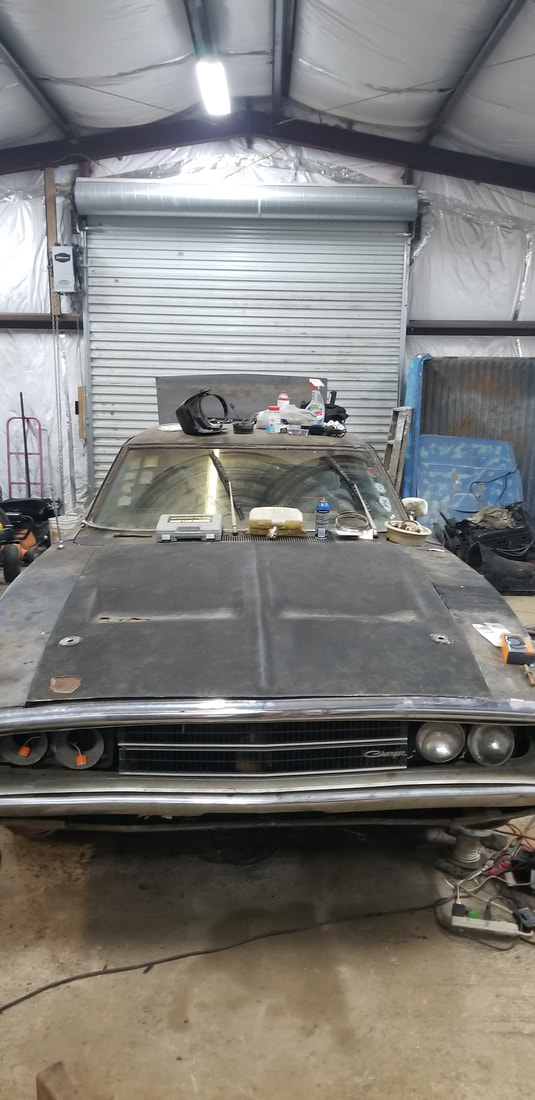
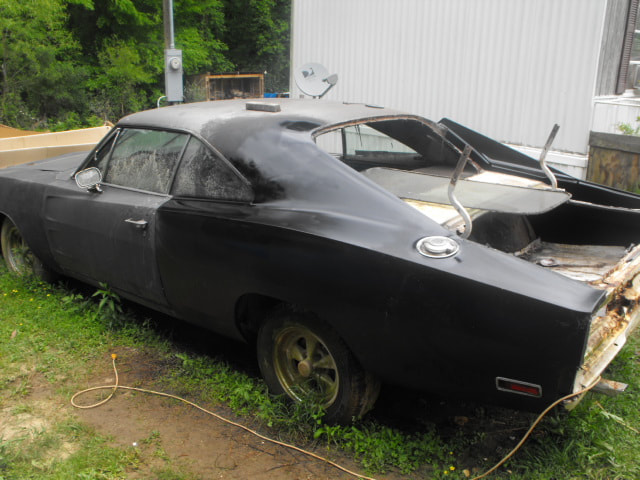
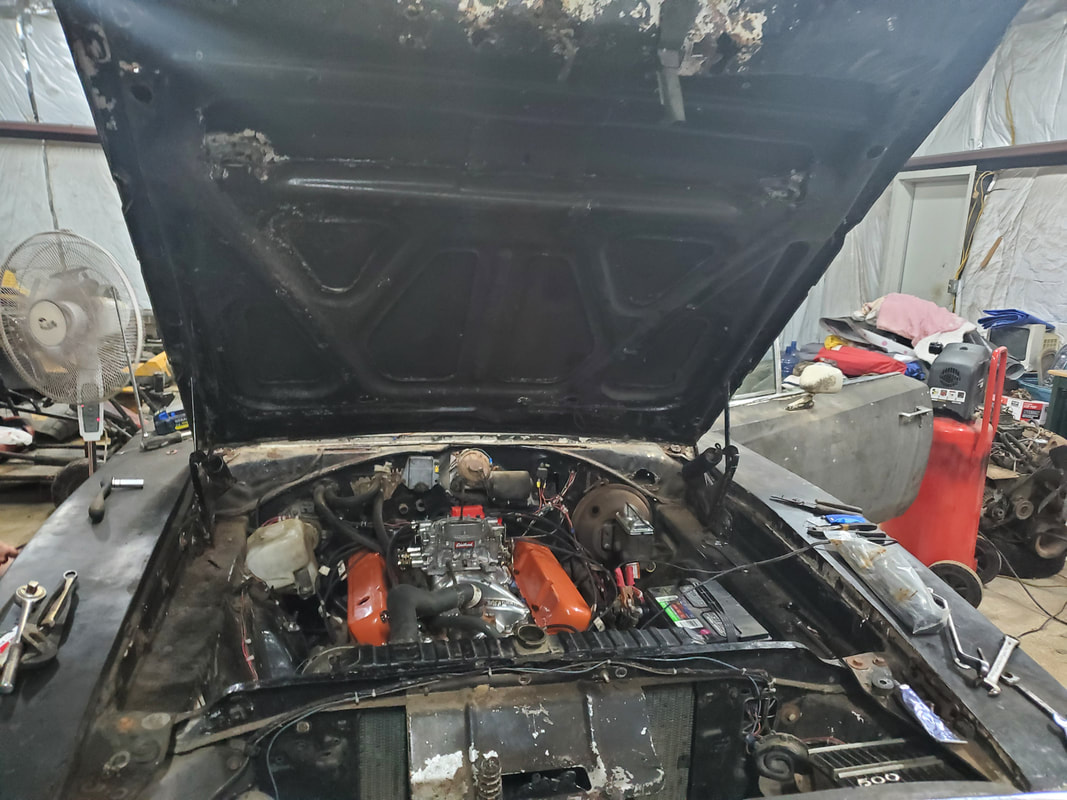
Car with hood closed and lined up.
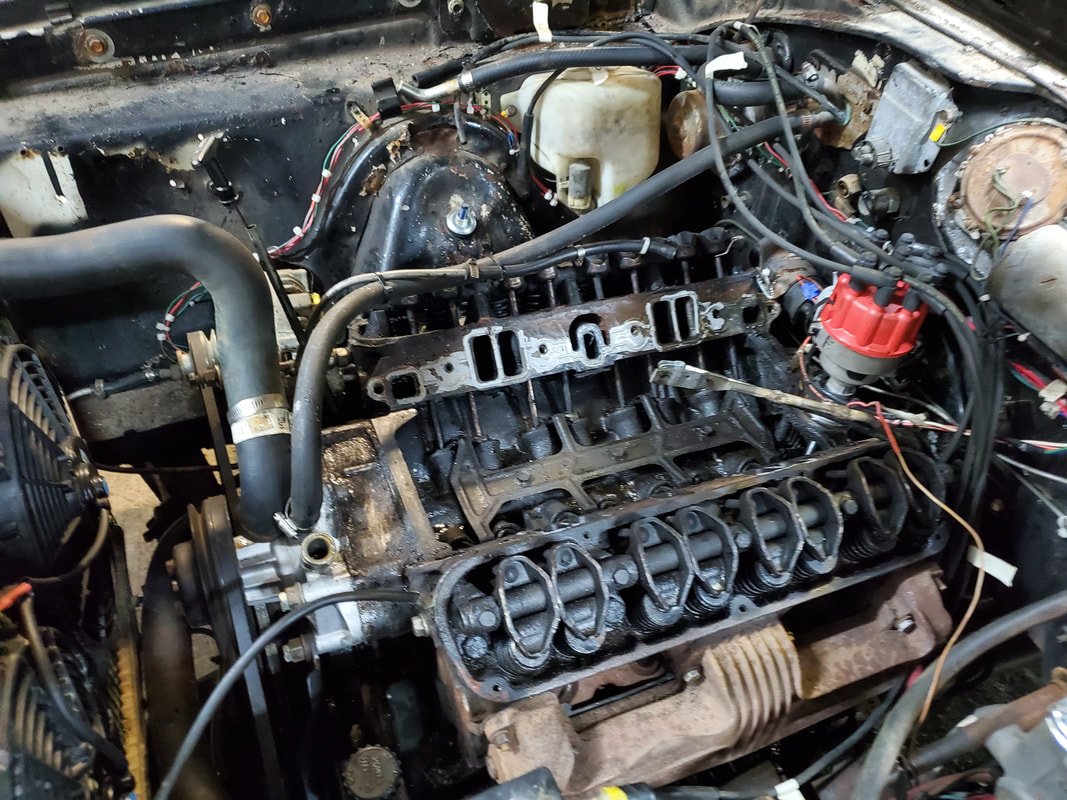
Engine after removing intake manifold in the process of troubleshooting the problems discovered on the engine.
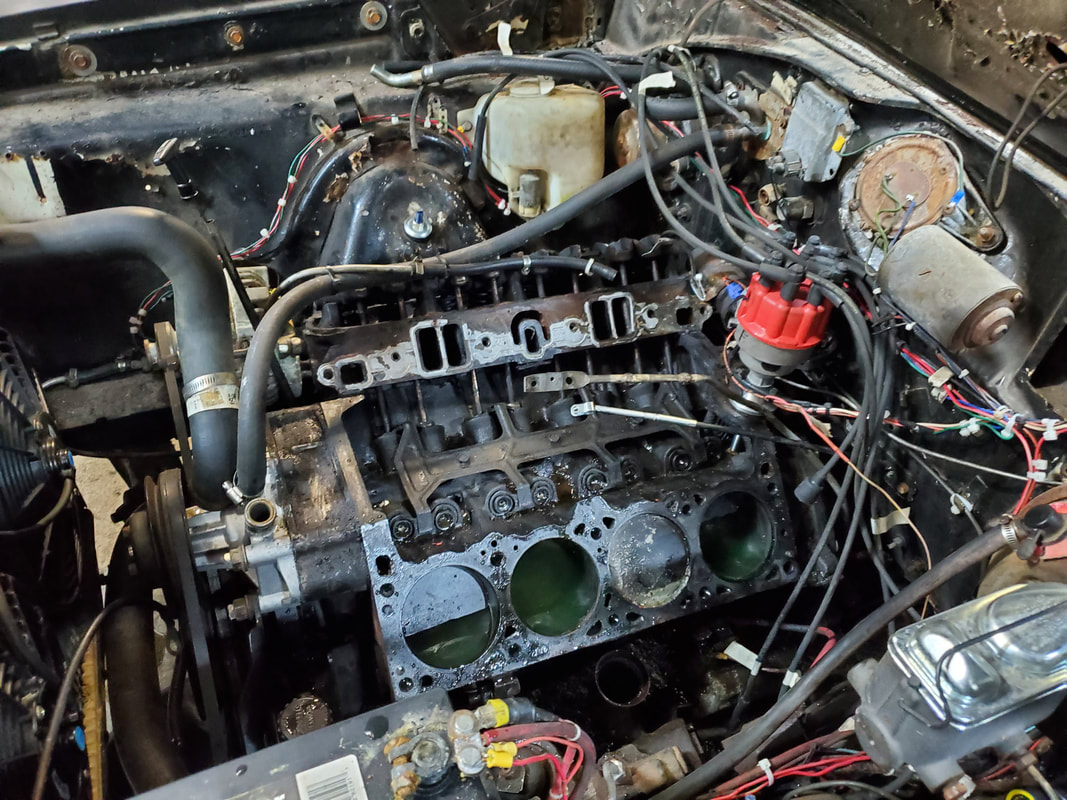
Left side cylinder head removed from engine.
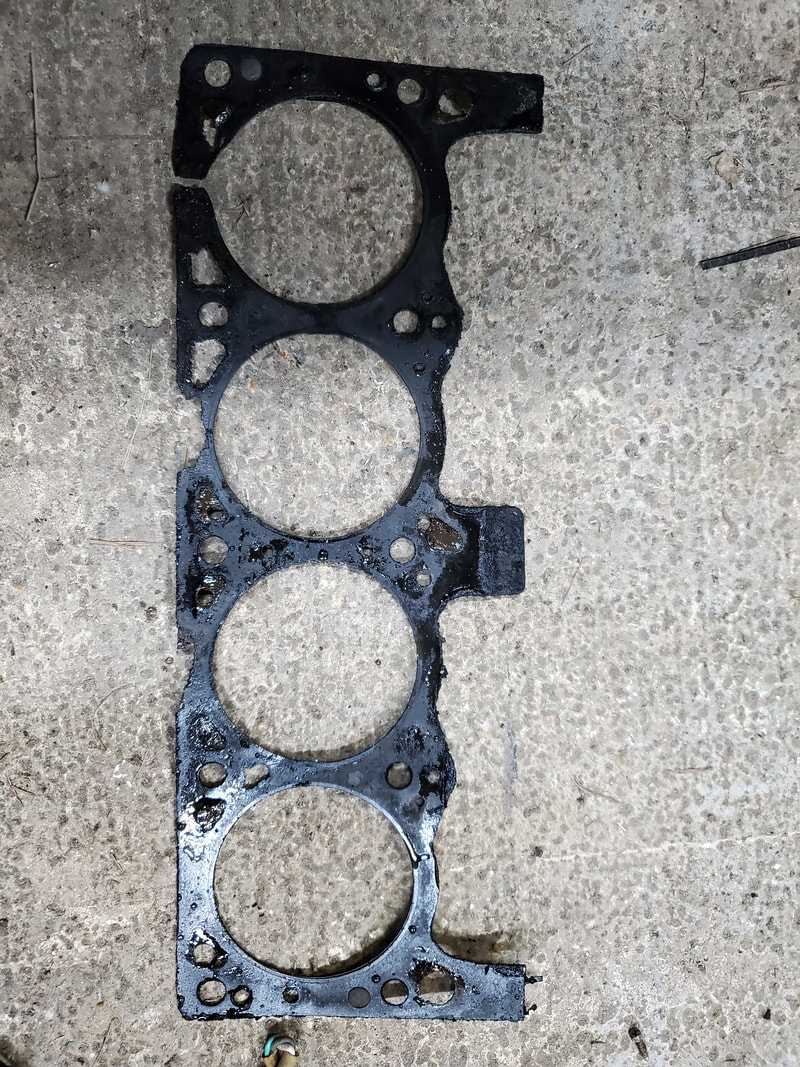
Left head gasket, note the break in the gasket indicating where we seen pressurized vapors blowing out as the engine was running. The cylinder next to it was on the verge of breaking just as well.
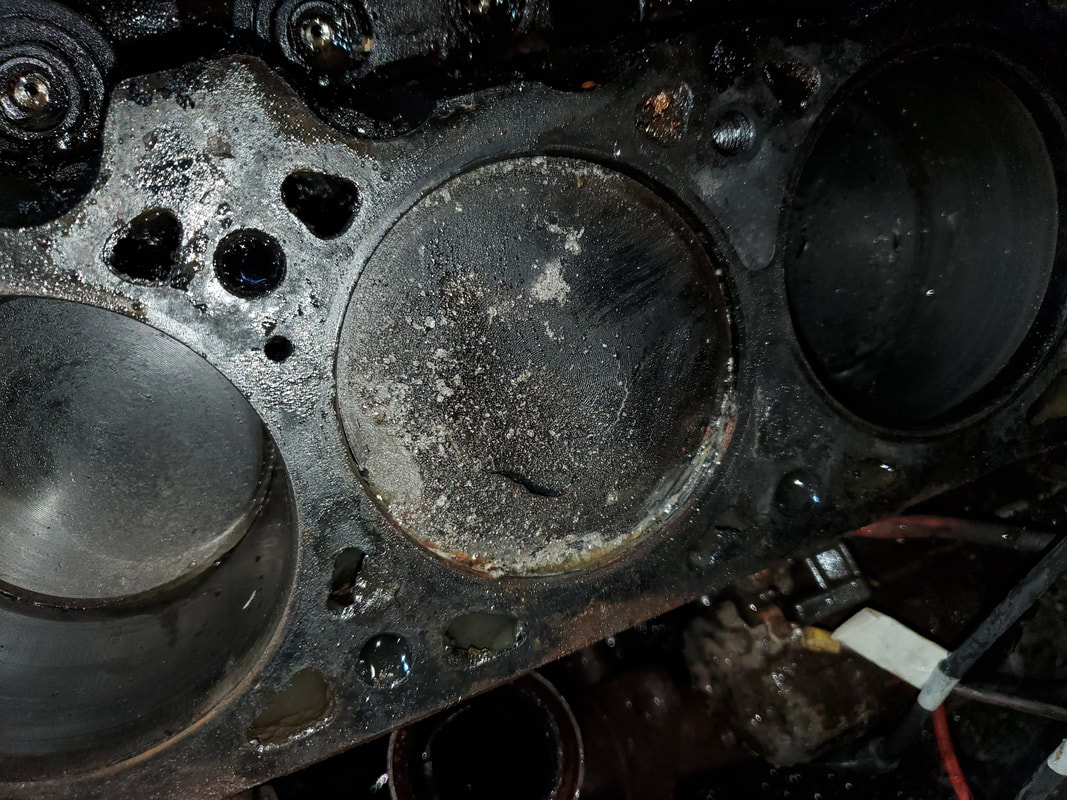
Number 3 cylinder (2nd from the #1 cylinder) showing signs of a destroyed piston. Top is fragged with visible breaks in the top. This thing was blowing hot vapors right into the crankcase.
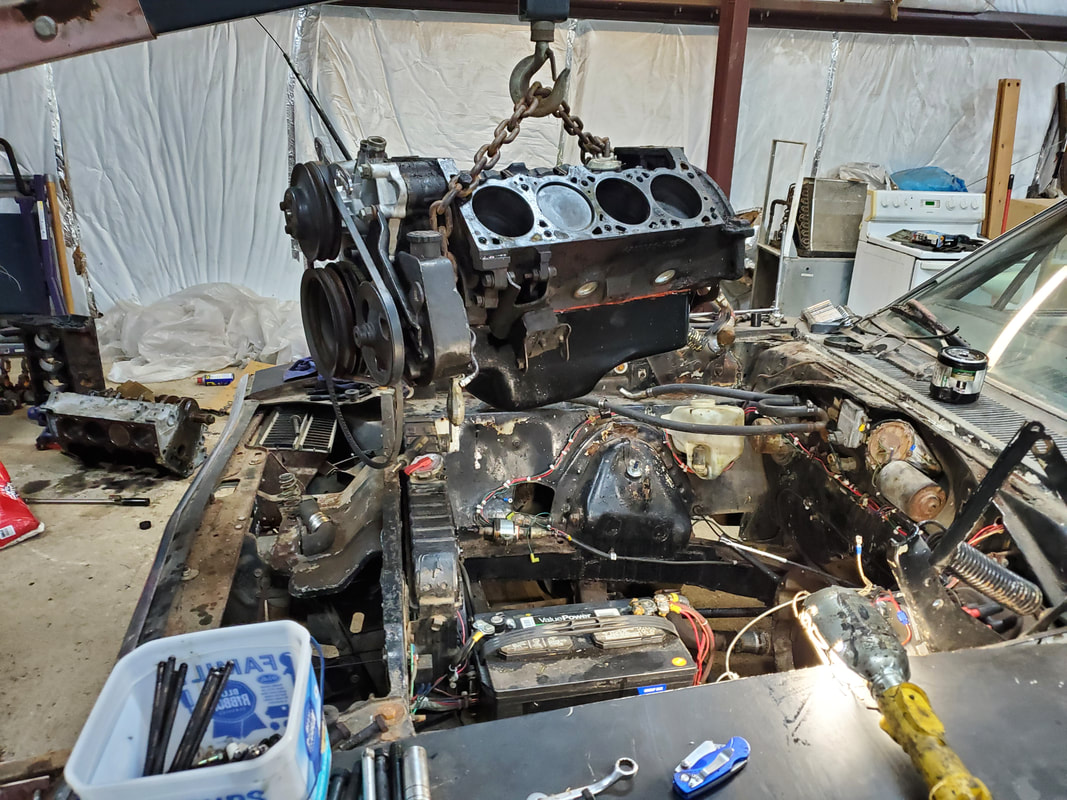
Removing the short block from the car.
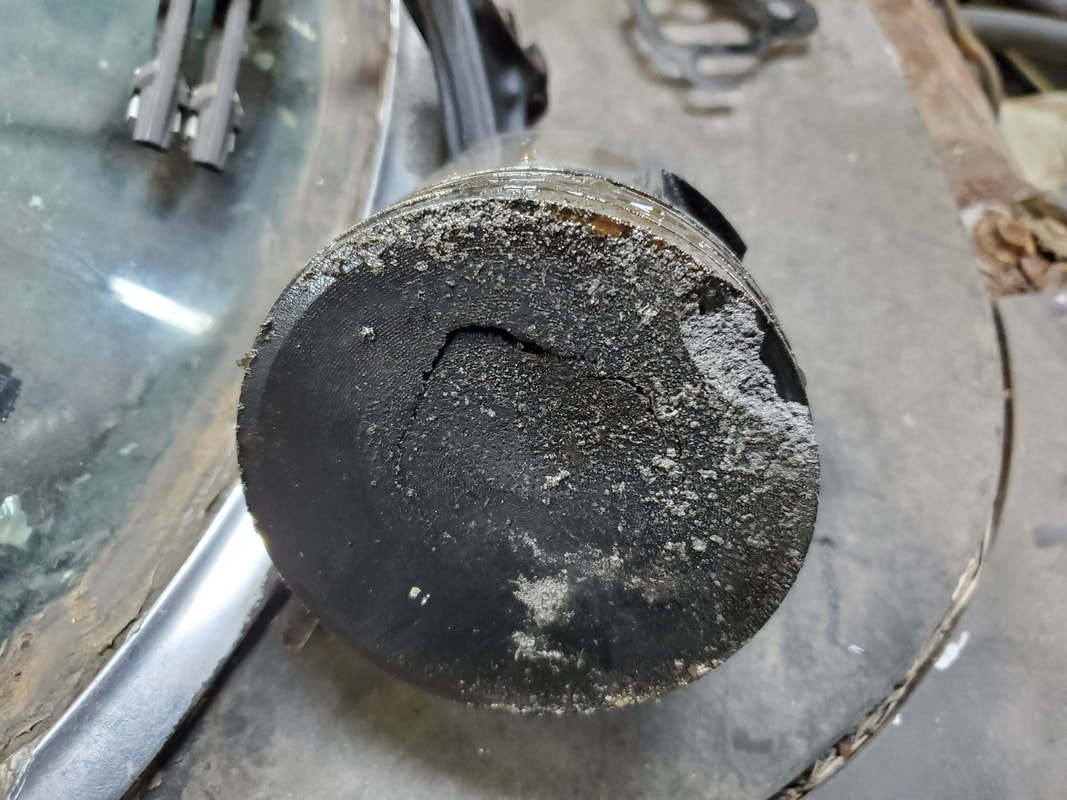
Destroyed piston after removing from engine, note the level of degradation of the aluminum in the piston. As I said, it was fragged, destroyed.
I recently picked up another 318 engine block that was rebuilt, but appeared to have been done wrong. Since I had the fragged piston in our currently used engine, I decided to pull a replacement piston from the extra block, since I wasn't using the thing anyway. I pulled the pistons out from the block, finding that when they torqued the main and connecting rod bearing caps, for whatever reason or another, one or more of the bearings locked up preventing the crankshaft from turning. I don't know if they turned the crank or to what amount it was turned and if there's other inconsistencies that may be keeping the bottom end from turning properly, but in the meantime, I need a replacement piston. After replacing the piston and reassembling the engine, I dropped the rig back in the car and tried again. The engine still had rod knocks and just sounded bad. I made a vain attempt to try and use some super lubricant to see if it would shut up the noise, but no it didn't.
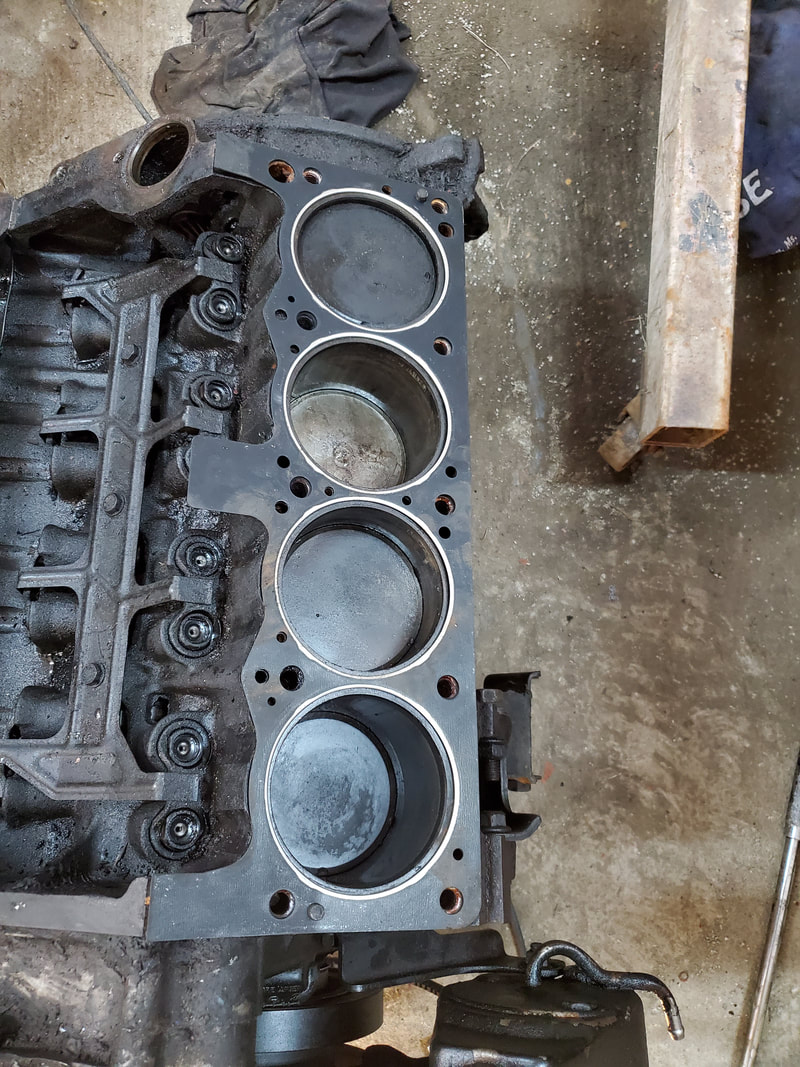
Replacement piston is in stalled, new head gasket is placed on top of block.
Everything is back on and the engine is ready to lift back into the car.
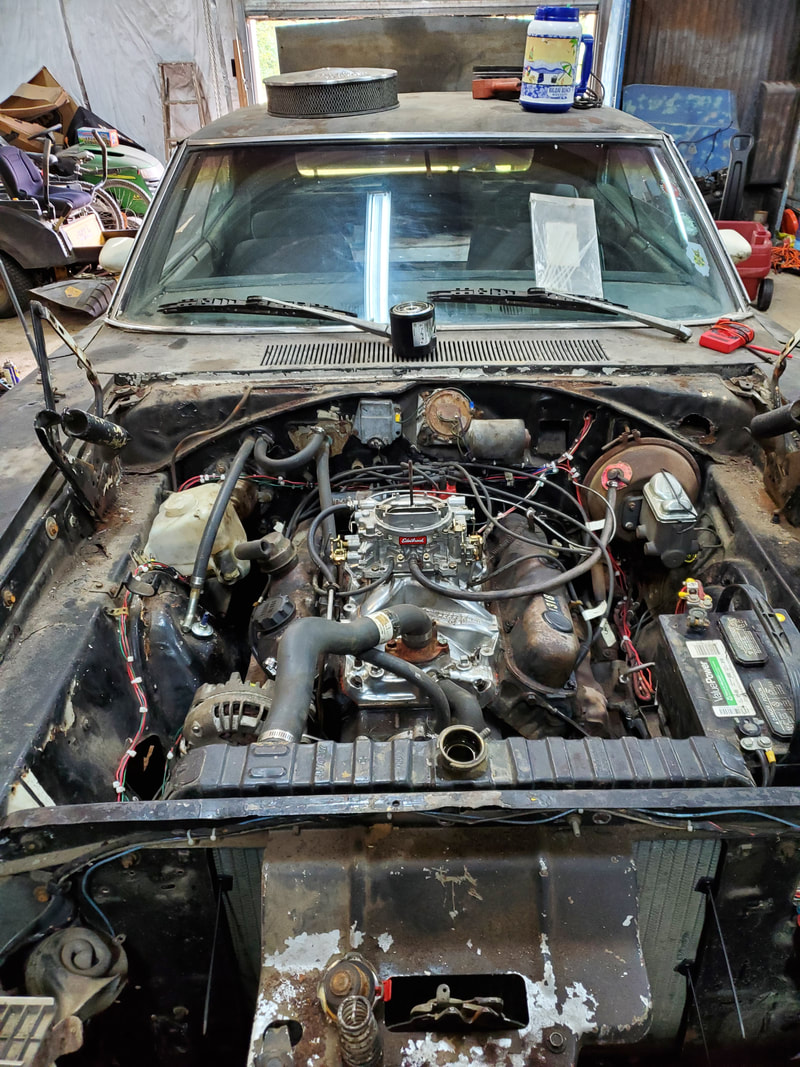
Radiator, hoses, carb and other associated parts are all back in place, engine is ready to start up.
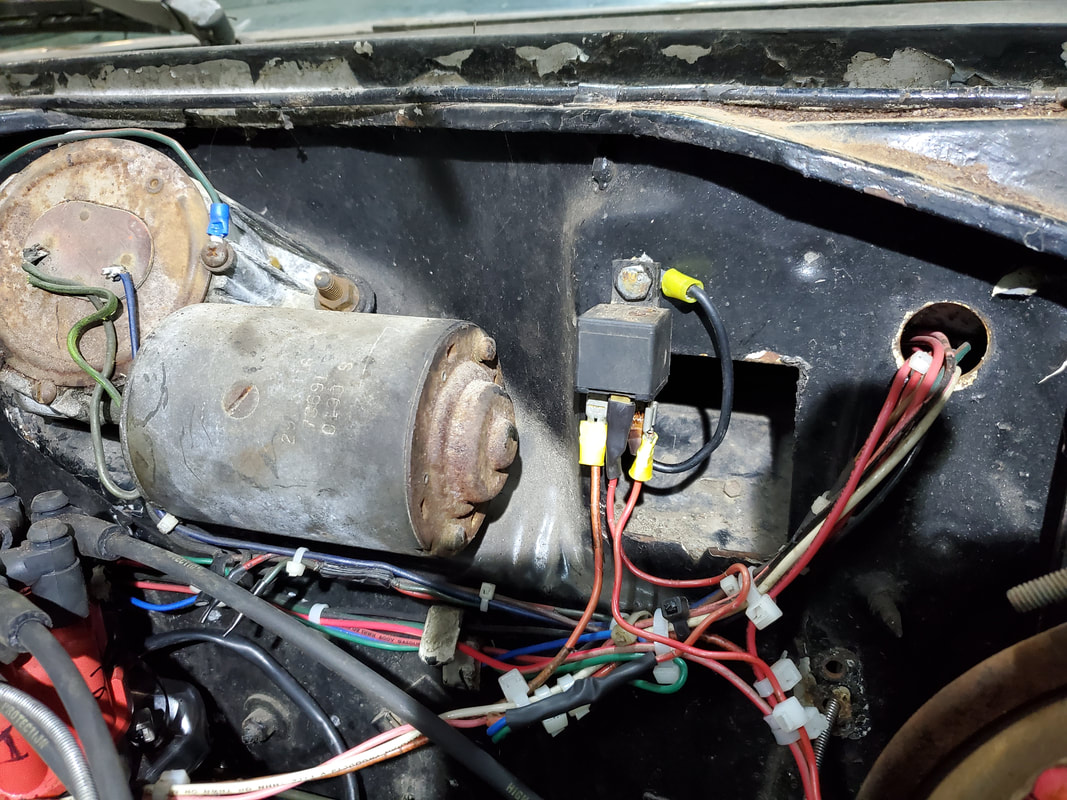
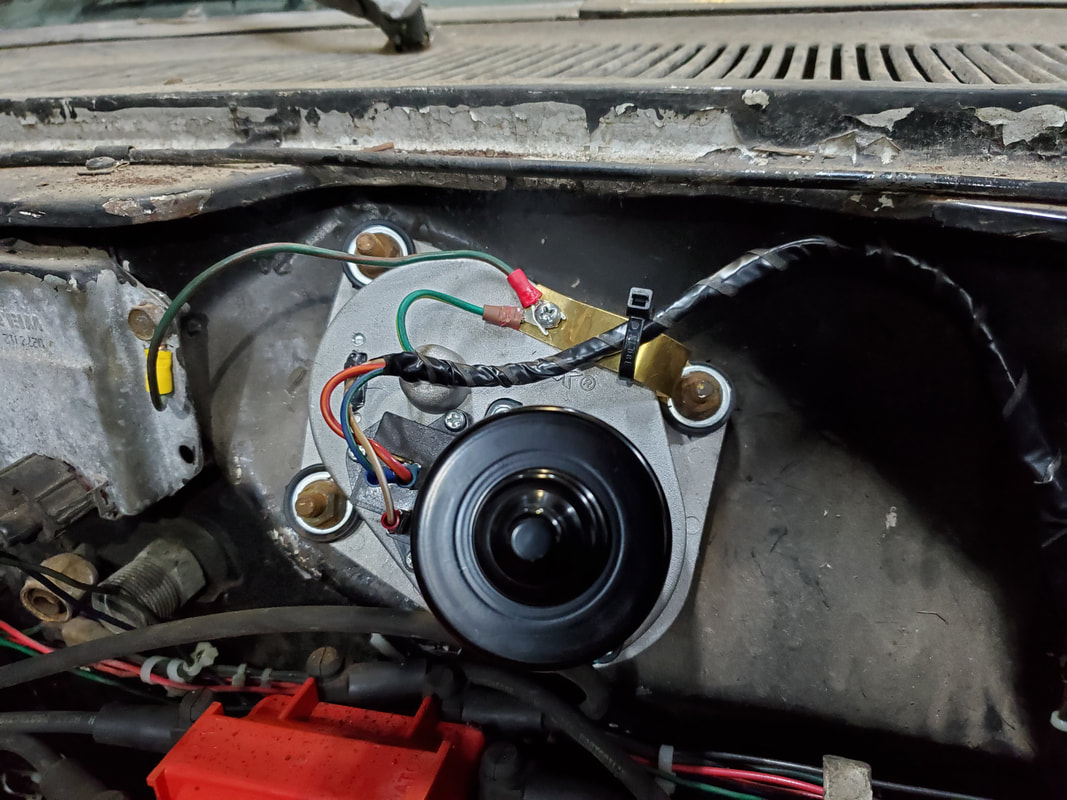
An automotive relay added to the firewall to switch on power to the distributor with the ignition switch since there was a weird gremlin present regarding how I had things wired up. The relay isolated the power going to the distributor to ensure a more efficient operation with the unit.
With the speaker holes traced and cut out, I painted the panel black to go along with the rest of the car's interior.

The panel is installed in the spot under the back window, using a drill to drill holes in the ends of the panel to allow me to secure it in place with screws. The speakers are secured in place with screws as well. Everything is wired up and ready to go as well.
At this point it was decided to take that extra 318 block and rebuild that thing from the ground up. Of course this meant getting a lot of new stuff, along with some new used stuff, like cylinder heads. Now the reasoning for doing this versus just pulling the bad 318 and rebuilding that is the idea that I can still rebuild the bad 318 at a later date and have an extra good engine for use in another Mopar while this car has its own 318. Now of course this involved breaking down the block since it was actually rebuilt before we got it. For whatever reason or another, the crank was unable to turn, like someone somewhere messed up on the size of the bearings when the short block was assembled because they didn't know what grind was put on the crank when it was turned, or something else was up deeper down. Anyway, I pulled everything apart, and after amassing the batch of parts we got to work. One of the things I did was spray paint the different covers and the engine block before the assembly of the engine in order to make the engine look better.
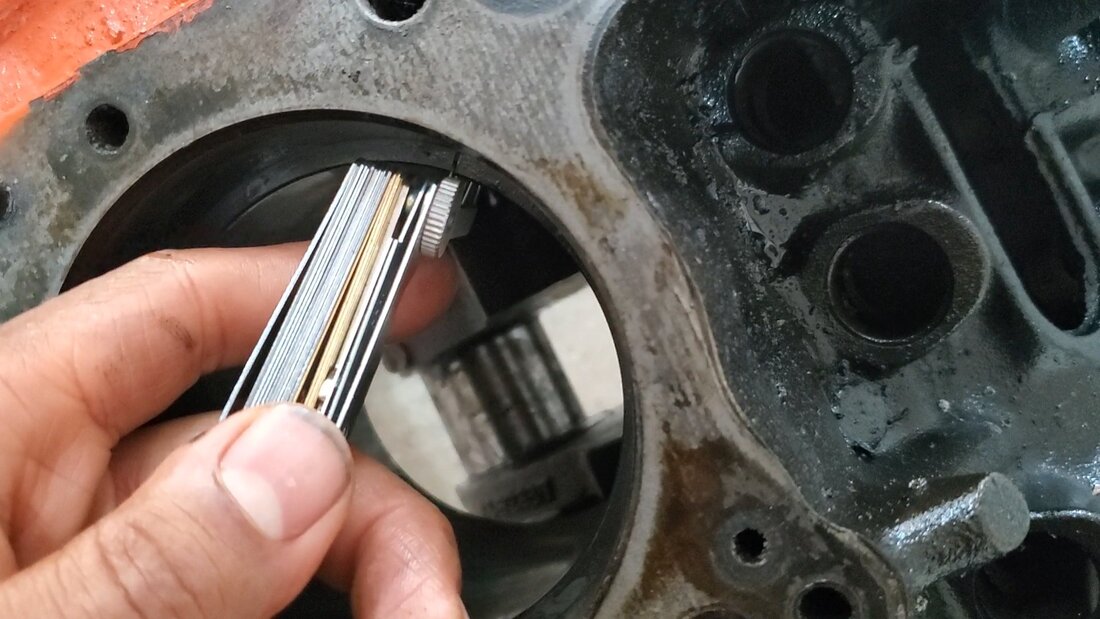
Using a feeler gauge on a piston ring to verify ring gap before assembly. If not in tolerance, the rings would have to be ground to get the ring gap within tolerance. These measurements are done with the ring in the cylinder, using a piston to ensure that they are in square and not at an angle that can distort measurements.
Using a piston ring compressor to squeeze the rings flush in the piston grooves while tapping the piston into the cylinder.
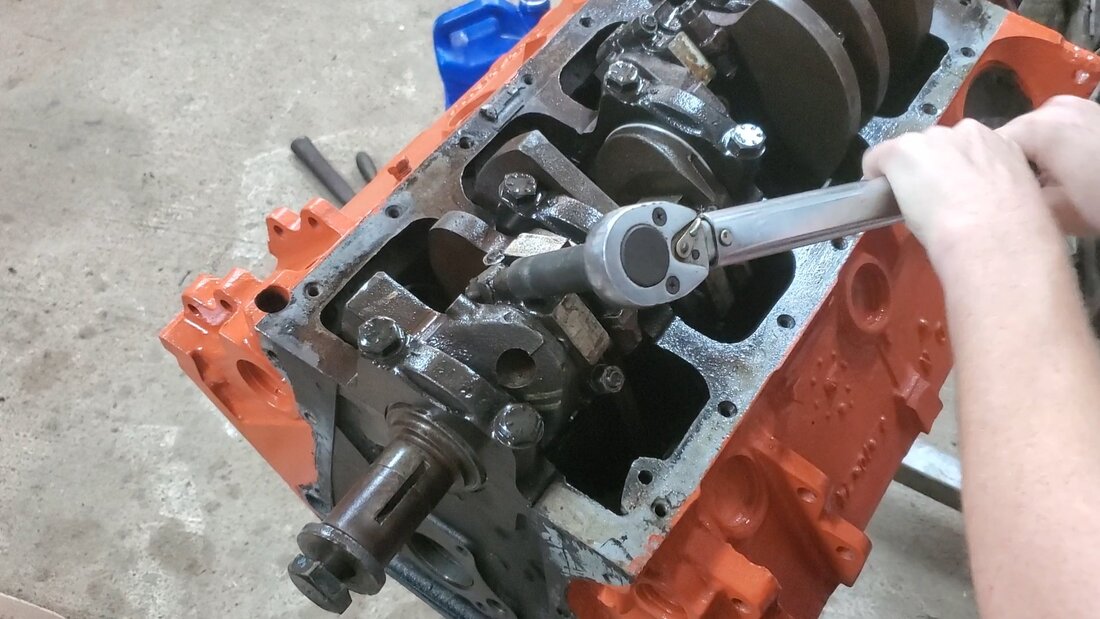
Torquing down the connecting rod bearing nuts. Using a click style torque wrench, I get a more accurate reading versus old school style torque wrenches, both of which we have.
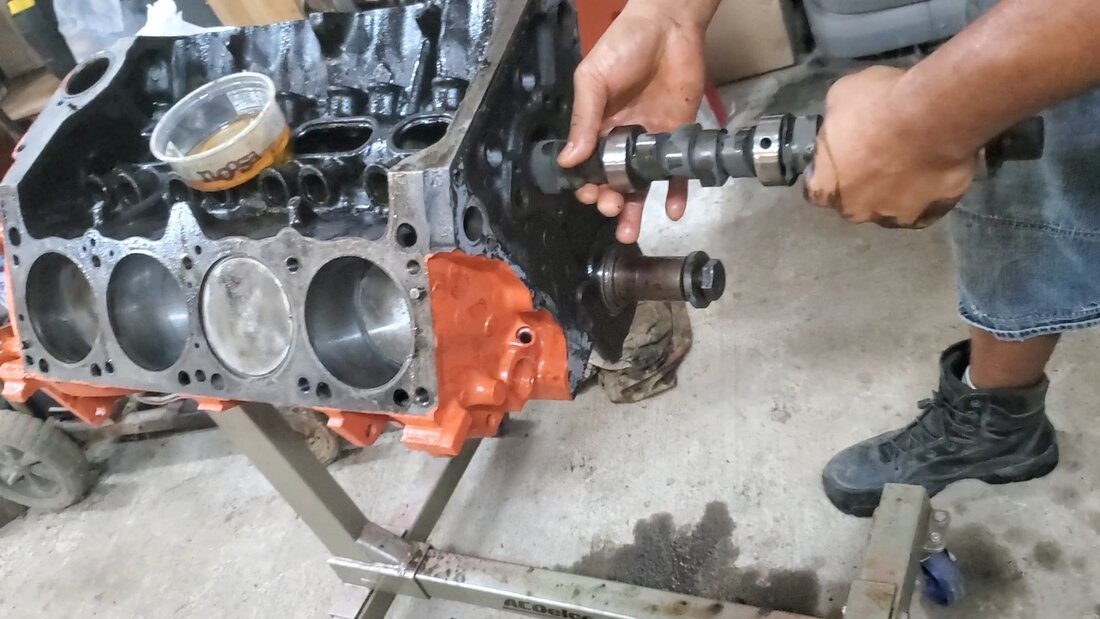
The camshaft needs to be greased up for insertion so there won't be any serious metal on metal contact between the camshaft hubs and the bearings. During startup this initial greasing will help keep the cam and/or the bearings from wearing too much during that couple of seconds the engine is running before the oil pump starts moving oil through the engine.
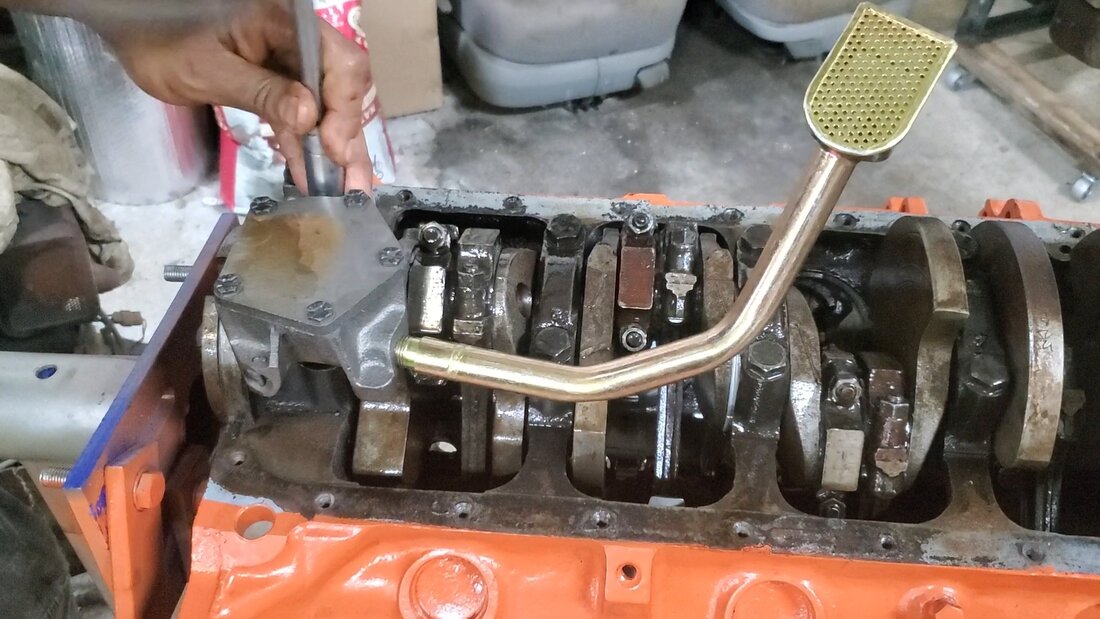
Tightening up the oil pump after installation. There is a shaft that goes between the distributor driveshaft and oil pump to also drive the oil pump from the camshaft. Also note the new oil pickup, all new stuff that had to be installed.
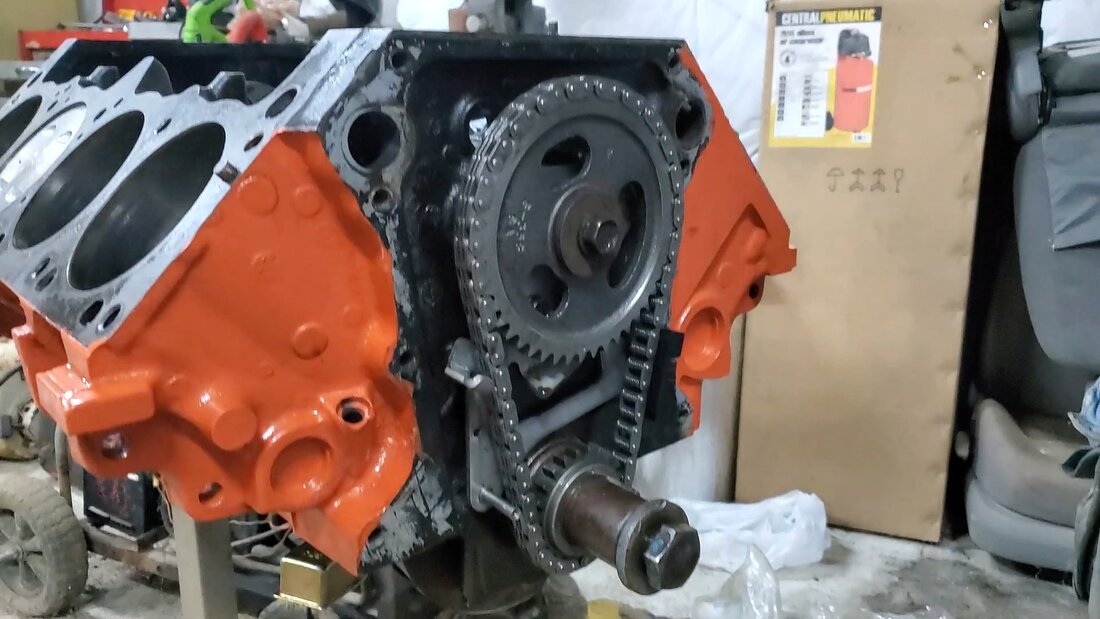
Bolt and washer installed on top timing gear.
Gasket is applied the same way to the water pump before installing the unit onto the timing cover and securing with bolts.
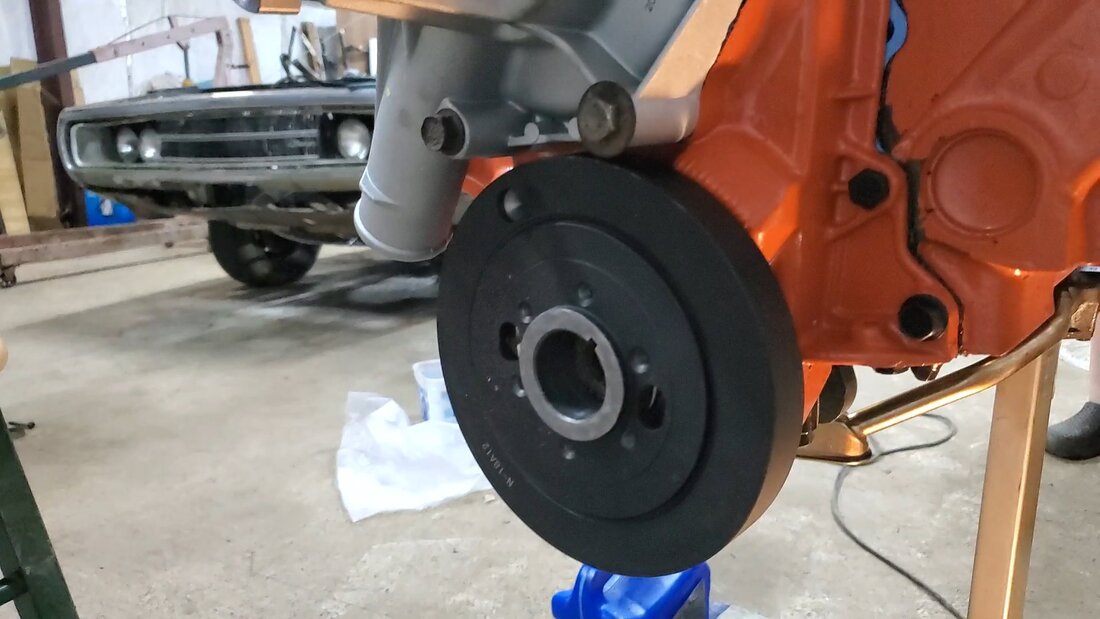
The harmonic balancer, another brand new item that had to be sourced, is installed on the crankshaft. Without a balancer installation tool installation would've been done the old fashioned way with a mallet.
The oil pan, another new part, having been spray painted and with a fresh gasket, is installed on the bottom of the engine, rotated upside down on the engine stand.
Left cylinder head installed.
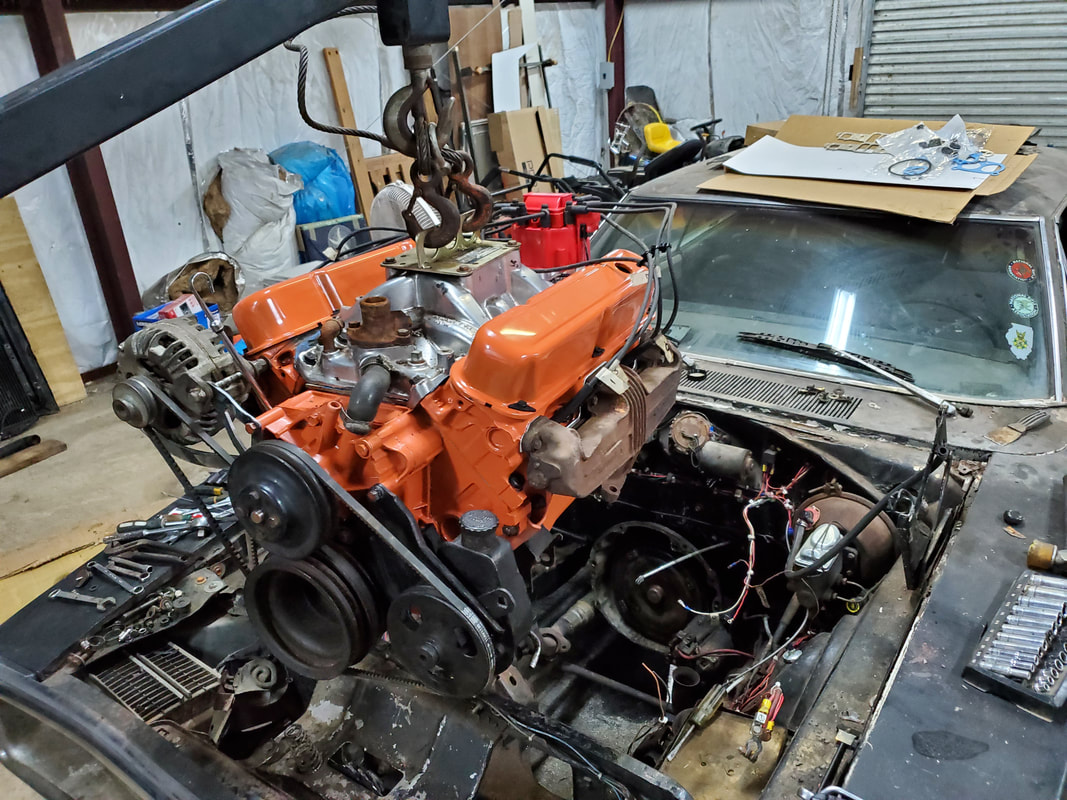
Working the engine into the car. Note the two belts on the accessories. Funny thing, this mix match of brackets and components have it where both belts are the same exact one for either side.
Engine is at home in the engine bay, bolted up to the transmission with everything hooked up.
After getting the engine in and hooked up I started the thing up but had what sounded like rod knocks. After seeing that the oil pressure dropped down I checked the oil and found there was water in the oil. This is when I found that either one of the head gaskets wasn't seated quite right or more likely, based on the fact that I saw water dripping from a point near the rear, that the intake gaskets didn't seat properly and allowed water to seep into the lifter valley and into the oil pan. Either way, I ended up pulling the top end apart again, replacing the head gaskets and the intake gaskets. The first set of intake gaskets were the regular composite paper type. The second ones I used were the metal type where you apply a ridiculous amount of gasket maker to both sides of the metal gasket then smash everything together. These turned out to be better. With the water problem solved I cranked the engine up again, still had the rod knocking sound. After pulling the oil pan off I found that a couple of connecting rods had excess movement. Turned out that the bearings needed were of the oversized variety. I installed the next size up, 0.010 over. Even these didn't do the trick. So now I'm going to have to go back in the engine again, either with it in the car or having to yank it back out. In the meantime I turned my attention to other things that needed attention on the car, like installing the H4 LED headlight conversion setup.
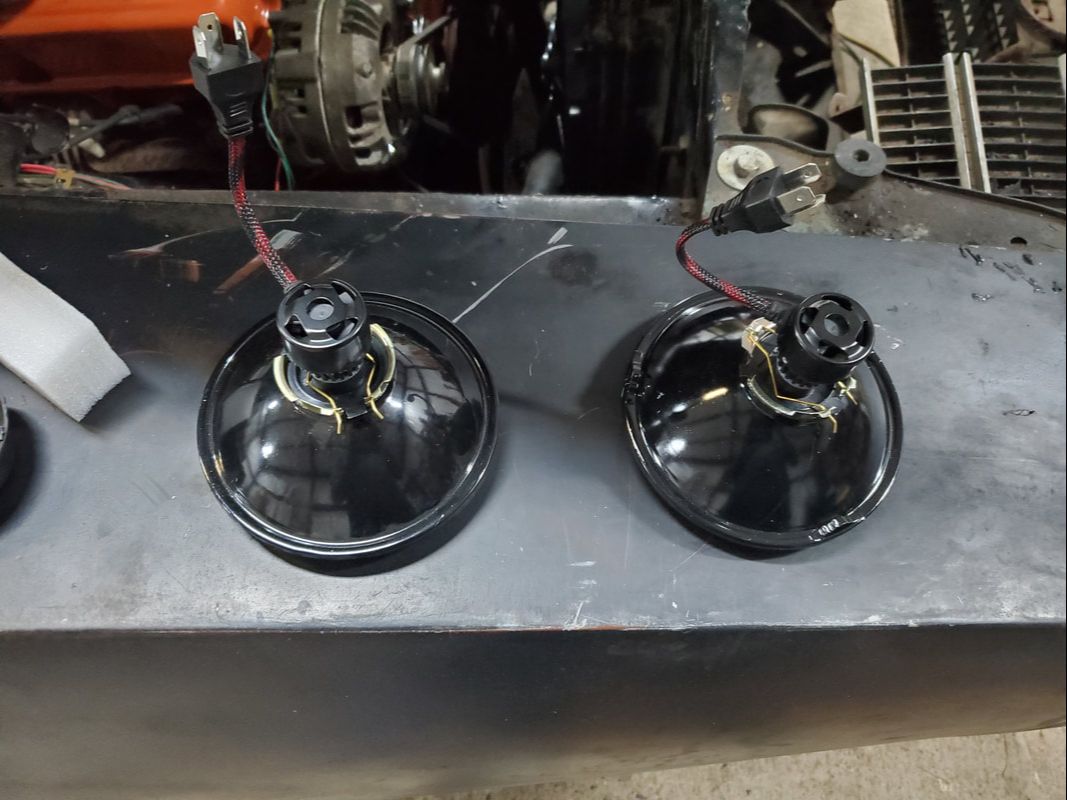
Pair of H4 style 5.75" headlight bulb housings. These shells fit in place of the old style sealed beam headlights and use the same H4 plug typically used on older cars. Aftermarket LED bulbs are available to fit these and other common headlights.
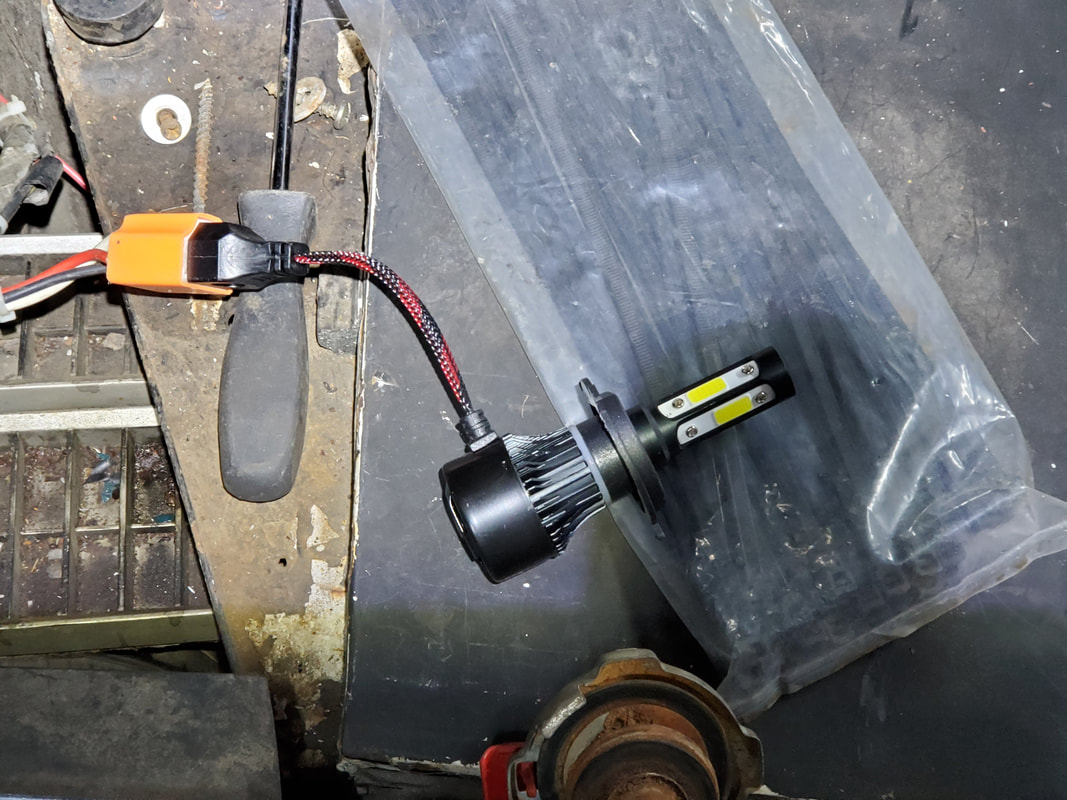
The H4 LED bulb plugged up to the car's headlight plug.
Inner headlight shells installed.
All four lights on.
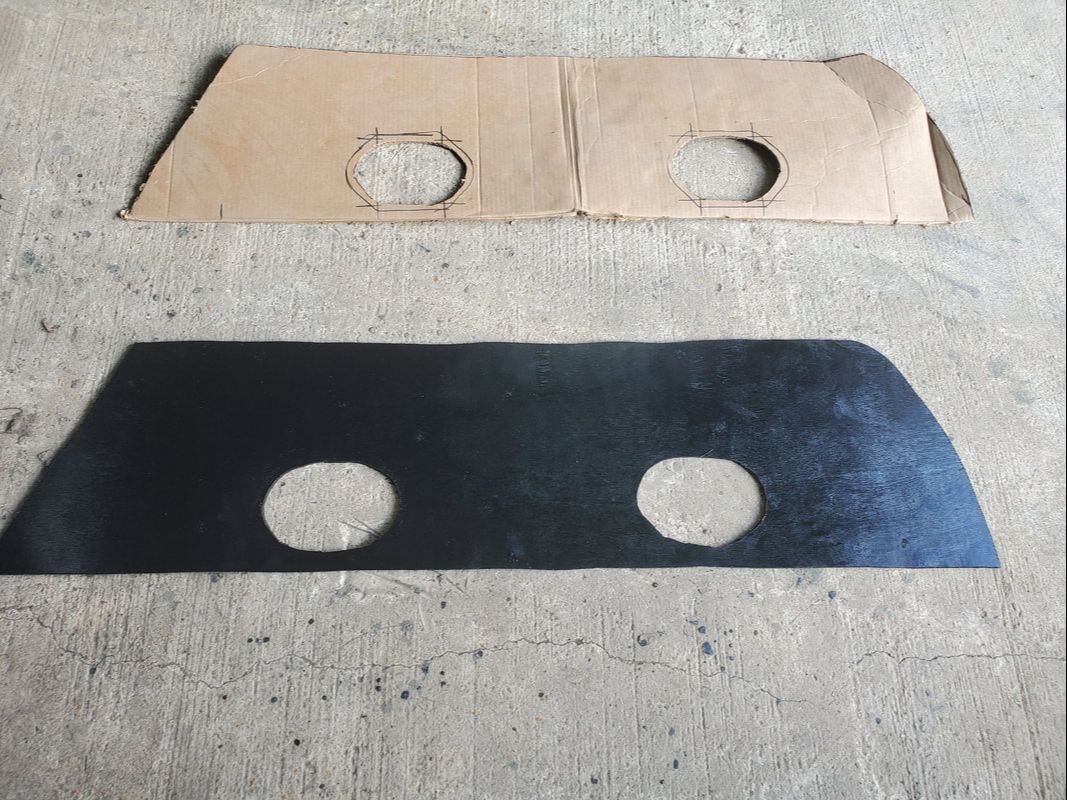
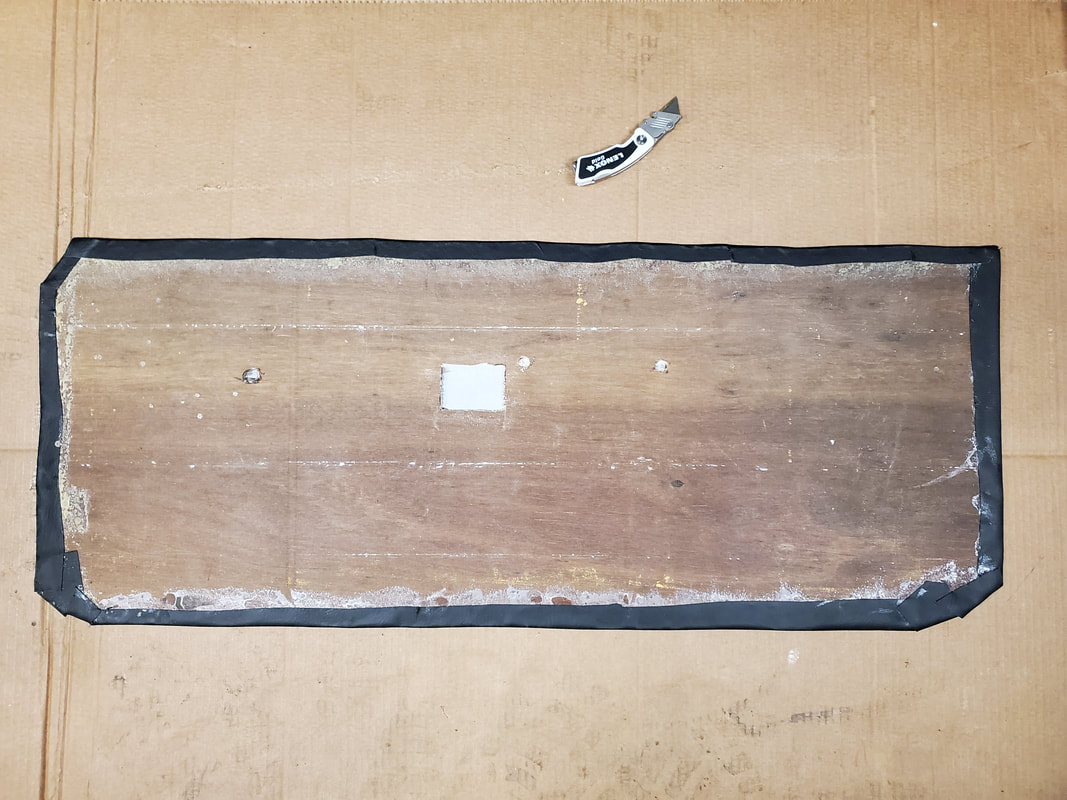
Our next little project on this greater project was to actually make a couple of replacement door panels. Since stock replacement panels are somewhere north of $400 for a pair, making a pair of generic panels to cover up the internals of the doors will have to do for now. Just like any door panel, you have to have a base, then some form of skin or covering for aesthetics. For me, I chose to use some old wall paneling as the base and some off the shelf black vinyl from the hobby store as the skin to cover the panel. I started off by making cardboard templates of the door panels as they would fit over the door shells, taking into account the locations of the window crank and door release latch. After cutting out the cardboard templates, these allowed me to trace out the final panels in the wall paneling. I cut these base panels out then took the vinyl and sprayed interior adhesive on the vinyl then laid the panel on the glued side. I flipped everything over and smoothed out any ripples so the vinyl will be nice and flush. Afterward I trimmed the edges, leaving only an inch all around, cutting slits where the vinyl worked its way around the edges of the panel. This allowed me to fold the "wings" of excess vinyl onto the inside of the panel to glue them in place. Once all the edges of vinyl were glued, I cut out the holes for the window crank and door release latch. I secured the panels on the doors with sheet metal screws applied in the corners and in the very middle of the panel so they'll look even and uniform.
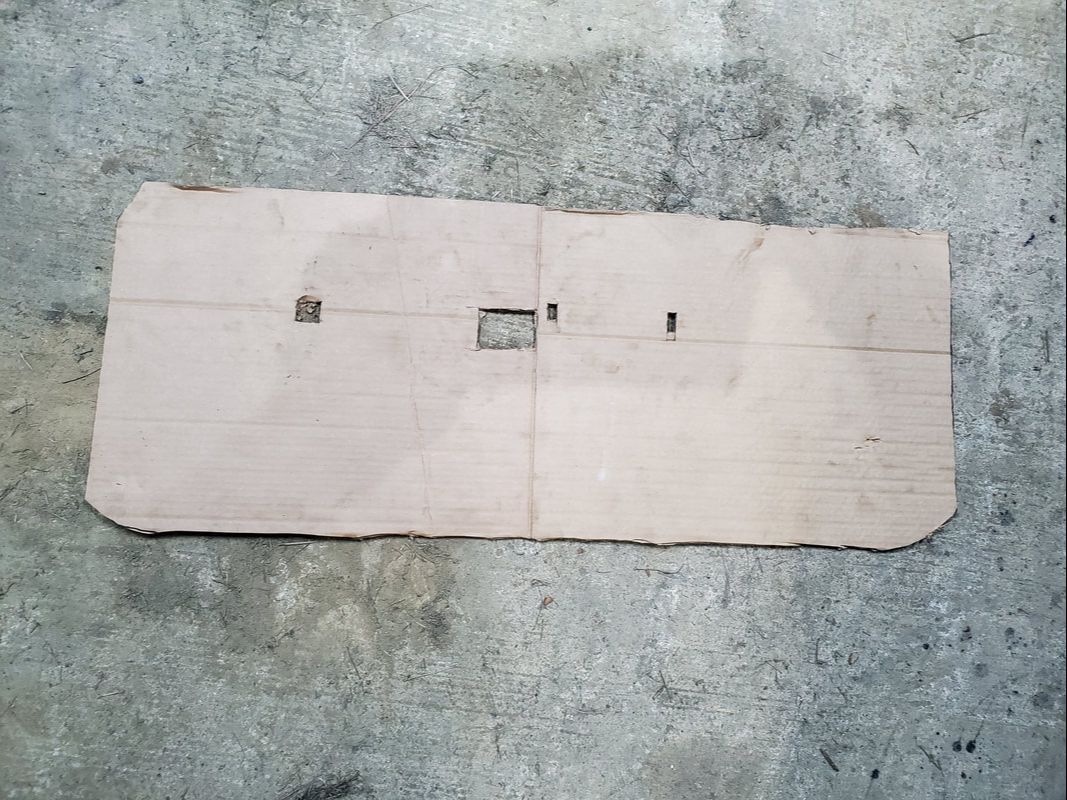
Cardboard template traced and cut out with holes for window crank and door latch.
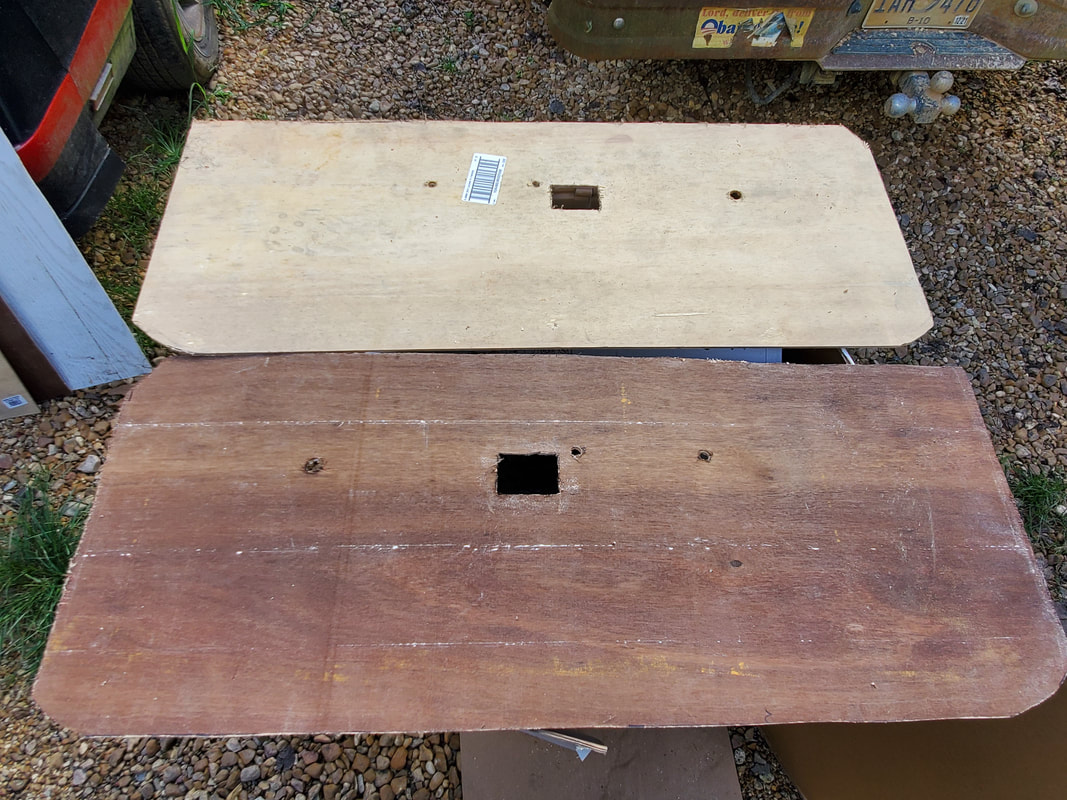
Holes cut out in panels for window cranks, door release latch and armrest screw holes.
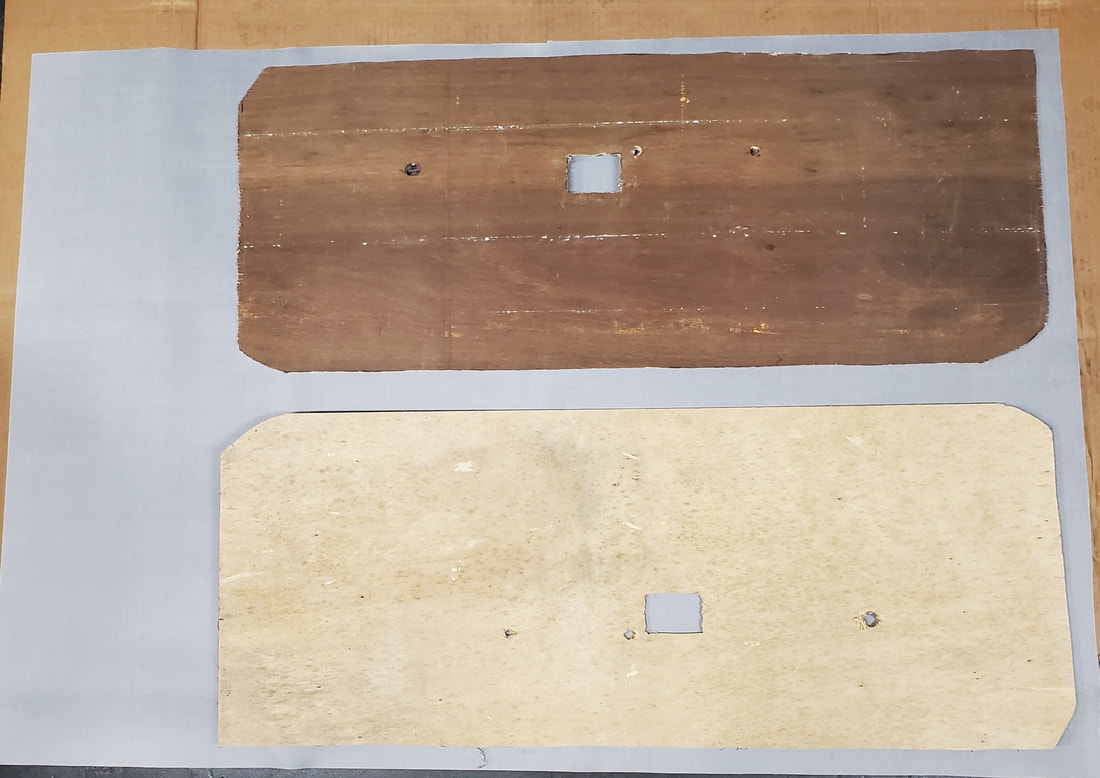
Base panels that were cut from scrap panel board are laid out on vinyl sheet in order to cut out the amount of vinyl that will be used for each panel to minimize any waste of vinyl.
Folds of excess vinyl glued on the underside of the panel. To ensure even gluing of the excess vinyl, I had to cut slits along the vinyl to make little wings to fold under without the vinyl buckling and folding within itself along the edges.
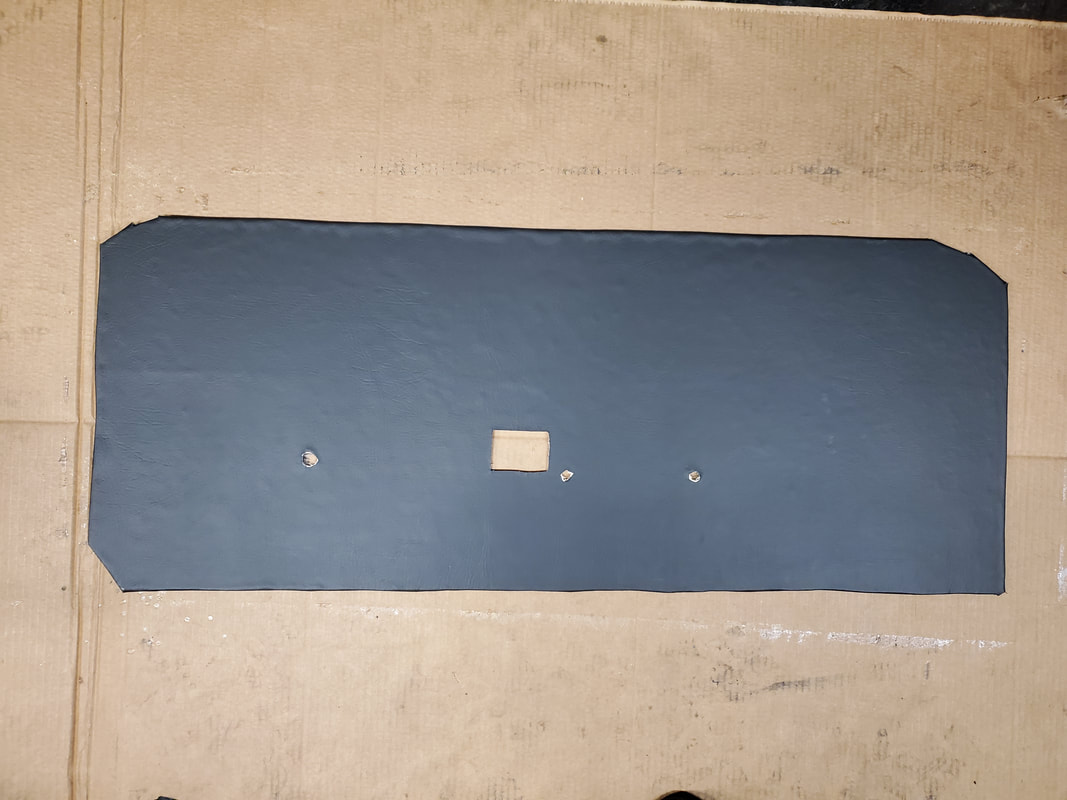
The completed door panel #1.
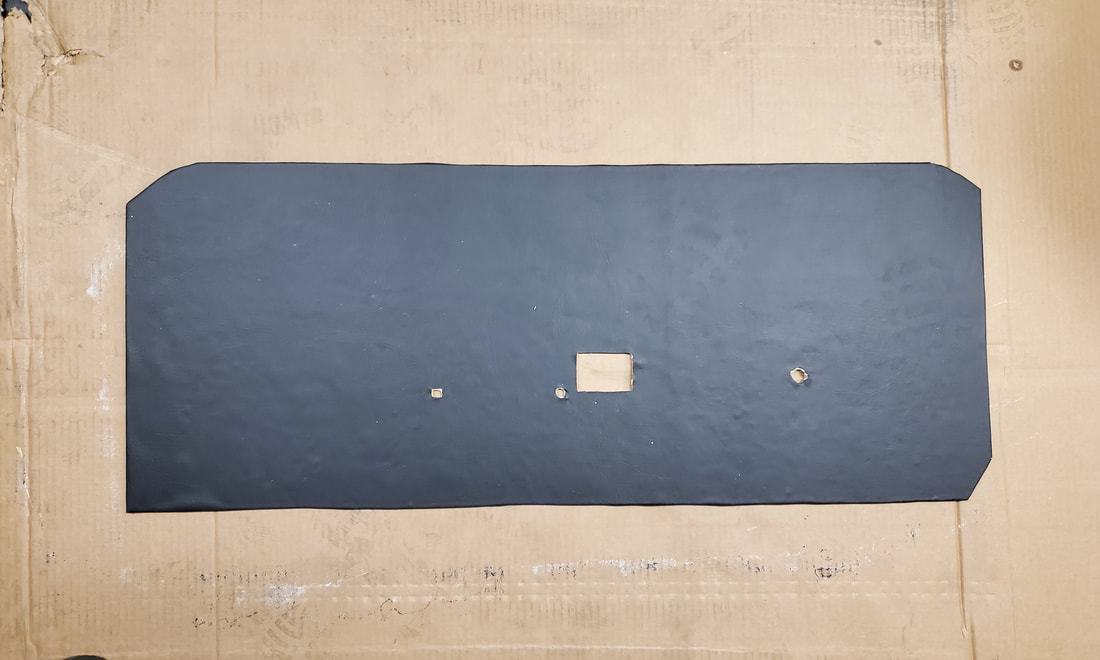
Completed door panel #2.
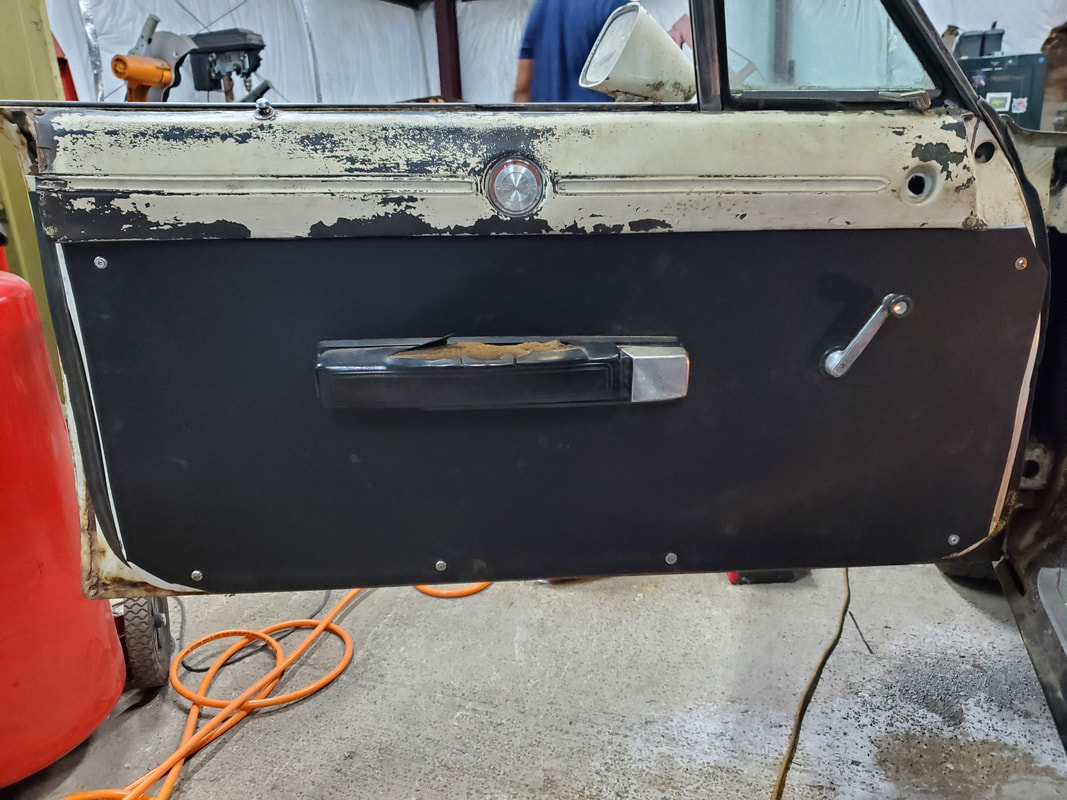
Driver's side door panel installed. Note how the mounting screws are situated in the corners and in the middle to make things look somewhat "factory" instead of having the screws mounted at random points along the perimeter of the door panel.
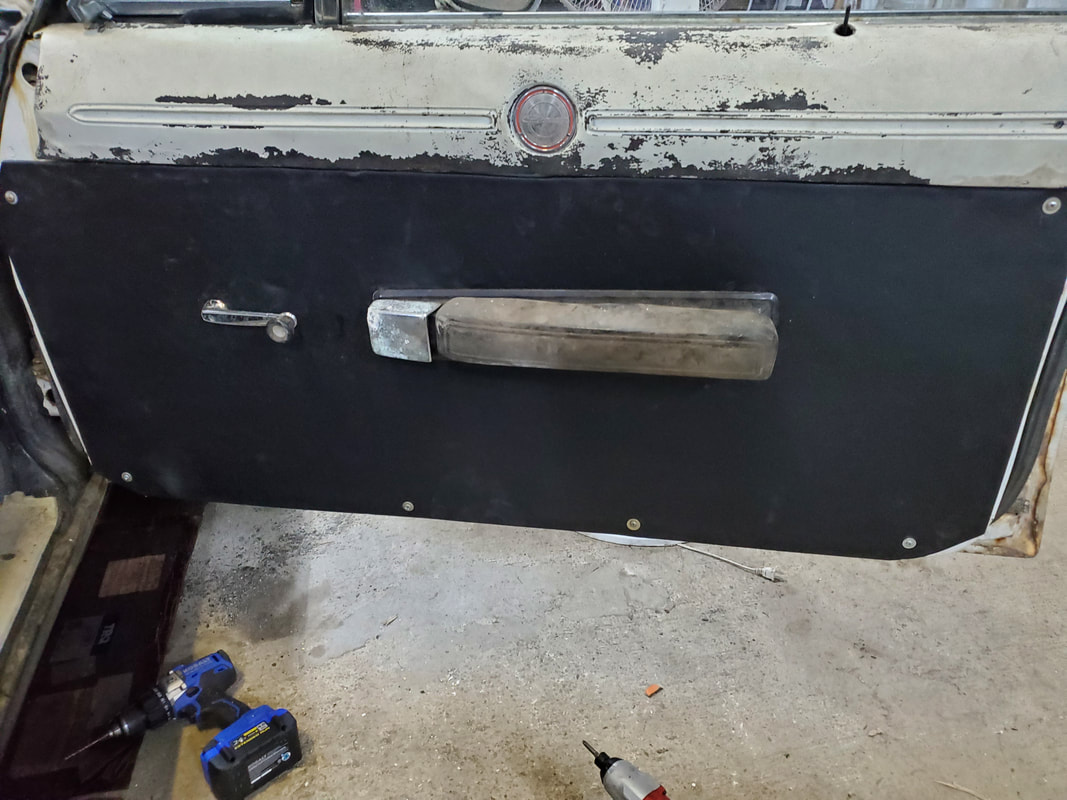
Passenger door panel, same thing.
The next thing on the menu is the replacement of the wiper motor. Even though the wiper motor worked, it worked slow. I had to disassemble the old motor once to get it to start working again but with it working slow and sporadic I decided to just replace the thing. Besides, they were pretty cheap online so it made perfect sense to just replace it. This involved going under the dash to disconnect linkages and remove the few bolts holding the unit in. After replacing the motor I then had to replace the switch as well since the switch was made for a 3 spd wiper motor and the replacement was only a 2 spd. I didn't even want to try and source the 3 spd motor and besides, the switch wasn't even in the best of shape either, with it being funny. Now funny thing is, replacement wiper switches for these B body Mopars are ridiculously expensive, with a rebuilt unit going for over $100, hell no. So I found an aftermarket rocker switch that was single pole double throw (SPDT). This switch has two positions that allow me to turn the wiper on the two speeds by rocking from one side to the other. Ironically, the switch body was actually the perfect size to fit in the rectangular hole in the dash panel where the old switch was mounted. With this convenient turn of events I was able to install the aftermarket switch and get the new wiper motor wired up to work as its supposed to.
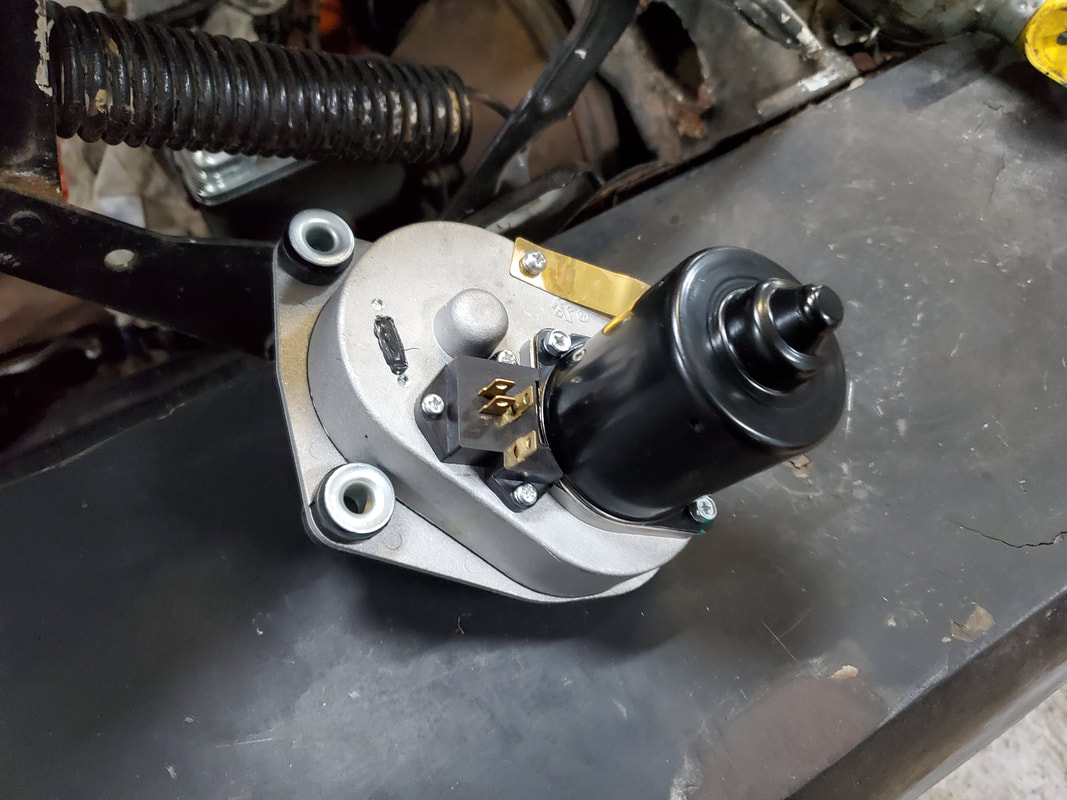
The new replacement two speed wiper motor. It's a smaller unit than the old one, probably more efficient as well.
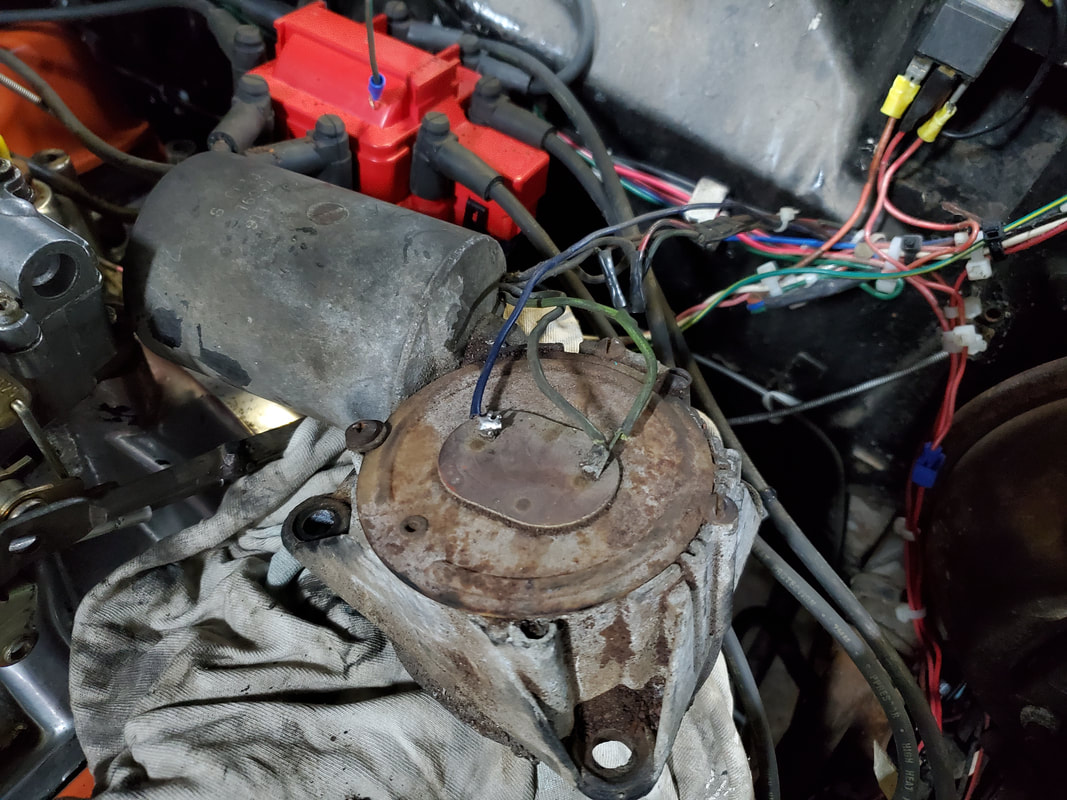
Old wiper motor after removing from firewall, note difference in size between the two. Also note the apparent age of this old motor.
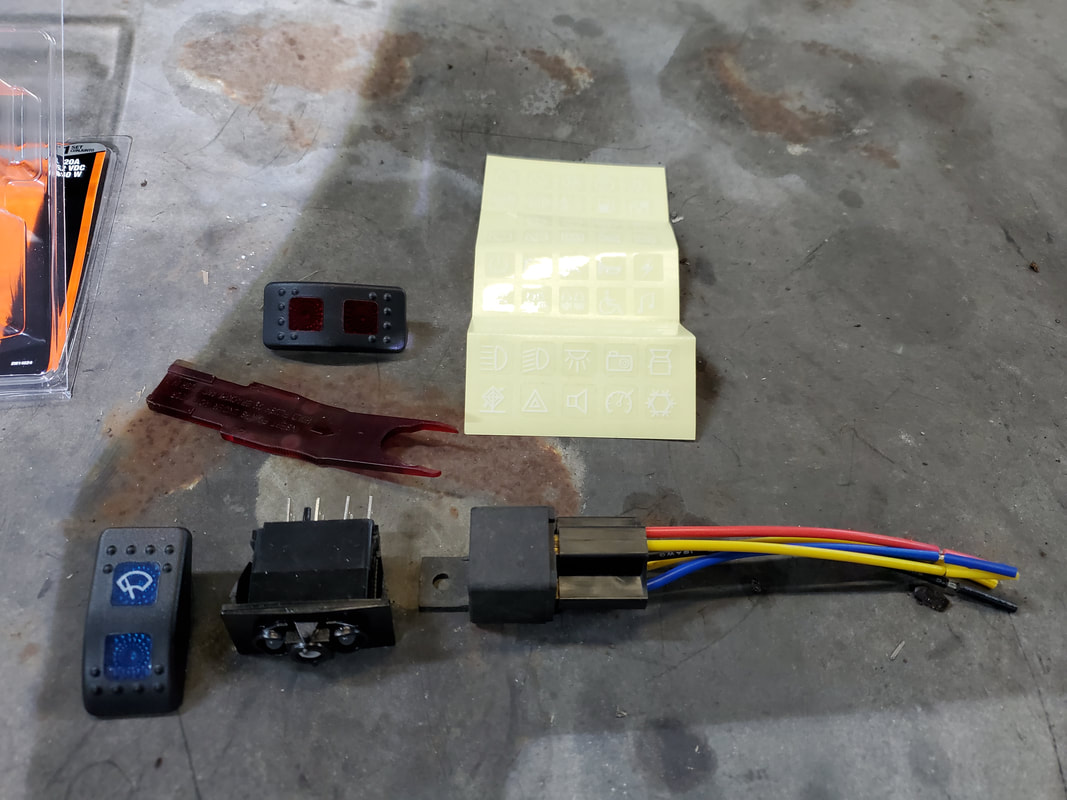
The aftermarket switch to be installed for the wiper controls. I was going to install an automotive relay to try in taking advantage of the homing feature on the wiper motor but tests found that feature to require a little more thinking to get it figured out how to wire this up as easily and neat as possible.
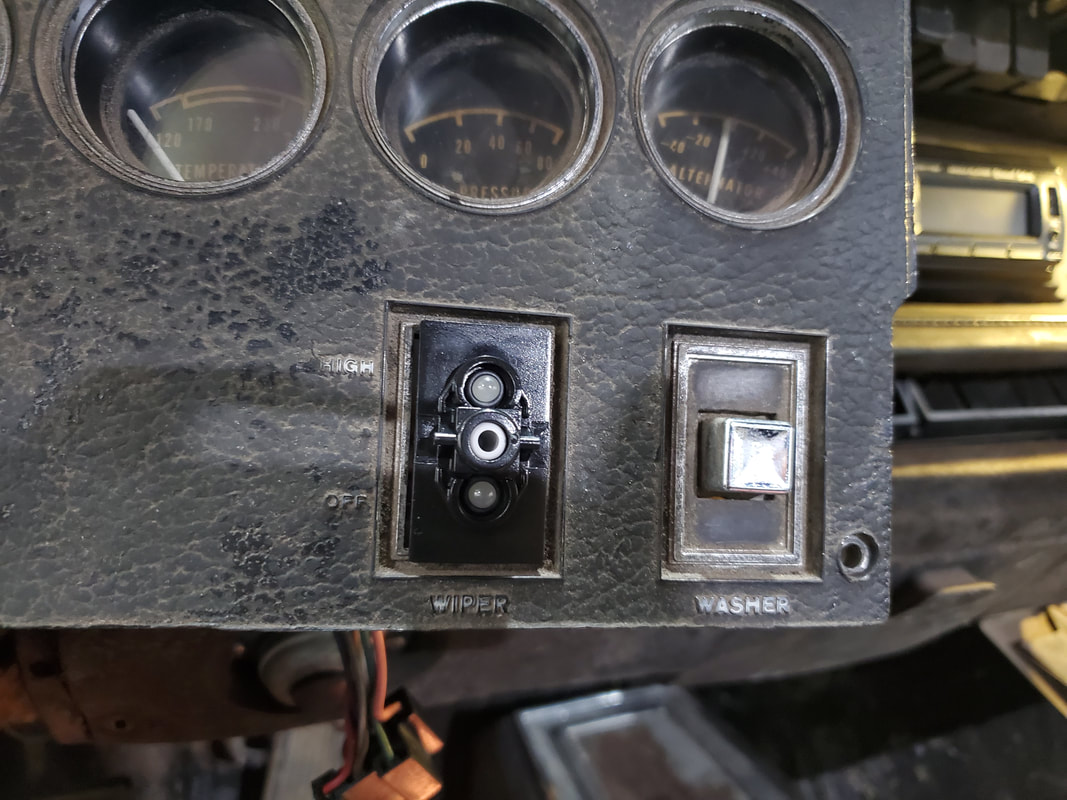
SPDT switch snapped into hole where old wiper switch was located, as you can see its damned near a perfect fit with the snap tabs behind the switch holding it in place.
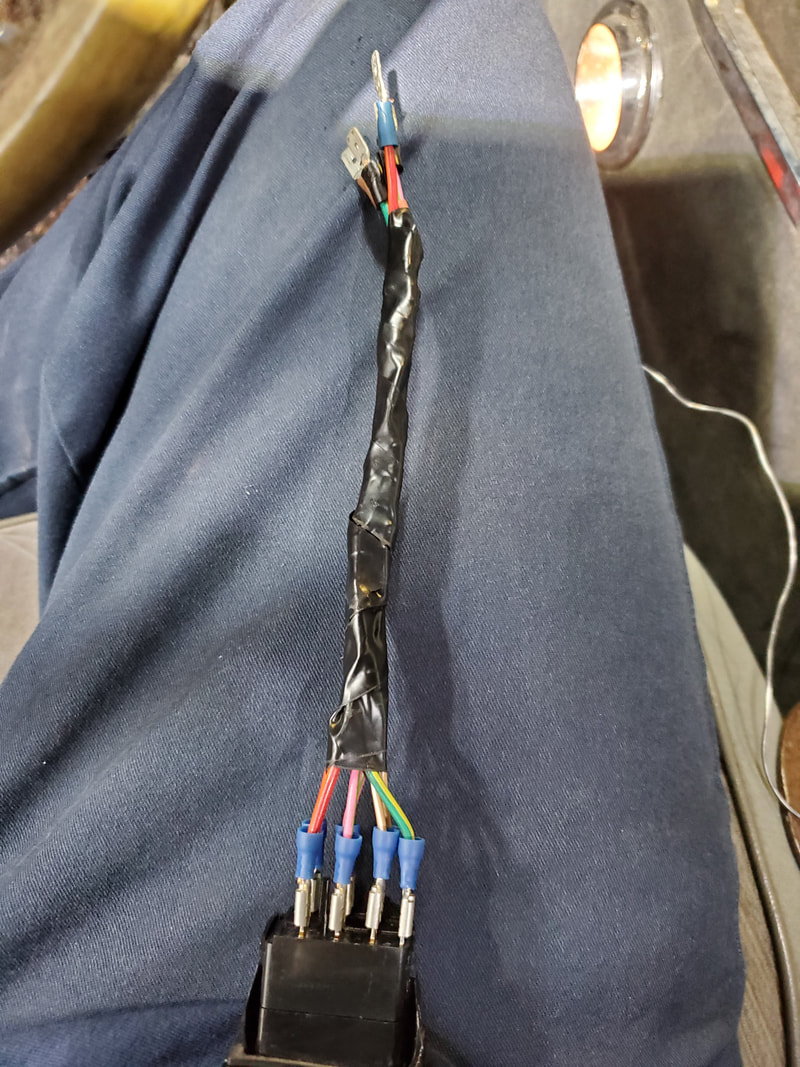
Finishing up the protective cover with a wrap of electrical tape.
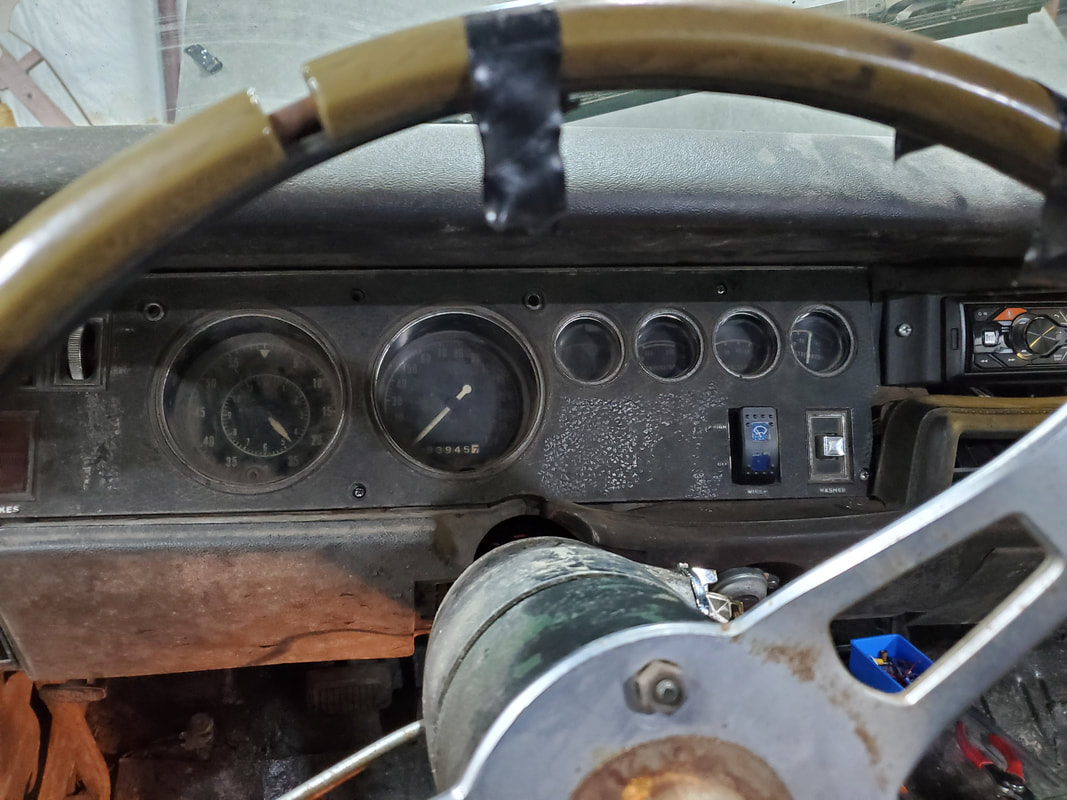
Switch snapped in place for the last time, with dash secured back in place.
New wiper motor secured in place against firewall. Motor was actually quieter than the old one, a much better unit. Switch also worked great.
With the success of the door panel construction I decided to do something about the upper door trim panels. These panels were white but the white material has been flaking off enough to be rather unsightly. Besides, with my intent to black out the car's interior, I couldn't go with white anyway. I decided to paint these panels black to match the door panels. I had to scuff and brush off all the loose white material from the padded panels, which are still in surprisingly decent shape. Afterward I masked off the Charger logo on the middle of each panel. I sprayed several layers of vinyl/automotive interior paint onto the panels, ensuring complete coverage several times over on both panels. After each coat I allowed the paint to dry before applying the following coat. With these panels done, I can soon put them up. I still need to source some clips that were used behind these panels to snap them in place on the doors. In the meantime I will turn my attention to the interior panels in the back seat area. These will be made in the same way as the door panels.
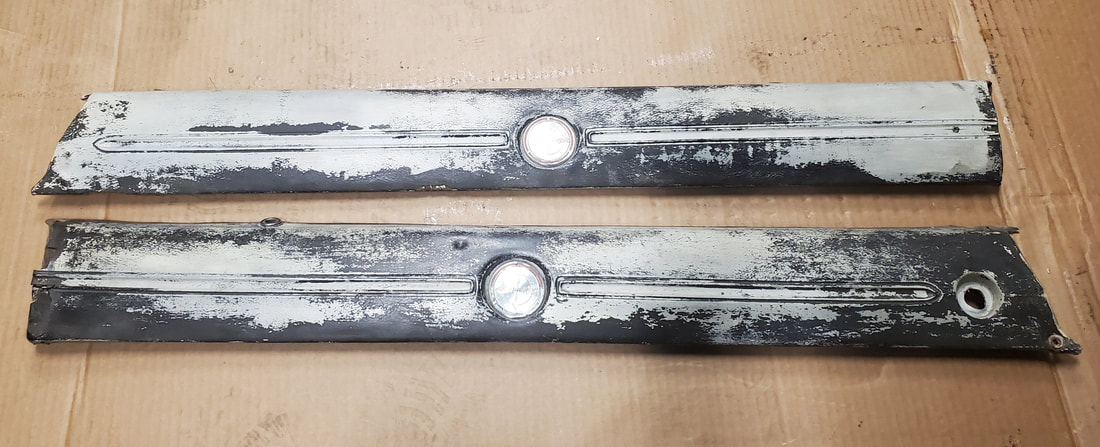
Both panels after wire brushing the loose material from the padded surfaces. Ironic that the underside is a base black.
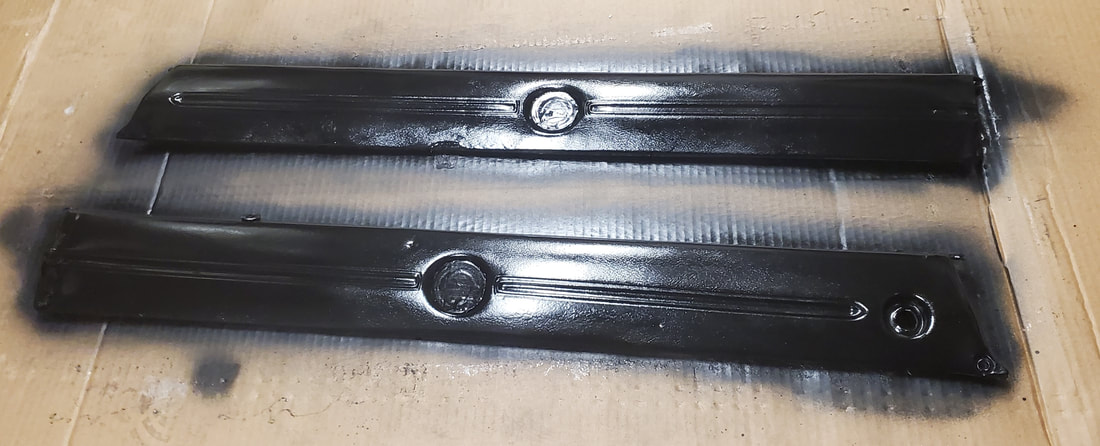
Both panels thoroughly sprayed with automotive interior paint to ensure proper coverage.
It's been some time since I last done some work on the Dodge, but just like with any of these cars, its long past time to get some work done. The work in this case is bringing a big block powerplant back into the game. A year ago, we managed to get our hands on a big block powerplant from a Chrysler RV, a 413 with a 727 Torqueflite transmission. Unfortunately, the transmission on the RV has a short tail and integrated brake drum on the output shaft. No slip yoke is present, nor was there any real provision to remove the brake drum and convert the thing to a slip yoke without removing the tail shaft and output shaft to replace the hardware with hardware from a car transmission. This ends up almost amounting to a full teardown since to replace these components requires the internals to be gutted. Also, the 413 has these extra-large cylinder heads that accommodate this large water pump that allows for extra cooling and severe duty but is not really compatible on a car as the spacing is just not there for this setup. Luckily the 413 is the same block as a 383 and 440. The 440 engine we have in the garage, which will need to be rebuilt again, can be the donor of its cylinder heads for the 413, which is a confirmed running engine. As for the transmission, I could take apart the old 727 that needs to be gone through again to donate its tail shaft housing and output shaft and the RV 727 can be torn down enough to install these new components while keeping everything in place, since all this hardware was still functional. I'll just have to make sure to tear things down and put it all back together exactly as it's supposed to be so there will be no mishaps that will result prevent the transmission's operation. Once the 413 is put together in the car format along with the 727 tranny, we can install this powerplant into the Dodge and get everything hooked back up in the way it once was in its better years.
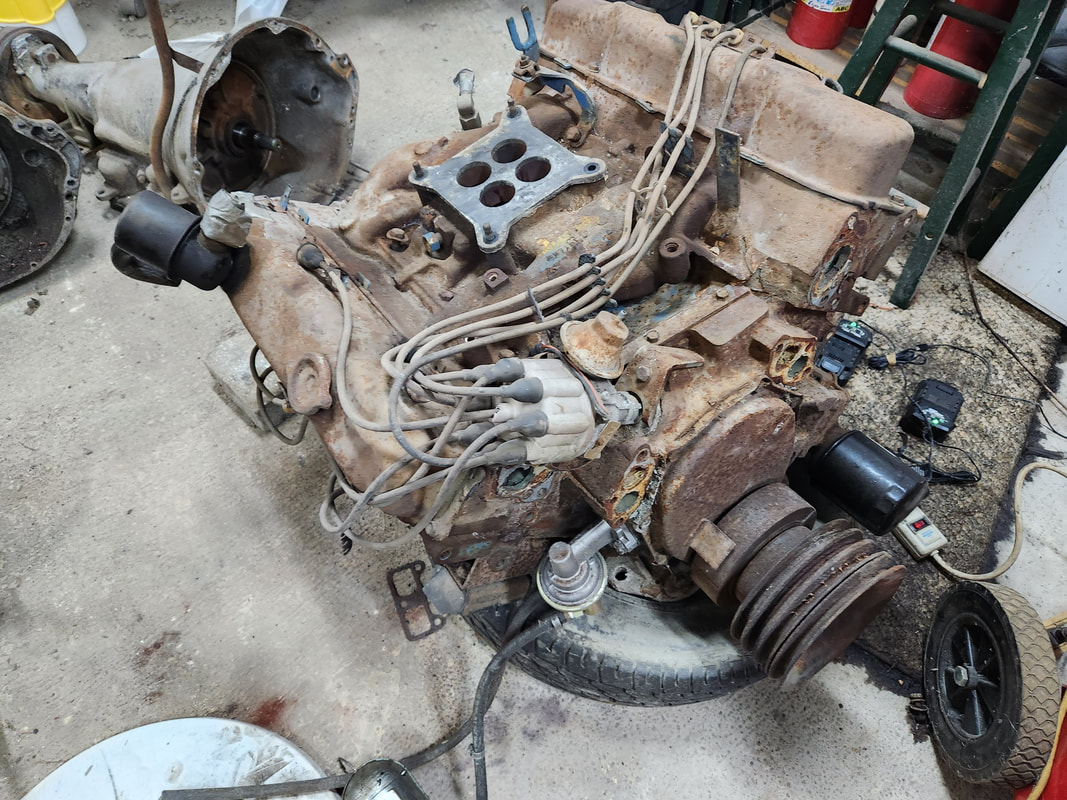
The old 440 engine that was in the Dodge at one time. It will need rebuilding again, due to the apparent rod knocking and overheating it had. The crank and rods were never turned so I don't know if any of these components are perfectly round, much less if any of these components have a cutting requiring larger rod and/or main bearings.
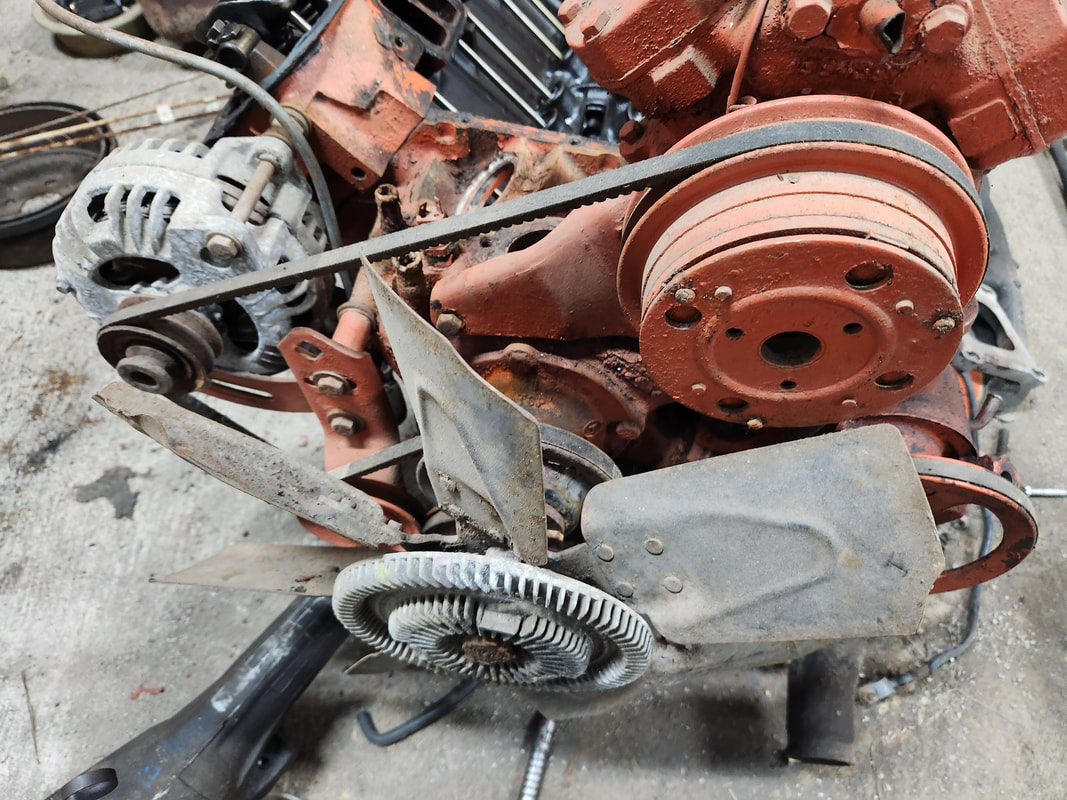
The 413 RV engine that was picked up from Texas a couple years ago as a confirmed running engine. Note the larger cylinder heads, These are too large to fit in the engine bay of the Dodge and will need to be swapped out with the cylinder heads from the 440.
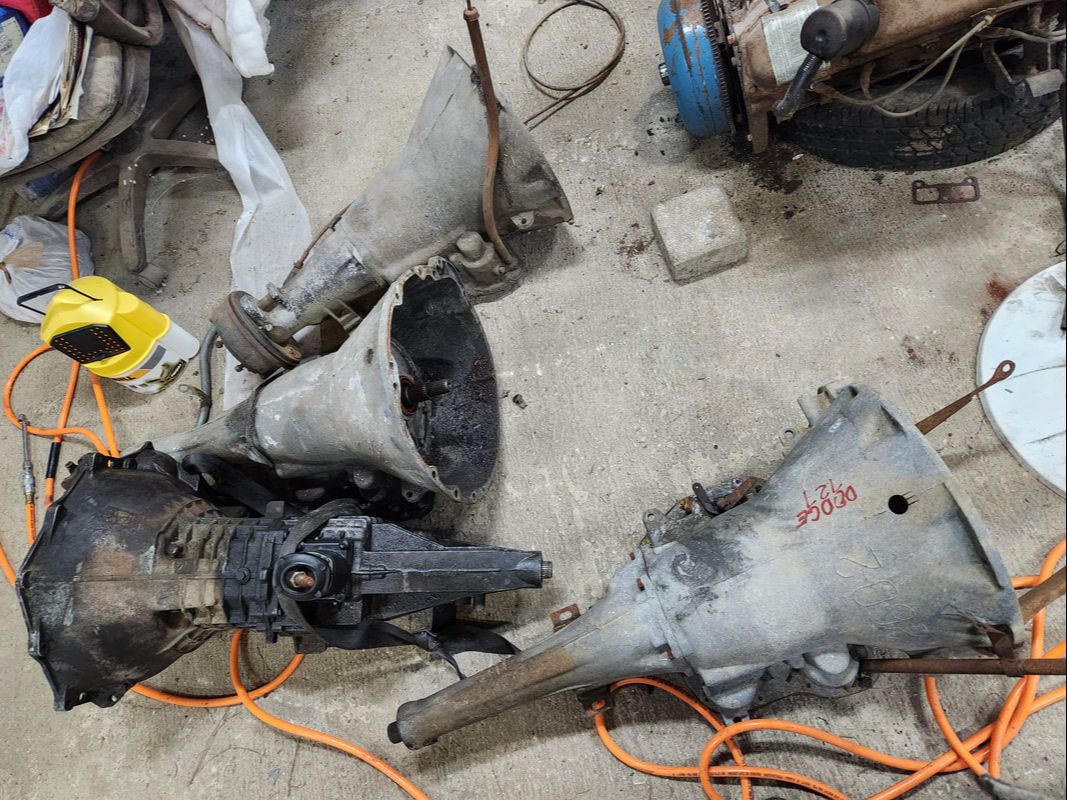
Here we have three 727 transmissions. The one on the bottom left is an S10 5spd, don't mind that one. The bottom right 727 is a small block tranny while the top one is the RV tranny with the integrated parking brake drum and short tail. This will need to be swapped out with the tail housing and output shaft, probably from the small block tranny, to make it ready for car use.
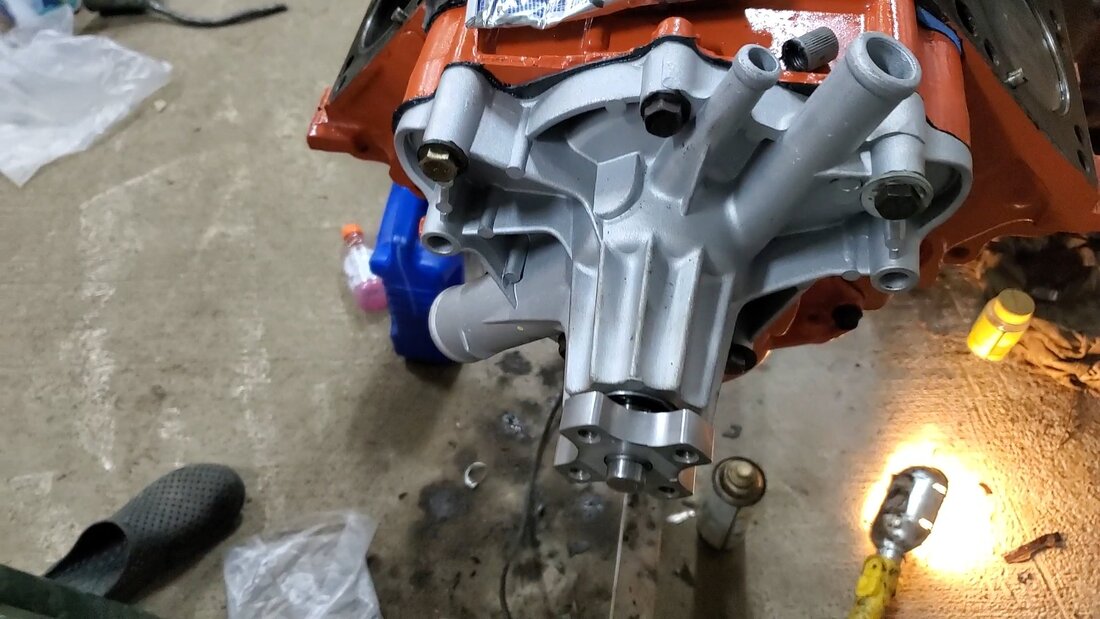
Along with the cylinder heads from the 440, the accessory drive and brackets and components will need to be swapped over to the 413 to make it a car powerplant.
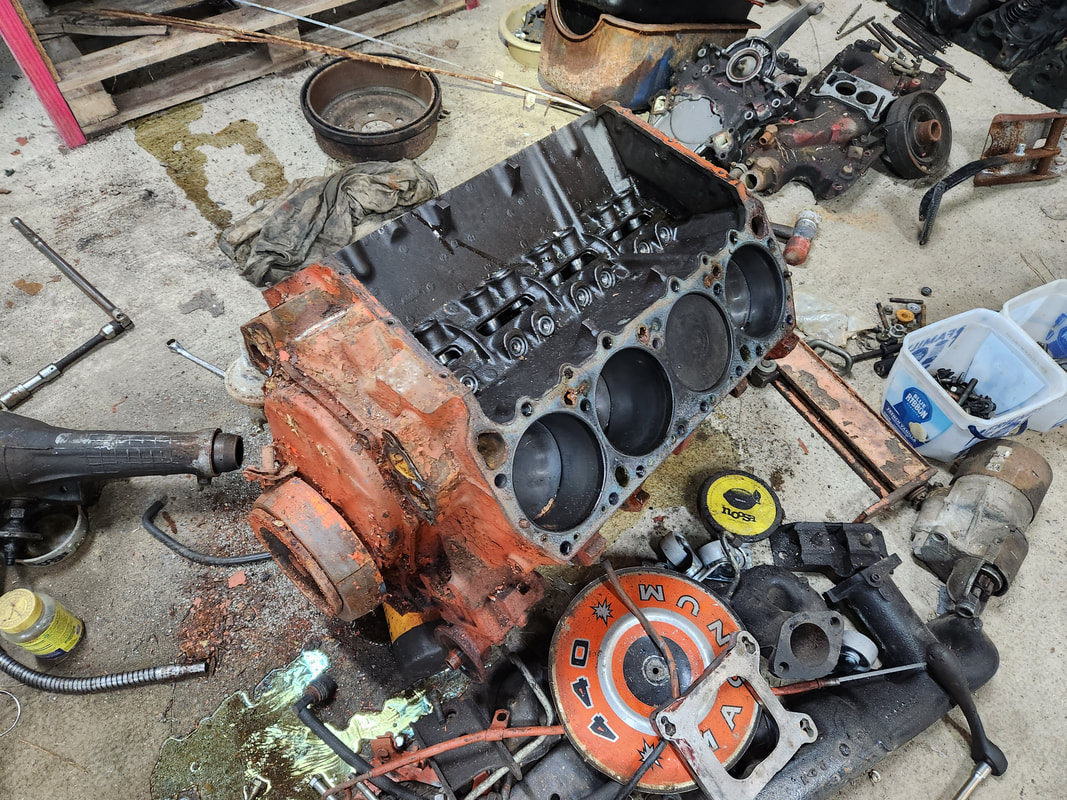
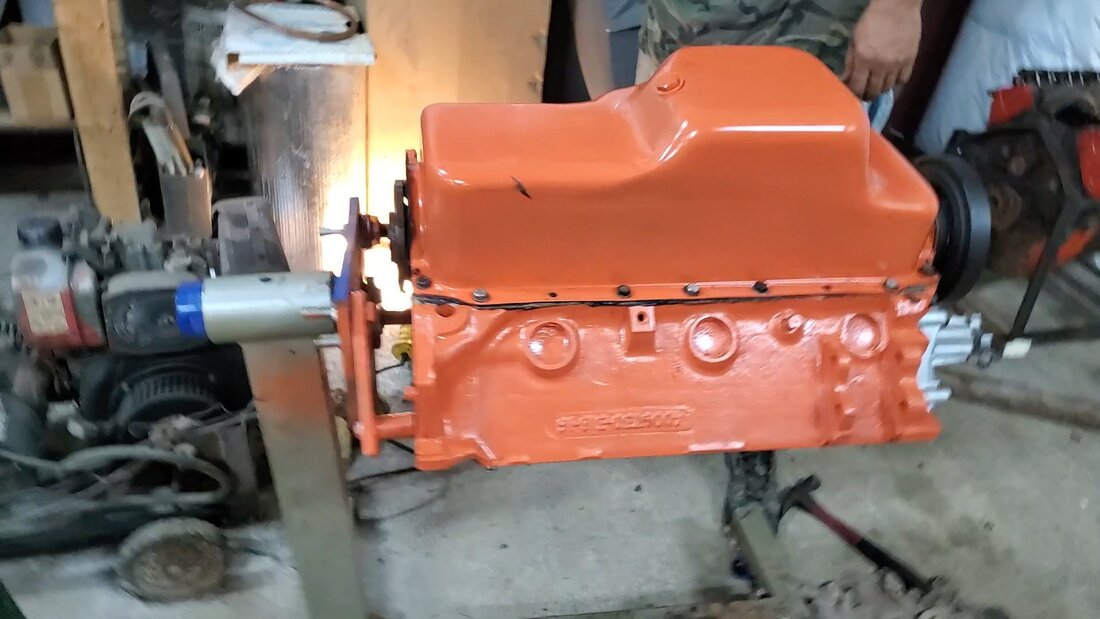
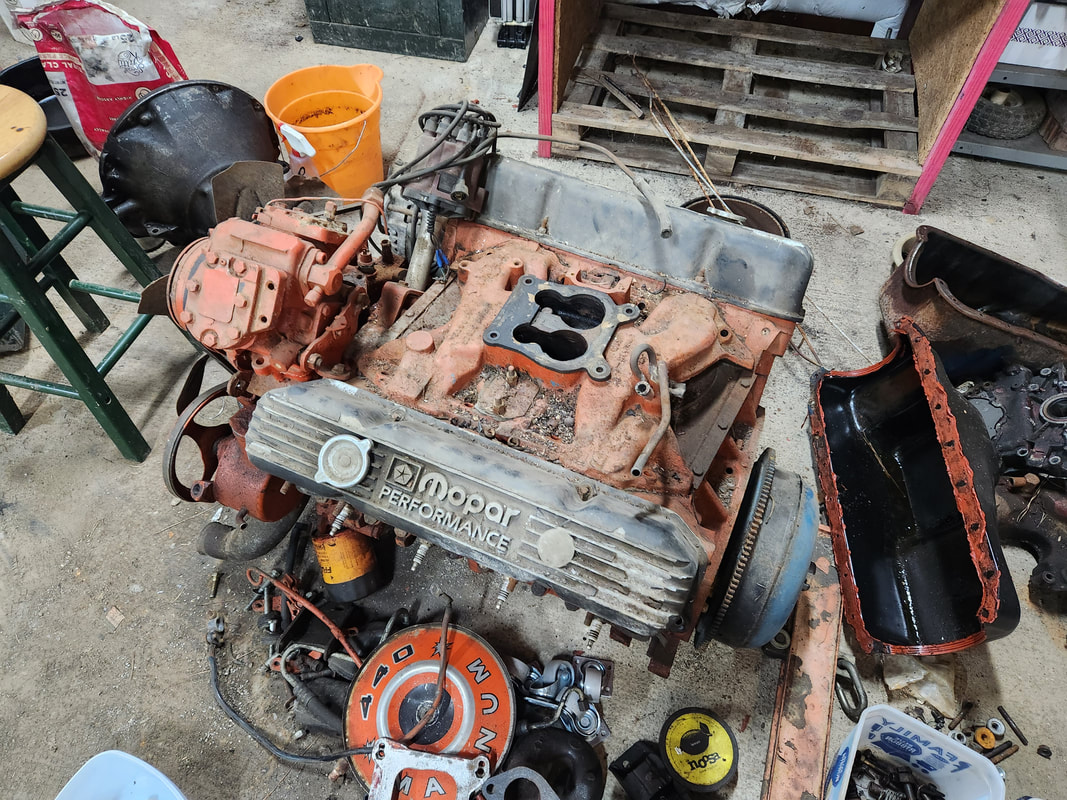
The 440 engine after removing the accessory hardware and cylinder heads, making this a short block. I will have to treat the cylinder walls with oil to keep things from flash rusting until I can get around to rebuilding this engine once again, or maybe sending the thing off to a machine shop to do a professional quality rebuild, which would have to include adding a little extra juice with stronger components. But that will be at a later date.
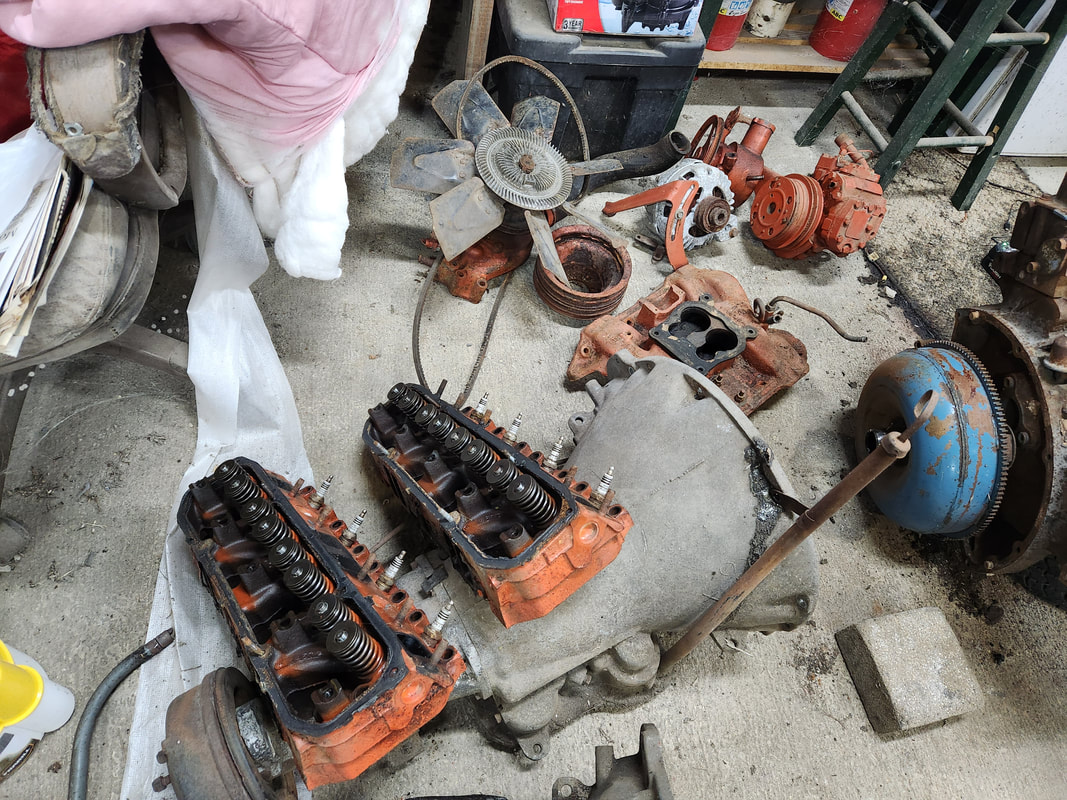
The 440 components all staged near the 413 in preparation for the reassembly of the engine.
